Ron's RV7 Aircraft Factory
Welcome to my personal blog. This site was created as an informal description of my build progress in the construction of a Van's RV7 aircraft. A place where family/friends/builders/curiosity seekers can follow along. It is not intended to be a detailed description of every step in the building process as that would be much too time consuming. There are plenty of sites that do a great job in that arena, that is not my intention with this site. My intention is for this to be a philisophical/motivational/inspirational account of the emotional ups and downs of the life changing journey...and it will change your life. I hope this will give you an idea, through my eyes, of what its like to make this transformation. A note to other builders, I am not an expert so do not put your safety at risk by attempting anything you see on this site until you have done your own research, or send me an email so we can discuss it. Any deviations from the plans are not approved, nor endorsed by Van's Aircraft or myself. Thanks for visiting.
Friday, May 3, 2013
Touching Base HOBBS 1899.5 hrs
Top of the morning to you! I just wanted to fire off a real quick status update since I haven't posted in awhile. I assure you, it hasn't been because of couch time, I've been quite busy. I just returned from my Tiger Cruise and I'm working on a nice writeup of that adventure. In summary, I shot right around 900 pics and had the time of my life...it really exceeded everything I could have imagined it would be. The US Navy just jumped to the lead of the pack with me, such a good group of people that I was fortunate enough to meet. Much, much more on this later.
I got a couple short work sessions in the hangar during the short week, mostly doing wire routing, along with with some flying (pattern work) in the Citabria. Tonight I leave for transition training with Alex in Dallas. So, no rest for the weary! Once I get back, it will be a green light to go pedal to the metal to finish this puppy up! As you can see, I am now right at the 1900 hr threshold. I'm figuring I can't be much more than 100 hrs away from being done...time will tell.
Monday, April 15, 2013
Infinity Grip HOBBS 1890.0 hrs
Tax day 2013! Woohoo, time to pay Uncle Sam...hopefully you all have this done, mine goes in the mail today.
It was a good, solid week in the Factory as I close in on 1900 hrs. I am sooo ready to done with building and flying that my motivation has been high as I worked through items on my checklist. I spent a fair amount of time on wiring tasks...getting the Vertical Power wired and just general wire routing, although no pics of that stuff.
Instead, here are some pics of the Infinity grip install. As you know, I started this task a couple weeks ago...but had to take a pause to consider (and research) how to do my removable co-pilot stick. Here is my solution...
First, here is the length I settled on for my sticks as promised. This is obviously with an Infinity grip and the Aerosport products carbon fiber panel. Other setups will most likely vary. Please, just use this a reference to cross check your stick length, do not blindly cut your sticks to this length without your own investigation of your particular setup.
At first, these sticks were a real bugger to mess around with. I ended up hot gluing the PTT switch in place as it seems to be the one that likes to pop out when installing the two halves. Once you get that puppy glued down...its much easier to get a good mate. One other thing, I had a problem with this grip not closing up tight...after double and triple checking everything, I couldn't figure out what was causing this? I ended up taking a rotary file to one (and only one) of the holes drilled in the stick, and opening it up slightly. This solved the problem, I think my hole, even though I drilled it on my drill press was not quite centered. By opening this hole it allowed it to close tight. Since I left the other hole untouched, the grip had no "play" in it. Problem solved.
I bought a nice $50 8 pin cannon connector from Vertical Power specifically for my removable co-pilot stick. Well, unless I am missing something...that isn't going to come close to working for me if I want a fully functional co-pilot stick...which I do. I did remove the blue covering and combined three ground wires into one, but even after that I still have 14 wires coming out of the stick. The only button that I could do without on the co-pilot stick would be the "smoke" button, but even with removing that functionality, I needed more than 8 pins. So, bottom line is although I have the wires routed, I need to source a different connector...probably just a DB15 and be done with it. So, it will take me 5 minutes instead of 1 minute to remove my stick...not a big deal and I'm tired of screwing with this.
In this pic, you will also see that I gave up on trying to get a connector "inside" the stick...it just wasn't worth the trouble. Finally I decided to just drill a hole in the stick. Yes, I realize there are many out there that say, DON'T do this. I say, don't do it without a lot of thought, but I feel comfortable with this for a couple reasons. Yes, this hole will weaken the stick, there is no doubt. But, I purposely put it as high as possible to stay away from the higher stresses near the attach point. The wire should be covered by the stick boot (need to verify this). If I somehow am able to bend this stick at this location, #1...I am VERY strong...and #2, I will definitely have jammed control surface and have bigger problems than a bent stick. Lastly, although every control is important...this is my co-pilot stick and I don't plan to ever fly solo from the right seat so there will always be someone who could take over from the pilot seat with a stick that has no holes in it. That's my logic, you decide what works for you since its your ass on the line.
When I did my pilot stick, it was quite amazing how quickly it all went together now that I had some tricks to work with. The hot glue mentioned earlier being one of them. The other is this tip from VAF...put the halves together without the red PTT button. Just put the two bottom screws in loosely, and then carefully insert the button. Works like a charm, took me about a minute to do this one.
I threw this tie wrap on here, not sure if this is my final solution, but maybe? Also, notice I could not seem to get a rubber grommet in the hole in the stick and I really didn't want to go any bigger with that hole. I may just leave it as is, and keep an eye on it for fraying of the protective sheath.
Fit check with the stick in place...oh boy, does that look cool! They are not "connected" together yet, but we're getting there. Both sticks still need connectors and wire routing, but this was a big milestone.
As you can see, since both sticks are the same length, I have the same 1/4" clearance for the pilot side.
Friday, April 12, 2013
Another Caribbean Adventure! HOBBS 1872.0 hrs
| Photo by Scott and Tanya Card |
My regular readers have heard this spiel from me before, but I often get asked by people who are not familiar with RV's or even small airplanes, "where can you fly these airplanes? How far can they go?" When I say around the world if you have the desire, they are pretty amazed. Not sure I will attempt an around the world trip, but I promise you the Caribbean Islands are going to be one of my first international destinations with Wablosa.
Every other year, Rosie or Jimmy B lead a contingent of planes to the Caribbean. Local friends Scott Mills and Gary Zilik have been on several of these trips, although not this year. Rosie and approximately 10 other planes are now doing a month long tour of the Caribbean islands. Here is their SPoT track...for a little inspiration and as Rosie likes to say, "keep pounding rivets, because its ALL worth it!"
4/15/13 Edit: Here is an updated track from Rosie's SPoT tracker from his airpark home in California...some 3600 nautical miles! That's covering some serious real estate, all in a plane built in a garage! Very cool!
Rat's Nest HOBBS 1872.0 hrs
Pretty good week as I close in on the 1900 hr threshold and also get ready for my upcoming Tiger Cruise and transition training. You'll see, as always I am bouncing around finishing up misc tasks I have been putting off...but I am getting more focused on getting the wiring to a point where I can do a power up of the system, which should be exciting...so stay tuned for that, hopefully soon.
Swapped out my white UHMW plastic blocks for black since all of my sub-panel stuff is, in fact, black. I'll do some touch up on this paint when I am done with my wiring activities.
I came up with this idea for managing my brake lines, I just used some 1" shrink tube I bought at the local electronics store. I then used a couple tie wraps to secure it all.
After some discussion with one of my hangar mates, Bill, I came up with a mounting scheme for the POS12 sensor. Essentially I just mounted this on the support piece (no angled bracket as some do as it wasn't needed in my install). By trial and error I found a location on the bell crank that provided the 1" travel necessary. In this pic, you can see I just used a clamp to move this bracket. I then cycled the motor fully a half dozen times to make sure I had a good location before drilling and riveting.
Finalized and ready to go. A DB9 connector here is a little bit overkill for the POS12, but I installed one anyway.
Originally I had locking latches on my baggage compartments, but decided to forgo the lock and just use these nice Southco paddle latches instead. Brian Beatty brought these to my attention and I really liked them. I also installed a stiffener in each door as these were a little flimsy for my taste, much better now.
I remember seeing other people's blogs while they were doing wiring and thinking, "wow! what a rats nest!" I also thought, it looks so daunting to see all of those wires running everywhere. How do they know whats what? Well, as you can see from these pics...I am now in that mode. It is a little daunting, but amazingly I pretty much know what each and every wire is assigned to. Later as I progress it will start getting cleaned up...but for now, this is it.
Winter is doing its best to hang on out here in the Rockies...temps plunged to -3 degs F with the windchill and we had snow on April 10th, with more forecast next week. Its making it hard to get any flying in with this kind of crazy spring weather!
Friday, April 5, 2013
Back in the Saddle HOBBS 1857.5 hrs
Well, yesterday afternoon, on a gorgeous spring day here in the Rockies I took flight once again in the blue and white sunburst painted Citabria after a 4 month hiatus from flying. This was the longest period of time without flying for me since I got my pilot's license 5 yrs ago. The reason for the break in flying activity was for what I am calling the "calm before the storm." As I now ramp up my flying to get ready for first flight I will be flying on a regular basis until then. In fact, the next 50 hrs of flight time will be unlike anything I have ever experienced. It will consist of more Citabria work, transition training with Alex, more Pitts work with Dagmar and of course being a test pilot for 40 hrs.
I can tell you, it was readily apparent yesterday as I climbed into the plane as the cockpit and environment felt awkward and foreign to me. It had definitely been too long and it showed. I felt tentative and 'behind' the airplane, neither of which are desirable for an aviator. My landings weren't horrible, but there was some obvious rust to be knocked off. Anyhow, it was nice to get flying again, and I am beyond excited to come out the other side of this 50 hr flight period a much different, and markedly better, aviator.
Lastly, today is the Rockies home opener and the weather forecast is 72 degs with plenty of sunshine. In light of this, yours truly will NOT be in the hangar this afternoon as I stake out a corner of a downtown patio bar with some friends to cheer on our beloved baseball team! KPR and fly safe my friends!
I'll leave ya with a couple pics of my favorite player, who just happens to play the same position I did, shortstop...Mr. Troy Tulowitzki (or just "Tulo" here in Denver), one of the best in baseball.
Monday, April 1, 2013
Learning Patience...Still HOBBS 1857.5 hrs
| Been riding the motorcycle to the hangar as the Spring weather approaches |
I always like to say that this project, the last four years, has changed who I am today. How I approach difficult problems, the things I've learned about myself, some of which are not complimentary by the way...my "lazy" streak, for example.
Four years ago I was very impatient. I grew up during the start of the "always plugged in" generation. Instant gratification and getting things done, right now, were the hallmark of my personality. I will say, in four years I have come a long way with being more patient. Although, even now, I am still learning to tame this beast.
Case in point, when I moved into the hangar I thought its full speed ahead to the finish line...this thing will be flying in no time! Well, I am now realizing that, even at this stage, things don't happen fast when you are building your first airplane...not sure why this lesson hasn't sunk in with me yet?
Think about it, EVERY SINGLE THING you do while building one of these is most likely a brand new learning experience. As such, it ALWAYS takes longer than you anticipate, get over it. You have to research, read, think, analyze, learn...then do, and maybe do it again.
So, whats my point? Well my point is, I am finally reserved to letting go of my self imposed hurry to get it flying...letting go of any imaginary deadlines I have set, and just enjoying the process...one slow step at a time. One day, it will take to the skies...just take a deep breath and relax until then...the good news is every step brings me closer to that first flight.
I purchased a 12x12 piece of stainless steel screen from McMaster Carr. I wanted to add these to my fresh air vents to keep critters and other creepy crawlies from entering the cockpit. Great idea and easy to implement.
Plenty of ways to tackle this...some guys go to the trouble of ProSealing this in place. Jason Beaver did it this way and I liked the simplicity of it....worked just fine...and no ProSeal needed. Wrap it around like this...then just insert the hose over the top. The hose clamp will hold it all in place.
Peering in from the outside...hole is covered, next task.
Labeling my spark plug wires...regular label with clear heat shrink. I also drilled access holes in my baffling as I get these finished up and ready for paint.
Adding flanges for the P-mag blast tubes. These will have 1" SCAT tubing attached to direct cooling air to each P-mag. Again, screen added for keeping unwanted debris from entering the engine compartment.
Jumping back to my center console briefly. I added a clearance hole for the throttle and prop cables...I need to this finalized so I can get lengths and order those cables.
And continuing with my stick install. Here is the co-pilot side. I am fine tuning the length. As I mentioned these need to be cut down as desired and for panel clearance. Some guys like to cut them as short as possible. I am in the opposite camp...keep them as long as possible. For two reasons. One, mechanical advantage...the longer the stick the more force you can exert on the mechanism. Two, the longer the stick the more precise you can be with your control inputs...one inch movement on a shorter stick equals more control surface deflection than a longer stick...i.e., less resolution. All unlimited aerobatic planes have long sticks...there is a reason.
So in this picture you can see I am free and clear straight ahead.
But moving it to the side, I am almost touching the panel in this position. Probably ok, but I decided to cut it down about 1/4" more just for a little extra clearance.
After cutting it down...much better, I think we are good to go with this length. I will measure this and publish what worked for me later. I also, although hard to see from this picture, rotated the grip slightly to align with my hand-to-shoulder angle. Pretty much everyone does this.
Still wresting with the removable stick design for the co-pilot. From a mechanical standpoint...not a big deal...the electrical side of it, not so much. I just bought some of these "dogleg" style button-type springs from McMaster Carr. I had to buy 7 so if any of my local readers need one, send me an email.
Pop that baby inside the stick and bam, works like a charm...that puppy isn't going anywhere yet easy to remove with the press of a button. I like it.
Getting the stick to fit inside the Infinity grip is a royal pain in the ass. You have to open up the grip and carefully install the stick while somehow keeping all of the wiring and switch relays in place. Its kind of a mess inside there. You really need some patience when you tackle this.
Here you can see, I removed all of the powder coat on the stick and also cut an optional slot in the side for wire clearance. There is nothing to be afraid of from a structural standpoint in doing this so I figured why not. I also had to ream out of of the holes as it wasn't perfectly on centerline, preventing the two halves of the grip from closing nicely. This project is still ongoing...working on the aforementioned electrical hurdles of the removable stick.
One of the cool things about the Vertical Power unit is its ability to position your flaps with incremental settings. But to do this, you will need to buy this POS12 position sensor which will give feedback to the unit where the flaps are. Also in the pic is a leftover threaded rod from my roll trim motor...I am going to try and use this for the POS12 sensor to attach to the flap bell crank. I still have no idea how and where to mount this puppy yet?
Painted my GPS antenna tray that will sit inside the engine compartment.
Painted and attached the baffles. Be sure to get this screw before putting your oil filler dipstick in place (resides where the duct tape is). Once you get that screw in...you can put your filler back in and safety wire it. I put a star washer on this to keep it from backing out from vibration.
And a nice view to leave you with of my baffles painted and installed for flight...hopefully. Looks cool! This was a nice boost for my morale to see.
Thursday, March 21, 2013
Navy Tiger Cruise!! HOBBS 1827.0 hrs
I just found out yesterday that I am getting the once-in-a-lifetime opportunity to go on a Navy Tiger Cruise aboard the USS JOHN C. STENNIS (CVN 74). Its an active duty nuclear powered aircraft carrier. We will be sailing out of Honolulu, docking in San Diego five days later.
If you are unaware, like I was, a Tiger Cruise is essentially a sort of appreciation cruise for family/friends of active duty personnel. No, I don't have any kids in the Navy...that I know of...this opportunity presented itself through some of my RV friends. I really was extremely fortunate to even be in the conversation to be honest, it was happenstance.
During the cruise, we will be treated to an airshow at sea, which will be worth the price of admission alone! Watching flight ops will be unbelievable.
There are five of us in our group and I am the only one without a flying RV. The plan is to fly their RV's from Denver to San Diego, overnight in SAN and then hop a one way commercial flight into Honolulu a couple days before departing on the Stennis. After returning to San Diego aboard the Stennis, we will then fly the RV's back to Denver. What a trip eh??
How this affects the Factory...? Well, I had to reschedule my transition training with Alex (he was great about doing this for me) to May 4th. Of course, this will delay everything on the project by about ten days as I will be on vacation about that long. But...its a no-brainer to take advantage of this, the plane can wait, it'll be here when I get back.
Doubtful we will see anything like this, but what a cool shot eh?
A parting shot of the Stennis in Honolulu...sailing past the Arizona monument in a moment of silence will be surreal. I can't wait, this should be amazing! A helluva birthday present for me that's for sure.
Slowly but Surely HOBBS 1827.0 hrs
I didn't log as many hours in the Factory this week. A couple things contributed to this. One, we had a record breaking 76 degree day on Friday, so I met some friends for a patio happy hour (hey, a guy has to have some fun sometime!). And two, I was feeling a little bit overworked and underpaid...so I took Sunday off completely. Which I realized was the first Sunday I haven't worked on the plane in months. Bottom line, I needed a breather, and it was a nice break.
But as I always say, breaks are fine...but keep them short and get back at it if you want to finish in a reasonable time frame. Nothing wrong with slow and steady. So...I am still progressing, slowly but surely advancing on "first flight" day.
Sure enough, I realized I didn't order enough shielded cable on my last order...I forgot about the headphone jacks needing it also. I buy my shielded cable from SteinAir. While I was on the site poking around to see if there was anything else I needed, I came across this new product Stein is offering....wheel chocks. Sure, easy to make yourself, but what I liked was the engraved N-number...and I gotta be honest, it saved me an hour or two of work to drill all those lightening holes and otherwise fabricate my own. The best part, they were only $29 for not one set...but a pair! You couldn't buy the material for a whole lot less than that and certainly couldn't have a machine shop engrave your N-number for anywhere near that cost.
There are very few things on this build that I spend my money and say...that was well worth it. Almost everything in this hobby is highway robbery. My Crow harnesses come to mind as being a GREAT value...and definitely these wheel chocks fit the mold, I recommend them.
Soldering, shrink tubing, labeling my headphone jacks...do everything you can to keep these wires secure and free from vibration. How many times have you heard of headphone jacks that are intermittent? Usually just wiggle it and it'll work again. Most likely due a loose solder joint is my guess...remember, solder joints don't like vibration.
Wire routing of the headphone jacks...I usually don't like the adhesive stick on tie-wrap holders, but you can see I am giving them a try...we'll see how the adhesive holds up over time, in my past they tended to get brittle and break off.
A TNC (threaded Neill–Concelman) connector for the Dynon transponder. They don't send you one (grrr), so you'll have to source your own. Luckily there is a local electronics store here in Boulder that carried these so I saved shipping costs. The TNC is the same as the BNC (Bayonet style) which is the more common version, this one is just threaded.
If you are using the PSEngineering PAR100EX, make sure you read the manual BEFORE powering this baby up! It comes configured for a 24 volt system, to switch it over to a 12 volt system you will need to remove the cover and move the red jumpers as indicated in the manual. Don't forget or you'll have a paperweight.
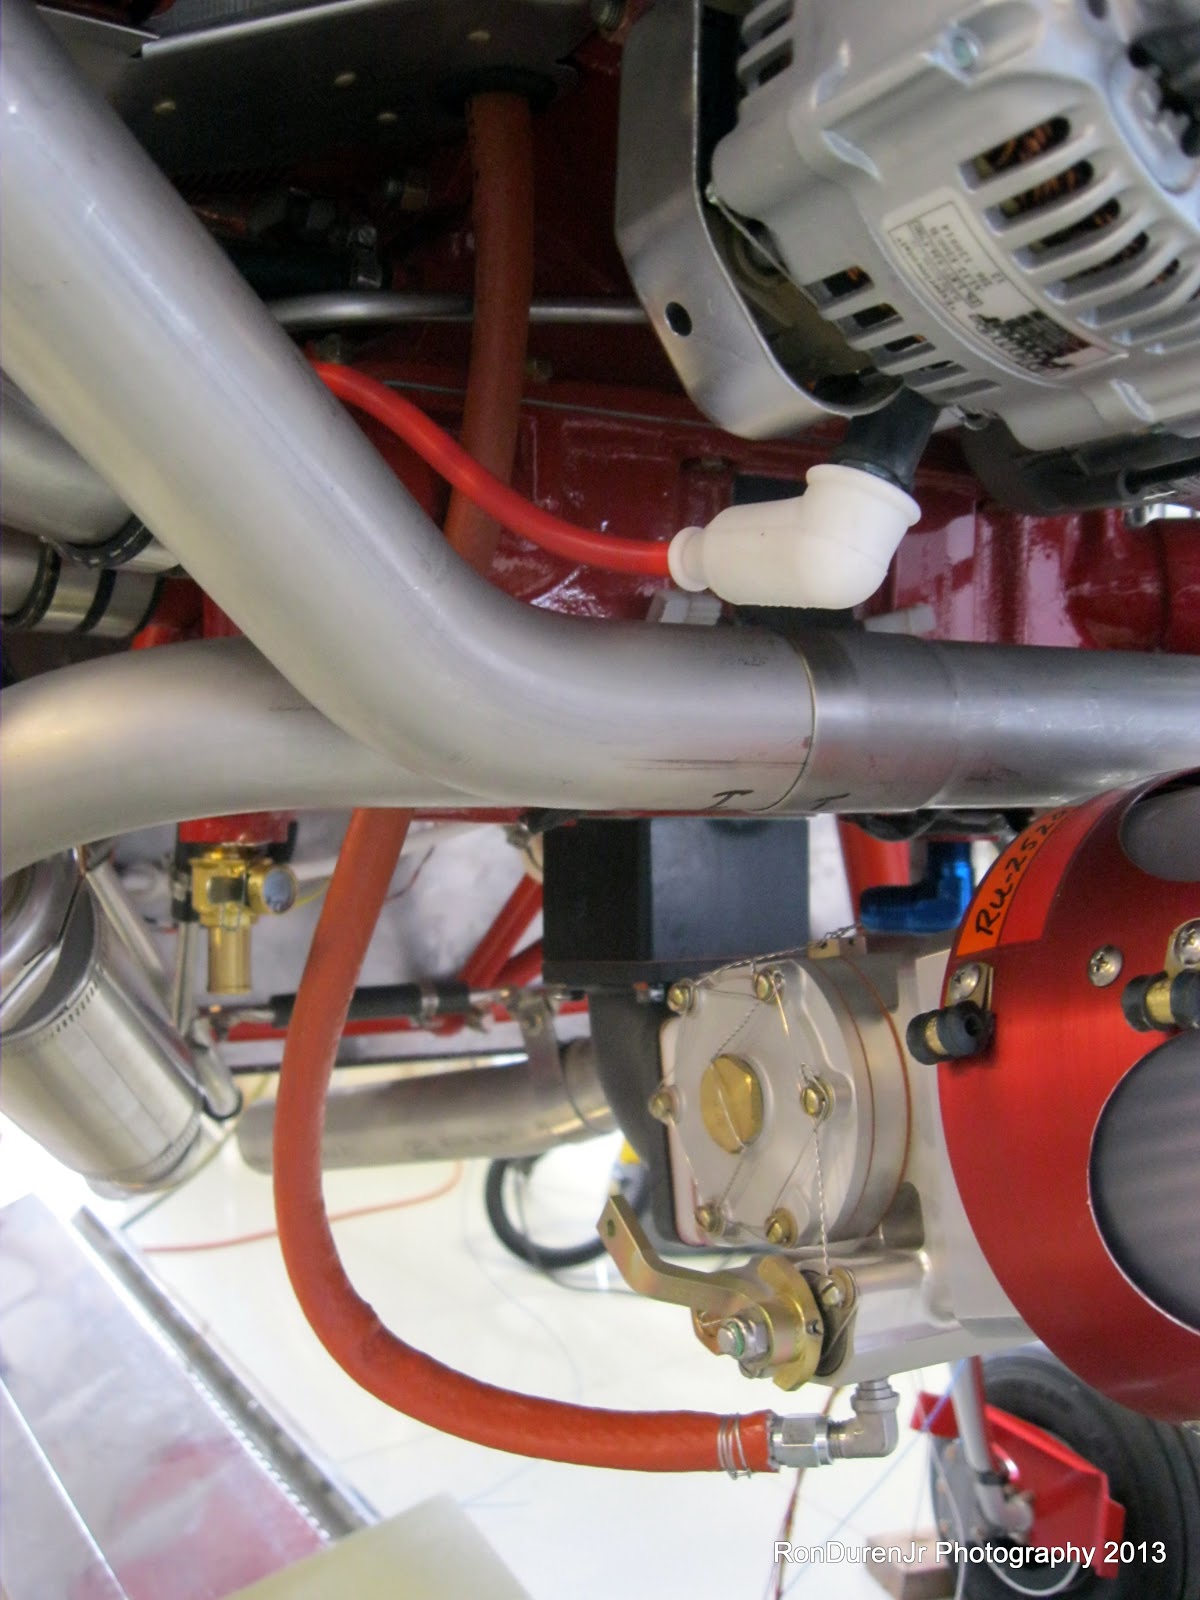
Trying to figure out my last few fuel lines in the FWF before putting one last order in to Bonaco. One of which is the fuel line running from the fuel injection servo to the fuel distribution "spider" on top of the engine. I suppose there are many different paths you could take to get this done. I want to keep all fuel lines as short as possible to reduce vapor lock potential with hot fuel so I chose the most direct route. This happens to be straight up through the bottom baffle.
Removing and then reinstalling this puppy was a little tedious, but its doable. As you can see, I drilled and inserted a rubber grommet for the fuel line routing.
And bam...there is where it enters the spider...came out well.
The other end attaches to the servo...I am still playing around with this fuel line routing to keep it away from the crossover exhaust as much as possible...what you see here is not final.
Subscribe to:
Posts (Atom)