Well this is a first, I have never created a blog post where I could add 57 hrs to the project HOBBS meter!! It was a busy week to say the least. I am way behind in posts so this one is going to have a lot of pictures and I am going to try and keep it short (fat chance!).
The two weeks with Dad helping out were amazing, we logged 82 man-hours in that time. I was able to get about 6-8 weeks of work done in two weeks with his help. That is a huge step forward in helping me get this thing flying sooner rather than later.
We got all of the fuel tank problems solved, all tanks passed their pressure tests. That was the green light to attach the tanks in place, install the Duckworks LE lights and rivet the top skins. Here are the pics and descriptions of our work...
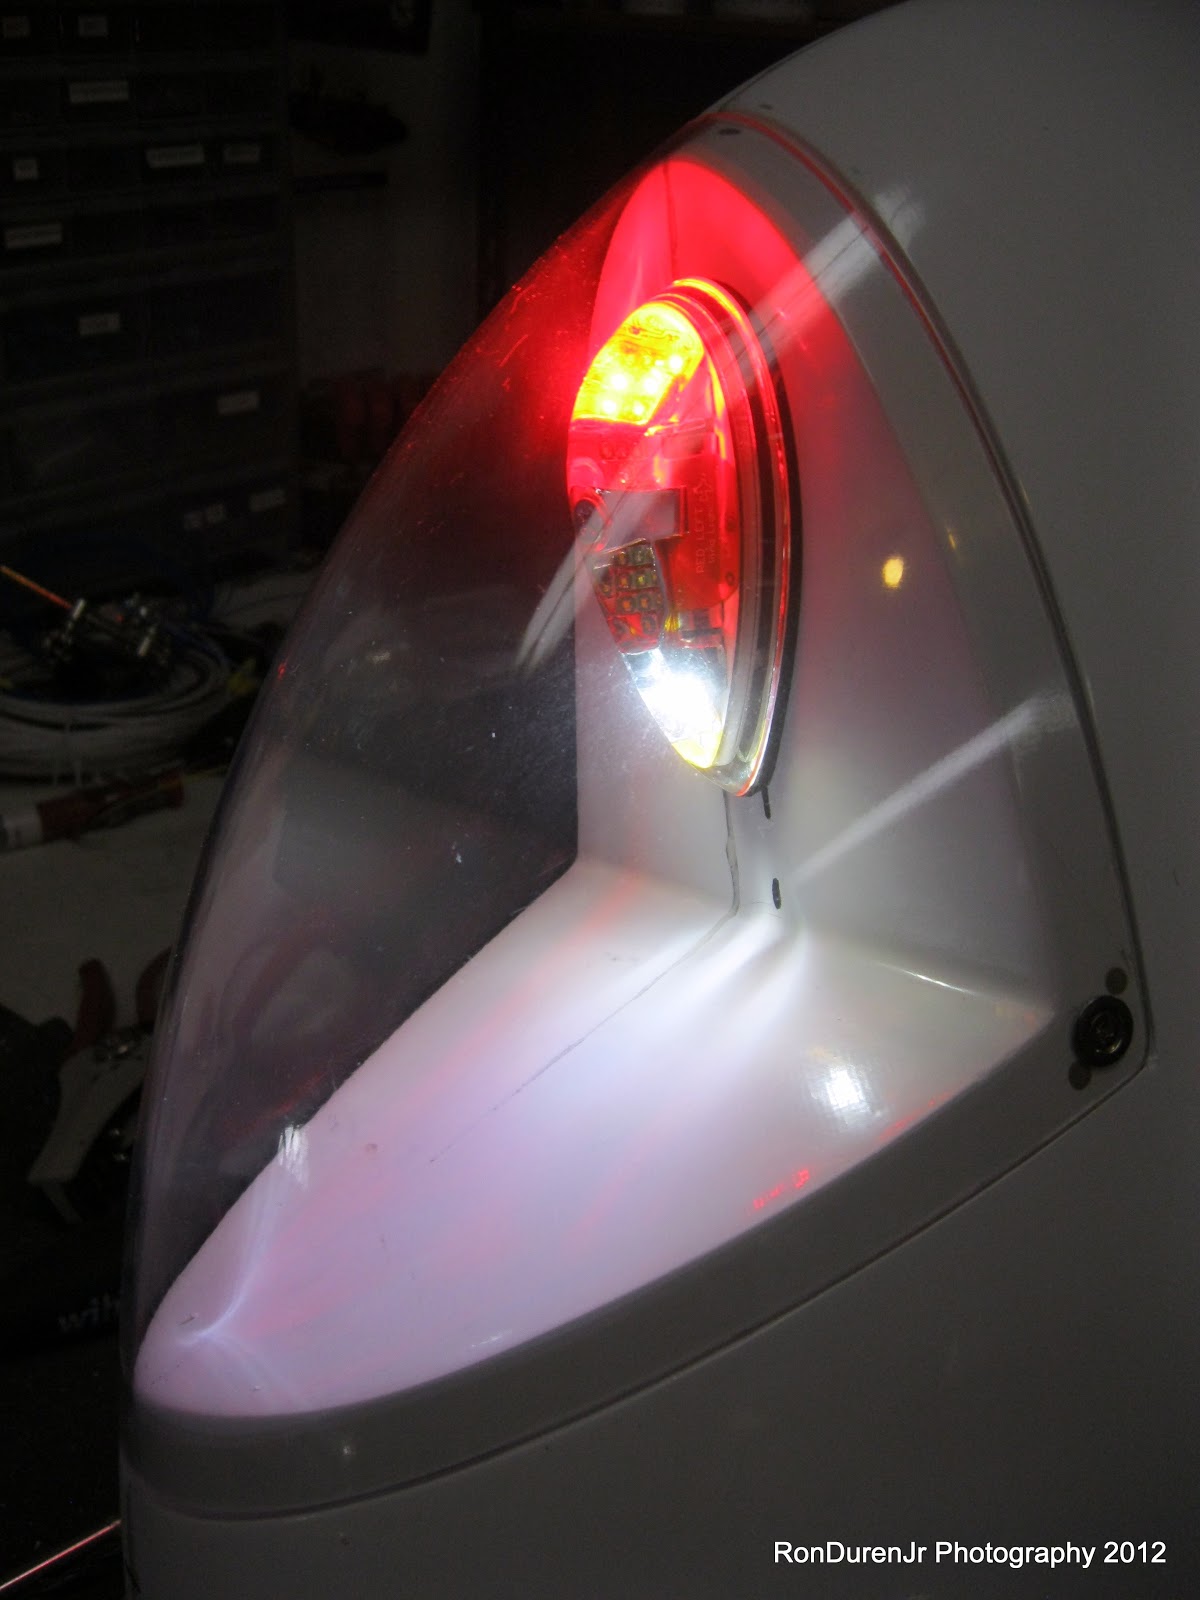
As you all probably know by now, I like doing little things on my plane to make it my own. Little touches that make it unique. The idea of having a plane exactly like everyone else's is mind numbing to me. So, here is another of my touches, unique to my plane. I changed the landing light cutout from the standard rectangular pattern to a circle. My thinking is, the lamp is round, why should the cutout be rectangle? I came up with this idea on my own but I'm sure I'm not the first to do it. Here is what I used for my cutout pattern...good ol' Shiner Bock from Texas! :)
Pattern layout and ready for the delicate cutout work with a dremel tool. Cutting into a perfectly good leading edge assembly certainly gives a guy pause. Cant make a mistake here or I'd lose my mind!
Dad having a go at his wing, he bravely went first as I drug my feet before starting mine. We both chose one wing to do from start to finish...it was a friendly little competition to see who's would turn out better. ;) In the end I would have to call it a draw...they both looked really nice.
Marking the holes and match drilling for the lens attach brackets.
Fitting the lens in place for match drilling. I think this is where we made a mistake in our process. Both of our lenses didn't come out with a nice tight fit with the skin even though they looked perfect at this stage. I think it was because we had this layer of masking tape on the lens for protection when we did our match drilling. The thickness of the tape may have caused our problem.
I plan to redo these lenses later and will forgo the masking tape for hopefully a better fit. Although the lenses didn't come out as we had hoped, everything else turned out great and it was a fun project. It took us both, working in parallel, a few hours to accomplish--its certainly not a 45 min task that's for sure.
Dad prepping the lens for the brackets and trimming it to size so it will fit in the hole. This took some doing to get it to fit in my round holes, but it is possible if you decide to go this route.
Here is what it looks like when its all finished. I was really happy with my choice to go with the round holes...looks pretty slick!
We mounted the light ballast on the end rib, outboard. I figured this was a good location so I could easily get to it if needed when the wingtip is removed. It also makes the wire routing a breeze as I can just enter the main conduit (just below in this pic) running down the length of the wing.
Man is that puuuuuuurdy! wooooo-wee!
We got all our prep work done that we needed to on Friday, setting the stage for riveting the top skins in place. We got up bright and early Saturday morning and attacked, and I mean attacked the top skins like we were possessed. We riveted all four top skins in place in roughly 5 1/2 hrs...the first wing (two skins) took about 3. We had to drill out exactly two rivets during the entire process (and one of the screwups I did was with the squeezer! doh!) and I also had one slip with the gun producing a small 'smiley' in the skin (no worries, this will be fixed during the painting process). Other than that, I was ecstatic about how they turned out! Even better than I expected to be honest. They really look great as you can see from the pics.
Although I had planned to use the back rivet method, Dad and I decided we liked the traditional method better...its quicker in my opinion. I was on the gun, Dad manned the bucking bar and we worked very well as a team burning through those skins. Its quite amazing how fast you can go with a good riveting partner. We got in a nice rhythm and cranked through them in no time. As Chris Ledoux used to sing during my rodeo days, "it was like child's play on Grandma's rocking chair."
I gotta tell ya, we were both pretty tired by the end, it was an intense 5 1/2 hrs to say the least. But probably the most rewarding part of the project so far.
Plumbing work for my ER tank vent line that I will run back to the fuse. This is different than how Mr. Tuckey did it...his vent exited through the bottom of the wing.
Installing the Dynon autopilot servo mounting bracket in the right wing. I ordered this
mounting kit from Aircraft Spruce for $75. Yes, in case you were wondering, I am now about 99% sure I am going with the Dynon SkyView system/Autopilot and AOA heated pitot. Its a lot to invest in one company, but I'm certainly hoping it will be a good choice.
Wow, this was quite a sight and milestone. Moving the wings out of the wing stand (amazing how light they were to carry!) so that we could disassemble the stand. It was kind of surreal...I had looked at that stand as a fixture in my garage for about 9 months and now I was taking it down and getting ready to store the wings and move on to the fuse. Surreal...but very cool.
Dad tackled the task of building a wing cradle to store the wings and did a fine job. I also learned the cradle will be real handy for doing the finishing touches (wiring/plumbing) on the wing before closing it up. He just reused the end pieces from my fuel tank cradle to fit the contour of the wing. I also reused the same wheels I had on my wing stand and voila...a sturdy rolling wing cradle. This is where the wings will reside until they are mounted to the fuse later in the project.
A couple photos of us celebrating a very rewarding work session. After we finished the top skins, it was time for a shot of celebratory Canadian whiskey (Crown Royal...my drink of choice) and a Costa Rican cigar! What a great feeling to see the cleco's all removed and a nice shiny wing staring back at us for the first time. In my mind, I could already see the wind flowing over it, creating lift.

In summary, we didnt get the wings done as I had hoped while Dad was here but we came pretty darn close. If I hadnt had fuel tank problems, I think we would've got there. The good news is the wings are in a state that I can either work on them now and finish them up or wait til later. I've been reading other blogs and I think I can rivet those bottom skins on solo...sounds like others have done it without too much trouble. So nothing is holding up my continued progress for the forseeable future. Many thanks to my Dad for working so tirelessly while he was here...I had a hard time keeping up with him! :) I have had no less than three offers from other builders wanting to fly my Dad to their project to do the same for them!! haha! Once again, a perfect example of Aviation creating lifelong memories that I will always cherish. KPR my friends!