Ron's RV7 Aircraft Factory


Welcome to my personal blog. This site was created as an informal description of my build progress in the construction of a Van's RV7 aircraft. A place where family/friends/builders/curiosity seekers can follow along. It is not intended to be a detailed description of every step in the building process as that would be much too time consuming. There are plenty of sites that do a great job in that arena, that is not my intention with this site. My intention is for this to be a philisophical/motivational/inspirational account of the emotional ups and downs of the life changing journey...and it will change your life. I hope this will give you an idea, through my eyes, of what its like to make this transformation. A note to other builders, I am not an expert so do not put your safety at risk by attempting anything you see on this site until you have done your own research, or send me an email so we can discuss it. Any deviations from the plans are not approved, nor endorsed by Van's Aircraft or myself. Thanks for visiting.


Showing posts with label Tools. Show all posts

Thursday, February 14, 2013

Back in Action! HOBBS 1730.5 hrs


Well boys and girls, the Factory is officially back in action! I finished off last weekend with a good run of work and this week has been real good so far. I expect some high hour weeks upcoming now that the move is behind me.
 
My first day working at the hangar went like this. I worked the first half of the day Saturday, walked down to Sean's hangar and we had lunch at the airport diner...came back after lunch and worked the rest of the afternoon. I then showered at the hangar (did I mention we have a shower and two bathrooms?), had quick a beer with my plane to cap off the day. I then drive to dinner followed by the movie theatre to see Top Gun in IMAX 3D with eight others of the RV crowd...(Sean & Diana, Gary & Caroline, Chuck & Brenda, Scott & Deb).  The movie was cool...the flying scenes were quite amazing, made you feel like you were in the cockpit. A wonderful aviation day!


The pics I promised of the brake lines on the gear legs. Again, this is 1" 'monster' tape with some polyurethane tubing for added protection. It came out good, I liked this solution.

 
My strategy now that I am in the hangar was to mount the tailfeathers for flight...and then work my way forward, crossing things off the punchlist. I was somehow thinking...this will only take me an hour or two since I've had the tail on countless times already. Well, I forgot all the little things I still had to do...I see a theme starting already...the "little things".
 
I needed to add nutplates and tapped holes in the longeron for the empennage fairing. And the biggie...I hadn't addressed the wire routing for the elevator trim tab and the rudder strobe. Both of which are not trivial...not particularly difficult, but it does take some time to think about and then implement. So...I am still working on this as I write this. I have the elevator trim tab wiring done...now moving to the rudder. I have a cool idea for the rudder...


Here I am trying to decided where to punch a hole in the aft bulkhead of the fuse to run the wire into the rudder cap. Sound simple...but its a little tricky if you want a nice setup to easily removed the rudder if needed. Like I said, after expending quite a few brain cells...I think I have a pretty clever idea...wait and see.

 
Oh, also...I needed to mount my ELT antenna. Although intended to mount on the top of the fuse...most RV builders mount them under the empennage fairing. I plan to go this route as well...hopefully my DAR doesn't give me grief over this as I have heard some do.
 
As you can see, I took advantage of the swept mounting angle to just enlarge the center tooling hole  on the bulkhead. I still need to crawl in there and finalize the nut since I can't reach it from the outside...but that's where it's gonna sit.

 
This is nice...a five conductor bundled wire for the elevator trim motor. I think this came with my Vertical Power harness? Very handy since it comes from Ray Allen and all the wire colors are exactly the same as on the motor. I thought this was shielded wire from the appearance...but its not, must not be needed?

 
This is a pretty standard wire routing path for the elevator trim for RV's...the path Van's recommends is problematic because of the jackscrew on the trim motor. It occupies the same space as the wire and would probably rub or even get caught up. I didn't get a picture, but you'll understand what I mean when you get to this part. So you can see, this provides a very nice way to remove the left elevator when needed...just unplug the DB9 connector and an adel clamp.

 
And a quick fit check to see how it all fits under the empennage fairing...looking good! Next up is the rudder strobe wiring path.


Lastly...moving to the hangar meant I needed more hose. I didn't like my cheap harbor freight air hose...heavy and stiff. Sean showed me his polyurethane hose from Home Depot and I thought...wow, this is much nicer than my old hose. I certainly don't need 100'..but it was only $40 so this was a no brainer. Very lightweight and flexible.

Monday, June 4, 2012

Empennage Fairing Done! HOBBS 1304.5 hrs


As much as I bitch and moan about doing fiberglass work...the sanding, mostly. When you finally get it to this point and throw a coat of filler primer on it--it is pretty cool. Very satisfying to see all the hard work pay off. No pin holes and really just a couple of minor low spots to fill. It took me way too long to do this bugger, but I am very happy with how it came out. But mostly, I am just glad to be done sanding the son of a gun!


Painted and installed my transducer manifold. This device provides a mount for individual fuel and oil systems. Each section has three ports, one for the flex hose, one for the transducer and one for a second transducer/switch. Flex hoses will go between the engine and the manifold.


I am using Permatex #3 on my fittings...Van's says to use Permatex #2. I bought the #3 because it is supposedly aviation grade...I looked at the spec sheets and can't see a difference between #2 and #3. If anyone knows otherwise, please send me an email.

Also, I am swapping out all of my alum fittings for steel on the firewall forward install. Long debate whether its actually needed...probably just fine with alum as Van's specifies, but I am going with steel just for a little bit of added margin.


I ordered some 1/8" thick copper bus bar material from ACS. They didn't say how long the piece was, but they were only about $3 each so I ordered 3 of them in case I needed more later. So, I recieved a 3' piece from ACS...they must come in 1' lengths...that should hold me for awhile eh? Local builders...I got extra if you need it.


I bought this to connect my starter solenoid to my relay. I also threw on a piece of shrink tube for added protection against shorts.


Attached the fuel and oil lines supplied by Van's...not sure if they are going to work for me? I may have to send them back and order custom lengths from Bonaco...we'll see.


Bouncing around quite a bit now in tasks. I decided to install my NACA vents. These supply fresh air to the cockpit. I didn't see anything in the plans of how to install these...but at this point of the build, not sure I need instructions for most stuff. I decided to do a 'belt and suspenders' install. I mixed up a batch of ProSeal and also used five CS pop rivets for added security. Probably could get by with one or the other just fine. I wanted the ProSeal for a good water tight seal...and added strength. I put washers on the back side of the pop rivets too...see pic. I will use epoxy filler to cover the pop rivets and blend them into the skin later.


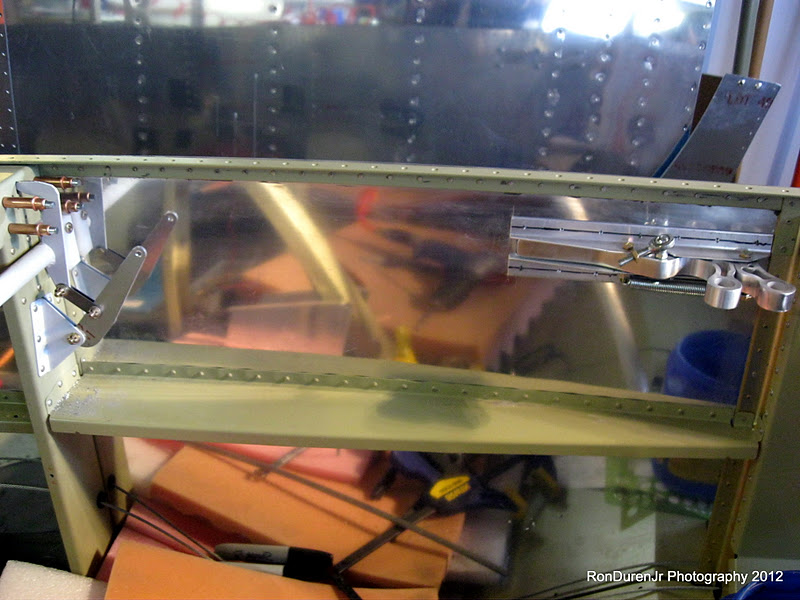
I decided to start hooking up my control systems...sticks, linkages, push/pull tubes, etc. Here is the linkage that connects the two sticks so they move in unison.


I'm not totally crazy about all of these control linkages not having any kind of added security against the nuts loosening....i.e., no lock nuts, cotter pins or safety wire. I'm sure there is nothing to worry about...thousands flying out there without problems. I will, however, put Loctite on all nuts to help me sleep a little better. Of course, finalize your nuts...very important on these so you can get a nice visual verification during inspections.


You can see the red anodized rod in place here to give you an idea. I highly reccomend you get a set of washer wrenches if you haven't already...these are a 'must have' tool when you have to install these buggers.


Finishing up some details of the canopy work...putting a nice cosmetic fillet of Sika on the roll bar.

Wednesday, May 23, 2012

Firewall Prep HOBBS 1281.0 hrs


More canopy work...finishing out the inside, added some flox fillets and some filler to smooth it out


I bought this little 'tool' from Avery tools. A magnetic finger for installing nuts/washers in really tight areas. I tried using tape prior to buying this with frustrating results. Mainly I wanted this for the nuts/washers that hold the strut brackets...those are a PITA (pain in the ass) to get to! Even with this, it took me awhile...a lot of deep breaths.


So, after getting the aforementioned hardware installed I put my struts back on. Now, doesn't that look cool!? I'm obviously biased, but the tipup canopy in the 'up' position like this is so cool looking to me.


I purchased a chunk of 3/4" thick black UHMW plastic. I will fabricate a new mounting block for my canopy latch, Van's sends a white block...but obviously that would look horrible in my black cockpit so I'm redoing this. To my local builder friends...I will have plenty leftover if you want some material to do the same.


Sherwin Williams color chips for my prop..."Flight Red" blades with "Fall Leaf" tips...need to send these off to Whirl Wind so they can match them


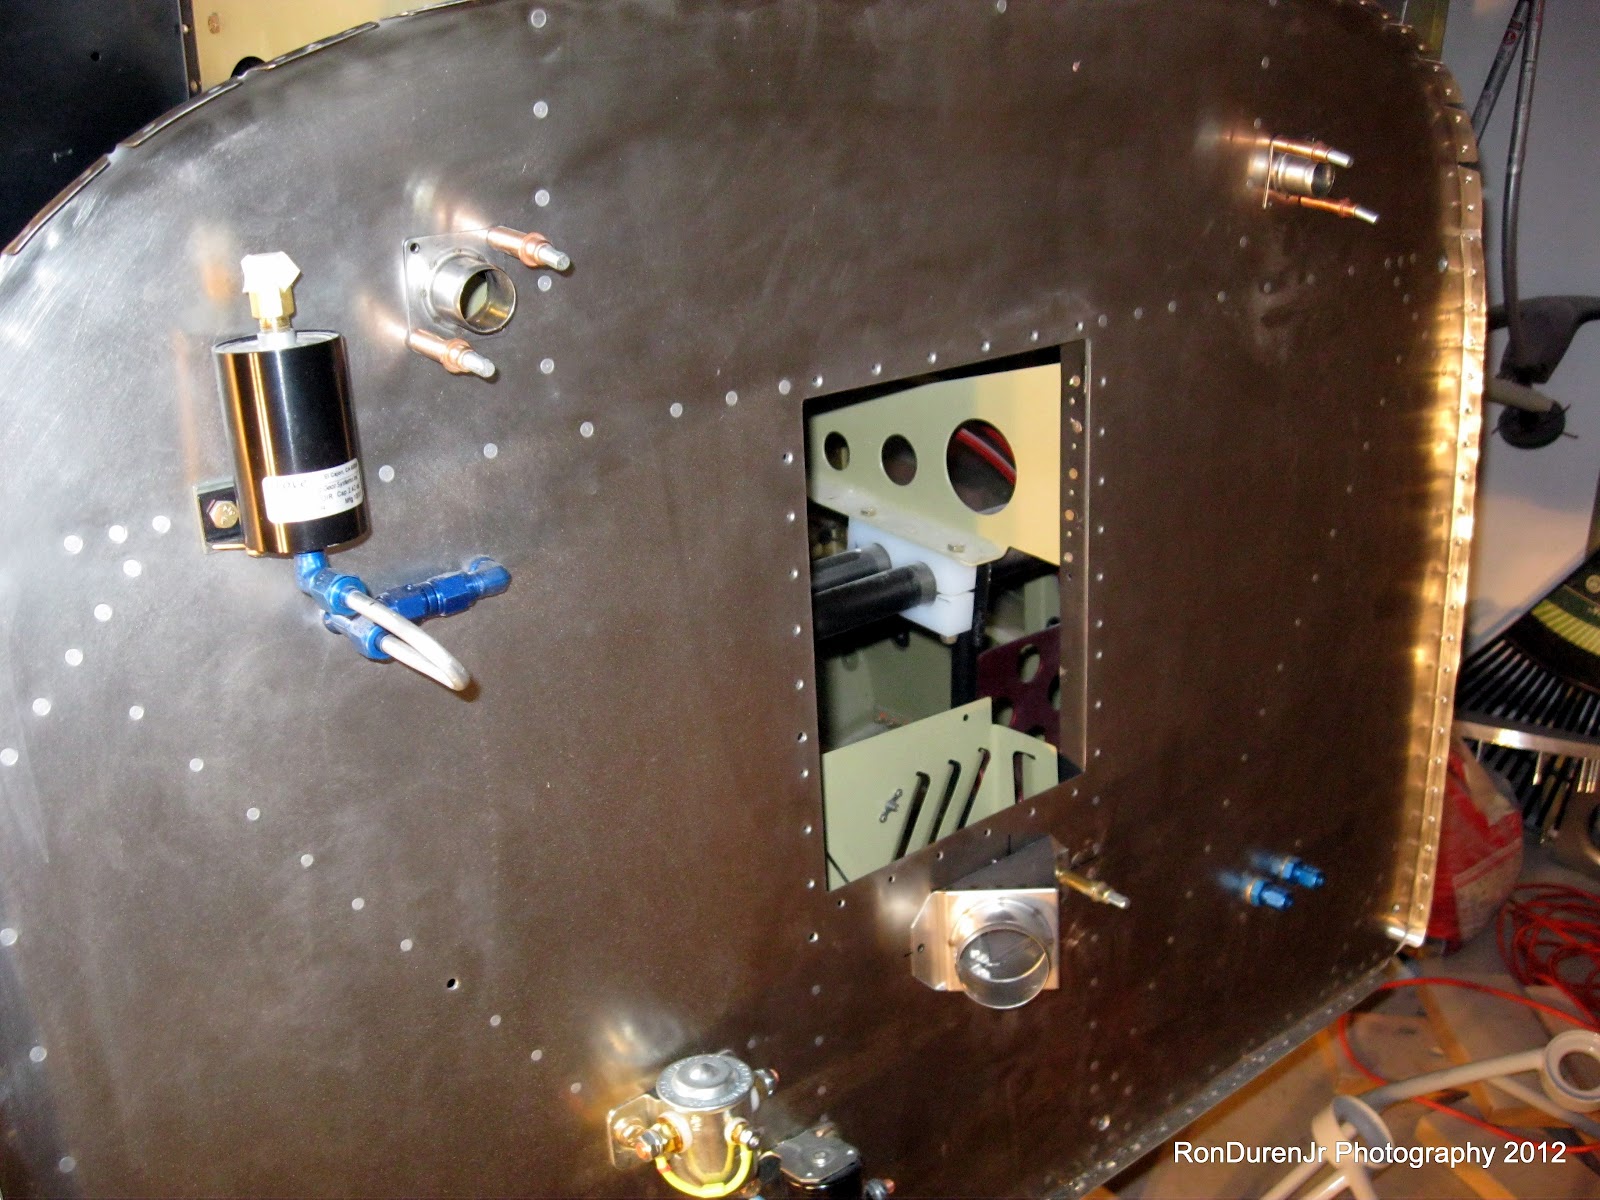
Getting the firewall ready for engine hanging...just about there. I should be getting a delivery date any day now from AeroSport Power for my engine. Two firewall pass-through kits for wiring. My SS heater box also installed. Make sure to use SS hardware on these installs.


If you use my strategy, be careful that you don't get your pass-through's too close to the manifold. I got lucky...I didn't think ahead before drilling the 1" holes for the pass-through.


My pass-through with the firesleeve in place. What you do is cut another piece of firesleeve that will wrap around your wires, inserted into the firesleeve shown here and then secured with hose clamps and caulk. Pretty slick...but these kits are $50 each from ACS...not cheap. And, my rant, they don't come with SS hardware!! A $50 kit and they cant throw in $2 worth of hardware?? They claim in the literature it is so the builder can decide on screws or SS rivets...really? Just send some screws already. I had to make a run to home depot to get some button head screws...you can see they are allen head screws. I don't like phillips...strip out too easy and screwdrivers are hard to use in tight quarters. As you start doing FWF stuff...think about making it easy to work on since you will be the mechanic. With that in mind, I've changed a few things that I'll share as I progress.


SS heater box installed...I did use phillips here only because I had these laying around, I may swap them for allen head screws later. I used some biotherm fire sealant (supplied with the kit...no screws, but they do provide sealant) here also...notice the gray fillet.

Wednesday, January 18, 2012

Canopy Latch HOBBS 1077.5 hrs

Here we are, after another productive week...I'm starting to make a habit out of this....progress has been excellent lately. ;) With the three day weekend (MLK day) I had an extra day to work on the plane. I've been a ball of energy and enthusiasm lately. I keep saying it, and it bares repeating, I am really enjoying this stage of the build...finally starting to do some actual finishing work, building mechanisms, etc...a lot of excitement for sure.

This week I tackled installing some of the features used for the canopy latching mechanism. As you probably know if you're been reading along, I decided to buy an after market latch from JDAir. I have no regrets on this purchase, good product and good customer service.


These are the brackets that will hold my struts in place. I started fabrication of these but didn't get completely finished. I just need to locate the attach points and I should be good to go...that can wait.


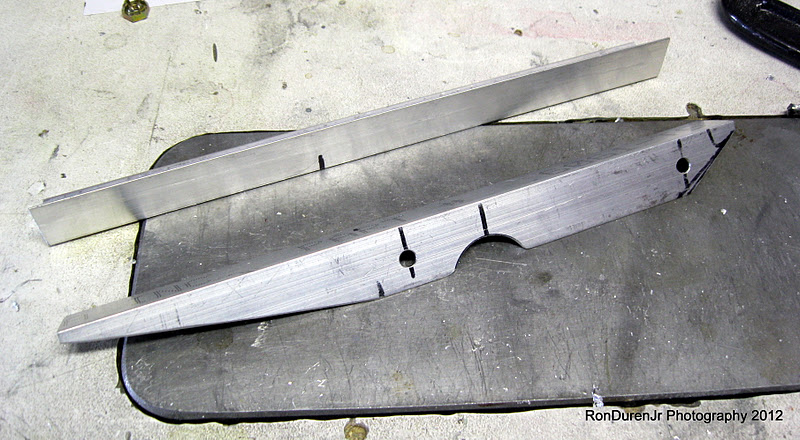
Shifting my focus to the canopy latch. Here you can see the process of fabricating the attach angle brackets that will hold my latch in place. One is done...


For the other, I just did a mirror image and traced the cutout and match drilled the holes. I will note that the 1" diameter hole probably isn't required for both top and bottom brackets (omit the bottom) although I think the plans say to do both. Not a big deal, with side panels it wont be seen on my plane...but it would save you a little work. I will just consider it a weight reduction! :)


I picked up this 1" diameter rotary file at the fly market at OSH last year. It was used and cost me a couple bucks. It was very useful for this little project of adding the 1" cutout and earned its keep already. Handy tool to have in the tool box.


Here you can see the sub-assembly taking shape. This will rivet to the inside of the fuselage. JDAir has .pdf installation drawings on their site for this...and let me add, they are nicely done. My only gripe was that the "full scale" 1:1 template was not actually full scale when I printed it out. Not sure why? Maybe some scaling issues when it was converted to a .pdf. This template is supposed to be used to properly place your cutouts for the latch. It would have been nice to have, but I worked around it...very, very carefully.


Here is the aforementioned cutout layout. I checked everything very carefully...double checked...verified...measured not twice but several times before committing to cutting metal. Yeah, I was a nervous wreck! You just don't "replace" a fuse side skin at this point in the build. It is imperative that there are no mistakes. I could patch a screwup I suppose...but man, I sure didn't want to go down that path.


The cutting into my beautiful fuse skin begins....oh boy! Are we having fun yet! Err on the side of cutting the opening smaller and then open it up gently with a file so you can sneak up on your finish dimensions. Keep doing sanity fit-checks to make sure you are in the right location and have the right size.


Take a jewelers file to smooth out your opening...gratuitious FAA shot.... ;)


Now that the hole is cut, I have my latch sub-assembly clamped in place. Since the template wasn't working for me, my strategy was to cut the holes for the latch first. Position the sub-assembly precisely inside the openings and then match drill the rivet holes for the attach angles. Worked well. Did I mention to be careful....? Work slowly and deliberately....


Coming together...I still had some very subtle filing to do for me to be happy, but this was pretty close to done in this pic. You can also see I have now drilled my rivet holes. All in all, it came out pretty darn good. It doesn't look like it was machined--it does have a hand-crafted look to it, but I'm ok with that. These are the things that make your plane your own...not a machine's. One other note, realize that your reveals (gaps) will need to account for paint thickness so don't make them too tight.


This is the powder coated hooks that will secure the canopy when the latch is actuated. The plans say to "bend" the hooks if necessary to get them to line up with your access holes. I didn't like this strategy...seemed kinda hokey. First of all, they were pretty darn close with no modification. One side was getting hung up though. My strategy was to file the leading edges to remove the sharp points. By doing this, you eliminate catch points. Worked slick. I'll paint that exposed area later.


Putting it all together before cutting the attachment alum rod (seen in pic below) to length and then tapping both ends.


And the finished product...this was cool, being a Mechanical Engineer, I really enjoyed the Engineering involved in the mechanism and the linkages. And the best part is it worked like a charm! This was a satisfying bit of work...and also one that I am glad to have behind me, it was a little nerve wracking as I mentioned.