Ron's RV7 Aircraft Factory


Welcome to my personal blog. This site was created as an informal description of my build progress in the construction of a Van's RV7 aircraft. A place where family/friends/builders/curiosity seekers can follow along. It is not intended to be a detailed description of every step in the building process as that would be much too time consuming. There are plenty of sites that do a great job in that arena, that is not my intention with this site. My intention is for this to be a philisophical/motivational/inspirational account of the emotional ups and downs of the life changing journey...and it will change your life. I hope this will give you an idea, through my eyes, of what its like to make this transformation. A note to other builders, I am not an expert so do not put your safety at risk by attempting anything you see on this site until you have done your own research, or send me an email so we can discuss it. Any deviations from the plans are not approved, nor endorsed by Van's Aircraft or myself. Thanks for visiting.


Showing posts with label Builder Visit. Show all posts

Tuesday, February 21, 2012

Scott Taylor Visit HOBBS 1146.5 hrs


Well, it was a busy week for me. First off, I previously mentioned a prospective RV8 builder, Scott Taylor, who joined us at the "Red Tails" movie. Scott is a pilot for Frontier Airlines. He called me up a couple weeks ago and said he had visited the factory, got a demo flight, along with his "first" RV grin. He then promptly took the plunge and ordered his empennage kit! Funny how that works isnt it? Congrats to Scott...welcome to the insanity that is RV building! So, I invited him over to show him my project, the shop and talk tools...of course, 3 hrs later I finally let him leave after talking his ear off. I always seem to do that when it comes to RV's... ;)

Secondly, I took Saturday off from building...first Saturday for quite some time. Of course, it wasn't completely devoid of RV activity however. I went out to FTG and joined Scott Mills for a breakfast flight in his RV9A to Pueblo's Spitfire Grill. It was a nice break from the usual Greeley breakfast run....the rest of the gang went to Centennial. Beautiful day for flying too, it was cold (15 deg F)and the air was as smooth as a babies bottom! Although there was some low lying clouds and haze scattered about...strange for Denver. Believe it or not, it was my first time flying over the clouds as we were at about 1500 AGL coming back from PUB and looking down at the clouds below while basking in bright sun, very bizarre...but gorgeous! I was mad I didn't bring my camera to capture the moment.

Scott let me fly most of the way down to Pueblo, it was nice to get some RV stick time...always good fuel for the fire. After returning, we loitered around the airport for a while...met a new RV7A builder in Chuck's hangar, then we (Gary Zilik, Scott and I) drove over to visit my project and drink a couple beers. It was a great day, a great break from building and great inspiration to forge ahead! Nothing gets me more fired up than a day like that. I suggest you also do this from time to time to recharge.


Finally finished up my rudder pedals as I tidy things up before riveting the forward, upper fuse structure in place in preparation for canopy fitting and glueing. These were overdue on the task list, but with anodizing and painting the powder coated steel tube added some time to the ordeal. I will tell you, and you can tell by the all the pictures, I am very happy with how these came out.

If they had a contest for nicest looking rudder pedals, not sure if I would win because I have seen some nice ones, but I would be in the running that's for sure! :) Too bad you'll hardly ever see them and they will get scuffed up by my feet! Oh well, they look nice now and I'm proud of 'em. The last picture shows my JDAir rudder pedal extensions installed.


Before painting my sub panels with JetFlex satin black, I added a bead of white paintable silicone as part of my "stop the canopy leaks" campaign! Ok, maybe just "minimize" the canopy leaks campaign. ;)


More tying up loose ends in the cockpit...finally getting back to the electric flap install. Here are my after market threaded flap rods that I bought from Avery...and of course, red anodized with the batch of parts I brought in.


Flap motor installed, finalized and don't forget to safety wire it as the Van's AD states....that was kind of a pain. Hooked it up to my portable battery and cycled it up and down a few times to see how she behaved...cooler'n snot!


These support ribs gotta go...they are a bad design, leftover from a time when all panels were 6 pack steam gauges. Nowadays, with flat panel EFIS being the norm, they just get in the way. There are plenty of clever ways to get around this by trimming them or making fancy new ones. As for me, I am just going to cut them off, use the cutoff pieces and strategically relocate them...more on this later.


Finally deciding what to do with my emergency canopy jettison assembly that comes in the kit. I don't plan to have this accessible for an in-flight ejection as I think that is very impractical in reality, but I do want it handy if I ever want to easily remove the canopy on the ground for maintenance.

This is what I came up with...and its been done before, instead of coming through the panel (per the plans) with the T-handle...I just went straight down with it. A 90 degree rotation and off comes the canopy...nice. I need to come up with a way to safety secure this however...don't want it vibrating loose in flight, that would be very bad day!


Support ribs trimmed back as mentioned above...


Don't forget these two -426 rivets...as I almost did...


Jettison assembly and canopy hinge brackets finalized....


Canopy held open for fitting with bailing wire attached to the plywood above...


I made these strut attachment brackets a couple months ago and just realized I screwed them up!! dangit! Read the plans wrong...must've been a late night?? The center holes need to be tapped for the strut ball stud...not through holes as I did. Oh well, add to the scrap pile...how big is yours??! I had enough material left over to redo one...but now I need to purchase some alum bar for the other one.


There is a known problem when installing the tip-up struts. The force of the struts in the closed position exerts enough pressure on the canopy to push is forward slightly and cause alignment problems. I wasnt even aware of this until Sean Blair sent me an email a couple weeks ago...glad he did. So many things to stay on top of, sometimes they slip by.

Clever builders that have gone before me (I seen these on Chad Jensen's site) put "snubbers" in place to combat this. Chad used carriage bolts because the round head is less likely to mar the paint, which I liked. I took it one step further and added vinyl caps that I found at McGuckins hardware store. Of course I had to tweak them slightly to fit and then glued them in place.


The design makes them fully adjustable to fine tune it...but gosh, this would be near impossible to access to adjust once this top skin is riveted in place so get 'em right and hope they dont move. I plan to loctite them.


From the rear side...this is where the vinyl cap will contact the canopy frame.


And a parting shot of the sub-panel finish painted, riveted in place, canopy installed and the rudder pedals partially installed. Wowza, looking good!

Friday, April 1, 2011

Builder Visit and Movie Night HOBBS 610.0 hrs

Last weekend, at my request, Scott, Gary and their wonderful wives Deb and Carolyn hosted a movie night out at the hangar. It was kind of a short notice deal so we just ordered pizza instead of our usual potluck style movie night. Prior to the movie I hosted a builder visit at my project. It was a great afternoon and evening of talking RV's and airplanes and flying. The movie Scott chose was Memphis Belle, one of my favorites.

My Dad really got a kick out of the whole day and evening. We finished the top skins on the wings, had some people over to see the project and then spent the evening in Gary's hangar surrounded by good people and fine airplanes. Not a bad day huh?

Both Dad and I were thinking, "pinch me". During the movie I noticed him turn around to look at the airplanes behind us. I cant think of many things in life that make a 65 yr old feel like a kid again. It doesnt get much better than that! :) Thanks to the Zilik's and Mills's for putting it all together.

Friday, March 11, 2011

Leading Edge Lights HOBBS 507.0 hrs

As I mentioned, last night I went over and helped Brian Beatty with his RV7 project. We were riveting his top wing skins in place. We ended up using the 'back rivet' approach that many builder employ for the wing skins. It was my first time doing this so there was a small learning curve.

I have to admit the first few werent the best (sorry Brian), but after a few minutes we had a good rythm going and the quality improved. I was working the gun and it took me awhile to get the proper trigger burst down. It takes a little more force (a longer burst) to get a good shop head with this method.

Brian's project is looking good, he has most of his wing skins done. Dynon heated pitot, wiring, fuel tanks, leading edges are all complete. We had a few beers afterward and talked tools, Oshkosh, Sun 'n Fun and Reno, good stuff! He also showed me his SteinAir master wiring kit, which was pretty cool.


Smile Brian!!
 So, I have debated the leading edge light solution for some time. I like the Duckworks kits that Van's sells but quite honestly think they are too highly priced ($250/ea) for what they do. I wanted to find a good LED version that was cheaper, had the same performance, would run on less power (be cooler) and last longer. I also thought about doing a custom fiberglass mounting setup.

The ER tanks taught me something that many veterans have already told me. The more you deviate from the plans, the longer it will be until it flies. Right now I am kind of tired of deviation so I decided to just buy the Duckworks kits and be done with it.

I'm still not convinced they are the best solution, but they are easy to install, have a proven track record and quite frankly they wont be used very often during the life of the plane. I sometimes spend too much time worrying about things that dont warrant it...this is one of those times. There are more important things to worry about...pitot tubes, servo mounting brackets, nav/position lights, strobes, etc.

So, I called up Van's this morning and ordered two and had them put in my fuse kit which is getting ready to be shipped.

Saturday, January 8, 2011

Brian Beatty Visit HOBBS 420.0 hrs

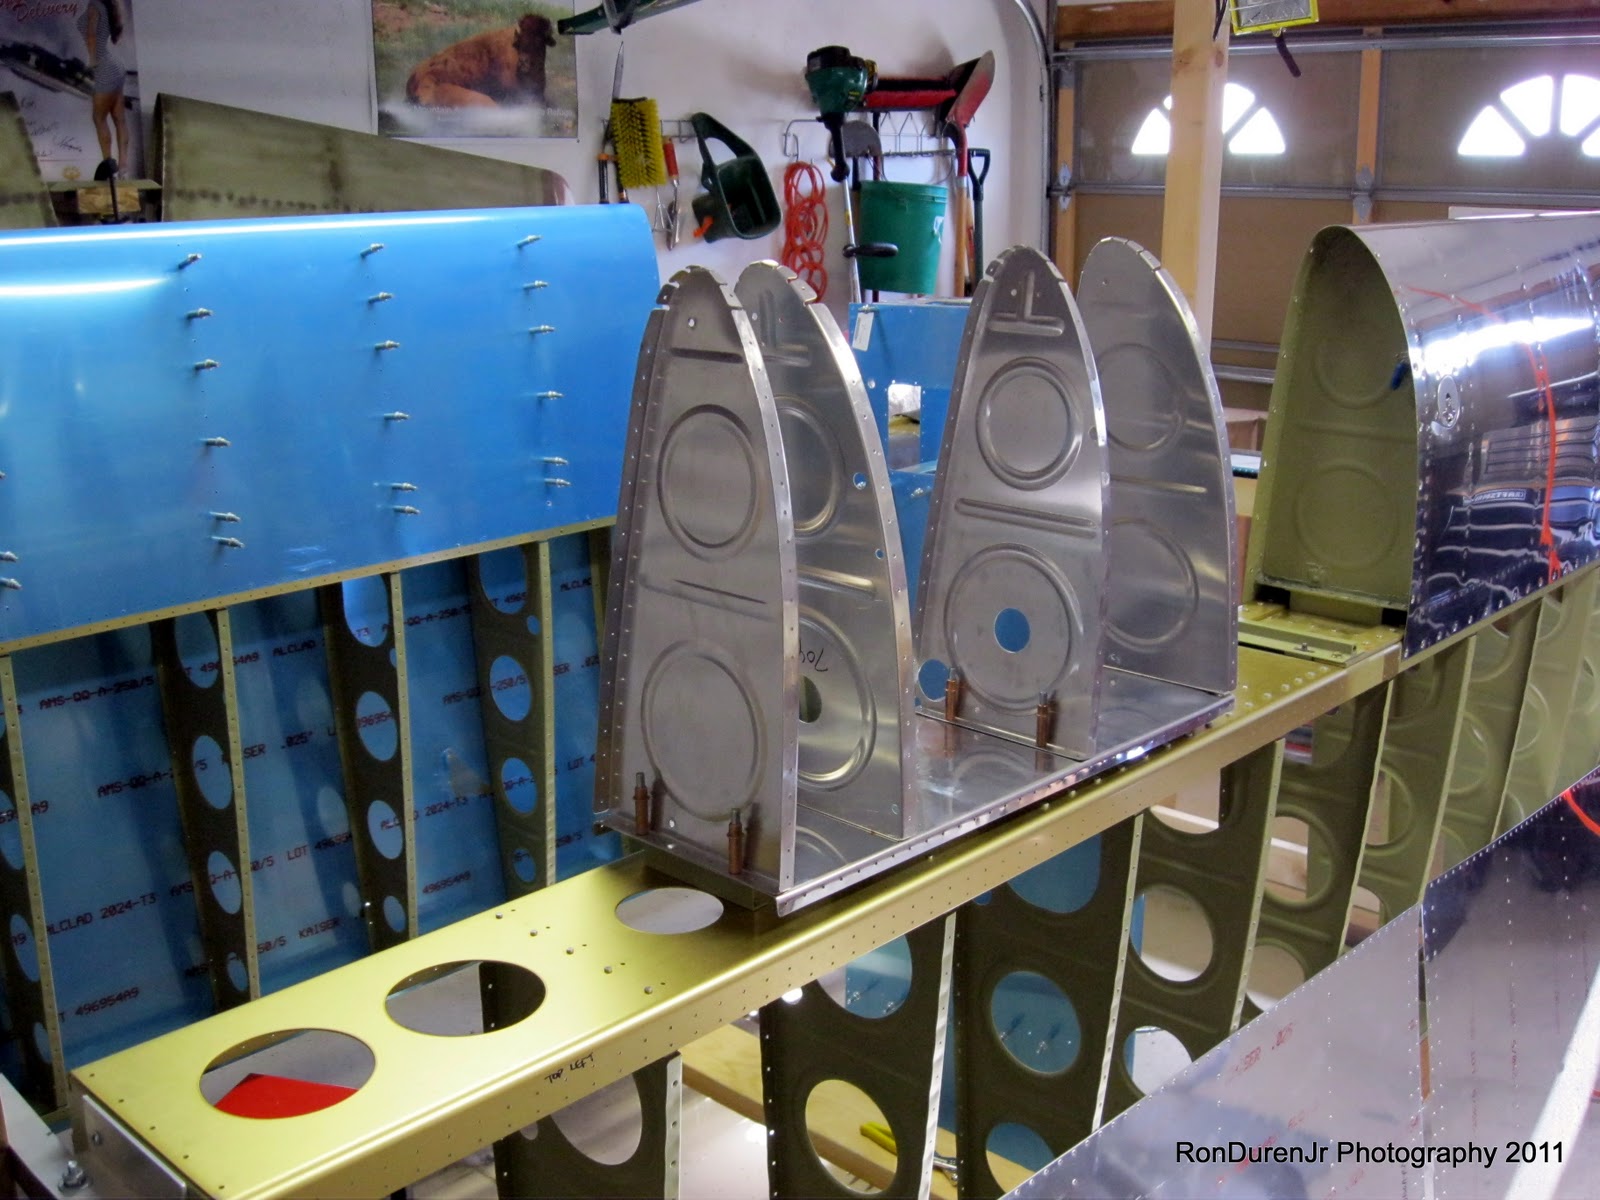
This morning I had a nice visit from fellow builder Brian Beatty, he is also building an RV7 and is almost neck and neck with me in his build progress. I met him through the Colorado RV list and we hit it off immdediately. He showed up at 8:30 this morning and before I knew it...two hours of good ol' hangar talk had zipped by! He gave me some good ideas and tips that he is doing with his wings that I'm thinking of incorporating into mine. Hopefully this is the start of another great RV friendship. The people you meet in this hobby are second to none in my opinion.

After Brian left I got down to the business of building an airplane...thats what this is all about anyway isnt it? :)

Most of my efforts today were working on my ER tanks and left leading edge assembly. It was a good day...exciting and very fulfilling.


New parts arrived from Van's...always fun to get a box from Van's! ER tank parts and spare hardware to refill the parts bins.


Notice the two different versions of 8-32 nutplates...this explains my earlier mistake on the tank access covers...doh! Interesting to note.


ER tank layout work...lots of head scratching...planning...more head scratching...but you can see its starting to take shape. Progress is being made and it was fun to see.


A piece of paper cut to specific length to help with layout...to keep the ribs nice and straight/parallel before I match drill them to the skins.


For the close quarters work of match drilling the skins/ribs, I needed to purchase a right angle drill from Harbor Freight. $32..which was a little pricy for HF but it worked good. Its a tool I needed to buy anyway...handy to have in the tool box as the project goes on.

Tuesday, May 25, 2010

A Helping Hand HOBBS 190.0 hrs


It's been awhile since I've posted anything. Mostly because there hasnt been anything to report, progress has slowed to a crawl as I await my wings and finish up my fiberglass work on the tips.

I have, however, made a couple visits to Bryan's project to give him a hand with his Horizontal Stab which he finished last week. See his description of our latest adventures here, Bryan's post It really helps to actually get my hands on some parts and do some riveting while I am in this lull in building, keeps my mind on airplane construction...I've learned I very much enjoy the activity. I am certainly chomping at the bit to get my wings...I have news on that front also and will post it soon.

Tuesday, April 20, 2010

Bryan's RV8 Wings! HOBBS 187.0 hrs

Last week my friend Bryan Raley kindly invited me over to help him unload his wings and do inventory. I say 'kindly invited' because I'm sure he knows how excited I am to see what those buggers look like out of the crate! I may have been almost as excited as he was to crack open those crates...thanks for sharing Bryan!


Mine will be pretty much identical to his, the RV7 and RV8 use the same wing. So, it was like a dry run for my delivery next month. It was very cool to see the parts and help out a little bit with the inventory. As I told my sister when she asked how it went? I said, "for the cost of that sub-kit, you'd think there'd be more to it!" haha! Such is the aviation hobby...things arent cheap.

Here is Bryan's blog entry describing the event...

Bryan's Blog Entry

Sunday, December 20, 2009

Pete Vinton Engine Hanging! HOBBS 168.0 hrs

Yesterday I swung by Everitt airfield, home of Rocky Mountain Airpark, to visit Pete Vinton's RV8 project. This is a great airpark property being developed near Parker, CO. Pete is one of the partners. I like Pete quite a bit, in spite of the fact he is a Cornhusker fan! :) If I won the lottery tomorrow, the following day I would be buying a lot out there with a house/hangar/barn and a couple of horses. Check it out here,  Rocky Mountain Airpark

Pete recently took delivery of a partially completed RV8 fastback and mentioned  he might hang his engine. I wanted to see his project but the engine is what perked my interest since he had purchased the same one I plan to install in my plane. An Aerosport IO-375 (see previous post for a description). I was dying to take a look at this beast. This particular engine dyno-ed at a whopping 217hp at sea level and weighs the same as a 180hp -360!! Thats gonna be impressive in an RV8 fastback!

Although Pete was draggin his feet a little about tackling this job, mumbling about cleaning up the shop or something. His partner Wes and I tore into it like two kids on christmas! There is something that just isnt right about a pretty new engine sitting on a pallet next to an inviting airframe. Although Pete has owned several aircraft, including most recently a C180, he was not entirely familiar with Lycoming engines nor had he hung an engine on an RV before. Wes and I were even less experienced. How hard could it be I thought? It just four bolts...

Well, its only four bolts but it was a little tricky getting them all installed at the same time. Because we were all new to this, it probably took longer than it should have. But, a few hours later, Pete and I were having a cold beer admiring our accomplishment. Wes had a dinner date with his wife for their 22 yr marriage anniversary so he had to bug out before the deed was done so Pete and I finished it up without too much trouble.

As Pete noted, the engine is the "heart of the airplane" that pumps the lifeblood needed for powered flight. Without which, the airframe is just a collection of inanimate parts. To me, hanging the engine is symbolic of the birth of a child, it will be nurtured and grow from here, but this is its start. Certainly a big moment in the evolution of a project and I was happy to share in it. I also learned quite a bit so that when the day comes for me to do it myself, I think it will go much quicker with the knowledge I aquired on this day. It really was a great way to spend a saturday afternoon.


A couple shots of the project. Here you can see the unfinished engine cowl in pretty pink, thats how it arrives from Van's.


A nicely done 'fastback' with aluminum skirt.


Van's stock tailwheel, Pete has already purchased a 'Flyboys' tailwheel that has better ground clearance. He will swap these out later.


He purchased some aftermarket gear legs that are pretty nice. They are all one piece, machined in the shape of a fairing. He says these saved him 11 lbs over the Van's stock legs and look pretty slick.


The engine as it arrives from Aerosport Power in Canada, after uncrating...


The stock valve covers, Pete has ordered an upgrade to these that will say 'IO-375 Magnum' I belive?


On the engine hoist getting ready to move it into position. Wes's son Clay looks on in the background.


And a few shots of the finished results...pretty huh?


Sunday, September 20, 2009

Bryan Raley Visit HOBBS 127.5 hrs

Last week my friend and fellow RV8 builder Bryan Raley stopped by for a visit. http://bryansrv8project.blogspot.com/ He attended the "Sheet Metal Assembly" EAA SportAir class the same weekend I did the composites class. So, he is raring to get started on his RV8 empennage. I suggested he stop by my shop for a tour. When I told Samira, she kind of chuckled, "oh so now you're the expert huh?" I laughed and said, "far from it, but its amazing how much I have learned already in just 125 hrs of experience." Can you imagine what it'll be like when this thing flies? Maybe, just maybe, I will be some kind of expert by then! :)

So anyway I wanted to point out some things that tripped me up in my building...show him my mistakes so hopefully he can avoid them in his build. Go over some confusing parts on the prints, etc. I also wanted to show him how I had my shop set up, my tools, my painting/etching/alodining process and other misc process stuff. It was a good visit, we spent a couple hrs talking RV's and tossing back a couple brewski's in the process. Does it get any better than that??!

Monday, July 20, 2009

Time for some Company! HOBBS: 93.0 hrs

Over the weekend, I had my first visitors to see my project. Bob Markert and his wife Mary (RV8 builders, currently working on their wings) and John Loretz and his wife April. Although John isnt a builder, he currently flies a 200 hp RV8 and seems to have an underlying interest in building. John introduced me to aerobatics in his '8' a few months back, boy, what a ride that was! My first loop and several aileron rolls, a few of which I did myself. Samira and I spent the day preparing for the visit, cleaning and organizing the shop along with the house. I made up a batch of homemade potato salad and we marinated steak and chicken for 'kabobs'. I went out and bought a slew of beer and Samira whipped up some tasty Red Sangria.
It was very cool to bring out all of my finished parts (HS, VS and rudder) from storage and simulate putting them together on the bench to form an aircraft tail! Everyone seemed to like the sight of 'airplane parts' under construction as well.
I was pleased to see the interest from the women to join us once we ventured into the shop for the tour. As I told the ladies, I dont believe building an airplane or aviation-related activities are strictly a man's domain nor should they be, so they are always welcome if the interest is there. Of course, Mary and Bob are building as a team and Samira is just about to delve into helping me as well, so I shouldnt be too surprised. And April seemed to be just as interested as the others, maybe there is a project in John and April's future...John did mention something about an RV10...hmm :)

It was a nice evening: good food, good people, good conversation (mostly about airplanes!), good beer and Sangria. A scene hopefully to be repeated again!

Wednesday, June 10, 2009

RV8 Builder Visit HOBBS: 53.5 hrs

Before I started building my airplane, I heard many stories of the legendary flying characteristics of the RV series. Because these stories were so widespread, you just kinda had to believe it to be true. In fact, I decided on Van's aircraft before I had ever flown one. But, when I finally was able to get my hands on the stick of an RV8A, words and descriptions couldnt do it justice...it was pure heaven, a delight to fly! I certainly had the RV grin.

Well, the same thing goes for the stories I heard of the great people associated with experimental aircraft and more specifically the RV builder community. I am still pretty new to this wonderful world of RV's, but I have already experienced great warmth and friendship from everyone I have encountered along the way. The stories, once again, really dont do it justice.

Last night was another example. Samira and I, along with another brand new RV8 builder (Bryan Raley), were invited over to visit Mr. Bob Markert's RV8 project. Bob and his wonderful building partner and wife Mary treated us like old friends, even serving us strawberry shortcake! As Bob was quick to point out, we already 'know' each other because we are 'RV' people. That pretty much sums it up, and is the general feel I get from everyone involved in this great passion for aviation and homebuilding. From local RV8 pilot John Loretz, whom I had never met, offering me a free ride (and refusing to take payment for avgas!) a couple months ago and now continuing with Bob and his wife graciously opening their home to us as old friends. I was really taken aback by all of Bob's offers to use his tools and jigs once he was finished with them. It is so refreshing to see this small group of people that still show the qualities that make America great. I feel very fortunate to live in a country where I have the freedom to be part of this great 'hobby'. I also thank Bob, who is an ex F-15 driver, for giving us that right and protecting this great country with his service.

Now for the details of Bob's project. Bob is working on his wings right now, and is just about to start sealing his fuel tanks. He is doing a few modifications at this stage, including a flop tube for inverted fuel (combined with the Christen inverted oil system) and extended range fuel tanks that will add 9 gallons to his fuel carrying capacity. These ER tanks are manufactured by a company called 'Hotel Whiskey'. These are all options I am considering for my project so I had a keen interest in talking with him about the details of each mod. Since this was the first time I had seen a project in progress other than pictures, it was very fascinating. For starters, Bob has a real nice shop setup in a three car garage. I was also a little taken aback by how big the wings look in the garage, and in comparison to the empennage. When you fly in an RV, the 'hershey bar' wings looks short and stubby...but seem much bigger when they are in a garage and not attached to the fuselage. I was also stuck by the magnitude of the work I have ahead of me, I now know the empennage is peanuts compared to the wings. There looks to be a lot more things to contend with on the wing construction, even a little intimidating. I did envy Bob's position though, although I am enjoying the building process, I cant say I wouldnt mind being at his stage in the project. Soon enough, for now, its the Vertical Stabilizer...followed by the rudder...elevators...trim tab....and on and on. Before I know it, like a child growing up too fast, it'll be over as quick as it began. I shall savor the moments.... :)