Went out to the shop last night and spent the majority of two hours thinking/planning out my ER tank architecture. I spent a fair amount of time doing this when I decided to go this route but hadnt done anything with it since, so it was time to add some more detail to the plans. Deciding where to place the tank ribs, getting a list put together of extra parts I will need to order from Van's, etc.
Its 'go' time! I have a bad habit of overthinking everything--sometimes I need to just stop thinking and start doing. I think I have reached that moment in time.
I gotta say the planning was fun, this is what gets my juices flowing. Not to offend anyone, but building one of these entirely to the plans holds little interest for a guy like me. 'Making it your own' is what truly draws me to this hobby. I would feel suffocated by building a lightsport RV-12 since you cant alter the build from standard. To me, life is too short to be just like everybody else...what fun is that? The coolest thing is going to OSH and seeing all of the clever tweaks people have done to their planes...even if its just a variation of something that has been done before. Anyway, thats just me...

Thursday, December 30, 2010
Wednesday, December 29, 2010
Right Flap HOBBS 400.0 hrs
Worked on the right flap last night....no pics. Cleco, match drill, disassemble, file, debur, scotch brite, etc. Dimpling and priming next. As you can see, I have reached 400 total hrs on the project...sometimes it seems more like 4000 hrs! haha! Its daunting to think that I am only about 1/5 done. Its a marathon, not a sprint, thats for sure...just settle in and keep pluggin' along.
Tuesday, December 28, 2010
Access Cover HOBBS 398.0 hrs

Last night I ProSealed my access cover into place. This picture will look a little different than a standard install. The 'extra' hole you see is where my original vent line was before I decided to do ER tanks. Consequently, I plugged that hole with a nut/bolt and sealed it up. Also, the screws are 10-32 black stainless steel--also not standard because of my earlier mistake of not installing the right nut plates. Of course, like I did with the other tank I will spray this with primer when I am done to hide that ProSeal application.
So now, the baffle is the only thing left to finish this puppy up! Before closing it up, I will take pics of every bay for documentation purposes, wipe it out with MEK so its nice and clean (no construction dust) and test the capacitance plate continuity one more time. I've also started on the right flap.
Monday, December 27, 2010
Fun With RV8's HOBBS 396.0 hrs
Over the holidays I recieved an email from a new reader, Kevin in Cincinnati, who is building an RV8 (I'm almost ashamed to admit my secret love is an RV8...). He sent me the link to a great video by Jon Thocker, I've seen this video before and I forgot how good it was--great tune and flying scenes. If this doesn't get you fired up about building one of these I dont know what will?
This week I will be finishing up the right tank and getting started on the right flap.
This week I will be finishing up the right tank and getting started on the right flap.
Wednesday, December 22, 2010
Happy Holidays 2010! HOBBS 396.0 hrs
A real quick message to wish everyone a safe holiday season! 2010 was a helluva year and I expect 2011 to be even better as I get cracking on the fuselage, thanks for reading along. I'm heading for the high country for the weekend so there wont be any factory activity for a few days.
 |
| ASF Christmas Card "Santa's Hangar" |
Right Tank...S'more HOBBS 396.0 hrs
And s'more work on the right fuel tank. Wired up the capacitance plates, continuity-tested 'em...thumbs up. Riveted/ProSealed the last end rib in place. Installed the modfiied (because of my ER tanks) vent tube. And then just some misc ProSeal work getting ready to close it up with the rear baffle being the last component...same song and dance as before...plenty of repitition on the wings.
Although I still contend the fuel tanks arent that bad, I wont lie that I am looking forward to having them in my rearview mirror! :) ...then I have to do the ER tanks, but that's another day.
Although I still contend the fuel tanks arent that bad, I wont lie that I am looking forward to having them in my rearview mirror! :) ...then I have to do the ER tanks, but that's another day.
Tuesday, December 21, 2010
FAA Photo-Ailerons HOBBS 394.0 hrs

I forgot to upload this self-protrait when I finished the ailerons. This, so the good ol' Federal government, knows I actually built my plane. If you read my blog you know how I feel about this silliness, but it could be worse...we do have great freedoms in our wonderful country, especially when it comes to aviation.
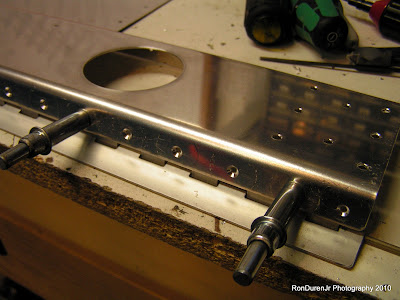
Left Flap Complete HOBBS 394.0 hrs
Finished up my left flap last night. As the plans said, this a pretty easy control surface to assemble. It is a little bit of a tight squeeze reaching inside to do some of the rivets but otherwise its pretty straightforward. I recieved a couple cuts on my hands in the process...and finally joined the "drilled my finger" club!
From what I've heard, I think its a right of passage when building an airplane to drill your finger at least once. It just grazed my thumb, but it was painful enough for me to say a few choice words. haha! On a side note, it sure is nice to rivet without having to deal with ProSeal all over the place!! :)


From what I've heard, I think its a right of passage when building an airplane to drill your finger at least once. It just grazed my thumb, but it was painful enough for me to say a few choice words. haha! On a side note, it sure is nice to rivet without having to deal with ProSeal all over the place!! :)


I would do the pop rivets (red arrows) before the solid rivets (blue arrows)...I didnt. This was a bitch to get into this tight space to do the pop rivets, and you can only do it with your 'modified' pop rivet gun (ground down for tight quarters). Click on the photo for a larger view.

Dont forget to machine countersink the main spar on the side where the hinge attaches.

I left the hinge pin uncut at full length since I'm not sure if I may need the extra length to secure it to the wing. I could've read ahead in the plans I guess? This works for now, I can cut it later.

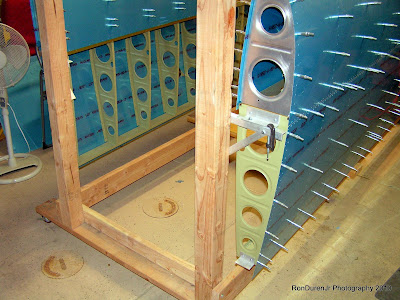
And here is the finished product, sitting in its stand.

Monday, December 20, 2010
Rolling Wing Stand HOBBS 390.0 hrs
I recently got a request from one of my readers about my rolling wing stand and how it was constructed. I wanted a rolling wing stand for a couple reasons. One, I didnt really want to drill into my garage floor nor my ceiling...not a big deal, but if I could avoid it I would. Second, I wanted to be able to pull my car into the garage if I really wanted/needed to...ie, snow days. I kept material costs to a minimum, but also plan to re-use them for the wing cradles when I am done.
So, with that in mind, I wanted a wing stand that was easy to move but also sturdy and straight. And it couldnt be any bigger than about the size of a car since I have a two car garage. I kept mine pretty wide so I have plenty of room between each wing for working...you could go narrower if you wanted. All of my mission parameters were satisfied and halfway through my wings I have been very happy with the results and I would do it again.
One thing I didnt do very well is square it up. Do a diagonal dimension check before locking it down as mine came out a little parallelogram. Just sloppy carpentry skills on my part. One other tip, you will have to acomodate for a more than likely sloping garage floor so keep that in mind as you build it and position it. Here are some pics...


Cheap Harbor Freight wheels...swiveling and locking, rated at 150# each


Support for the center of the wings to take out the sag...just a piece of all-thread, but the key is to integrate it into the stand so it is completely mobile


I positioned the wheels so that it wouldnt tip over when only one wing was mounted and I also wanted to avoid a tripping hazard and minimize width...this is the position I came up with

The center beam is great for hanging lights (as shown) or prints or air hoses or anything else you might want. I actually used it as a paint stand to paint my HS before I started on the wings.


Thursday, December 16, 2010
Tank Success! HOBBS 390.0 hrs
I had purchased the tank pressure test kit from Van's so I was using that to conduct my test. It is cheap and a pretty simple setup, it includes a plug for the fuel pickup fitting and a bicycle style valve that screws into the fuel drain sump. I then inserted a glove into the cap to help seal it better, taped over it with duct tape and then attached a 'balloon' to the vent line. I didnt actually have a balloon handy so I just cut off a finger from a rubber glove and used electrical tape to attach it. It worked just fine...well, sort of.
For some reason I thought I was supposed to pressurize the tank and leave it overnight to see if the balloon stayed inflated. So I pressurize the tank...no problem, set the tank off to the side and start doing something else. I checked back about ten minutes later and the balloon was already deflating. Are you kidding me right now?!! Let me just tell you, a feeling of dread came over me at the sight of that! Ugh!
Well, so not to throw my arms in the air and panic, I decide to work the problem. I went back and read the directions that Van's supplied with the kit in their entirety. Sure enough, it says to pressurize the tank and then use soapy water to check for leaks. No need to leave it overnight. So, extra soapy water it was...and sure enough it was leaking pretty darn good around my electrical tape holding the balloon in place so that concept didnt work too well. But, I checked the rest of the tank and besides the fuel cap...it was all good! woohoo!
So, I think I have a good seal on my tank. I personally wont be 100% positive though until I fill it with fuel and use it for awhile, that will be the real test. But for now I will accept this victory and move on to the next one.
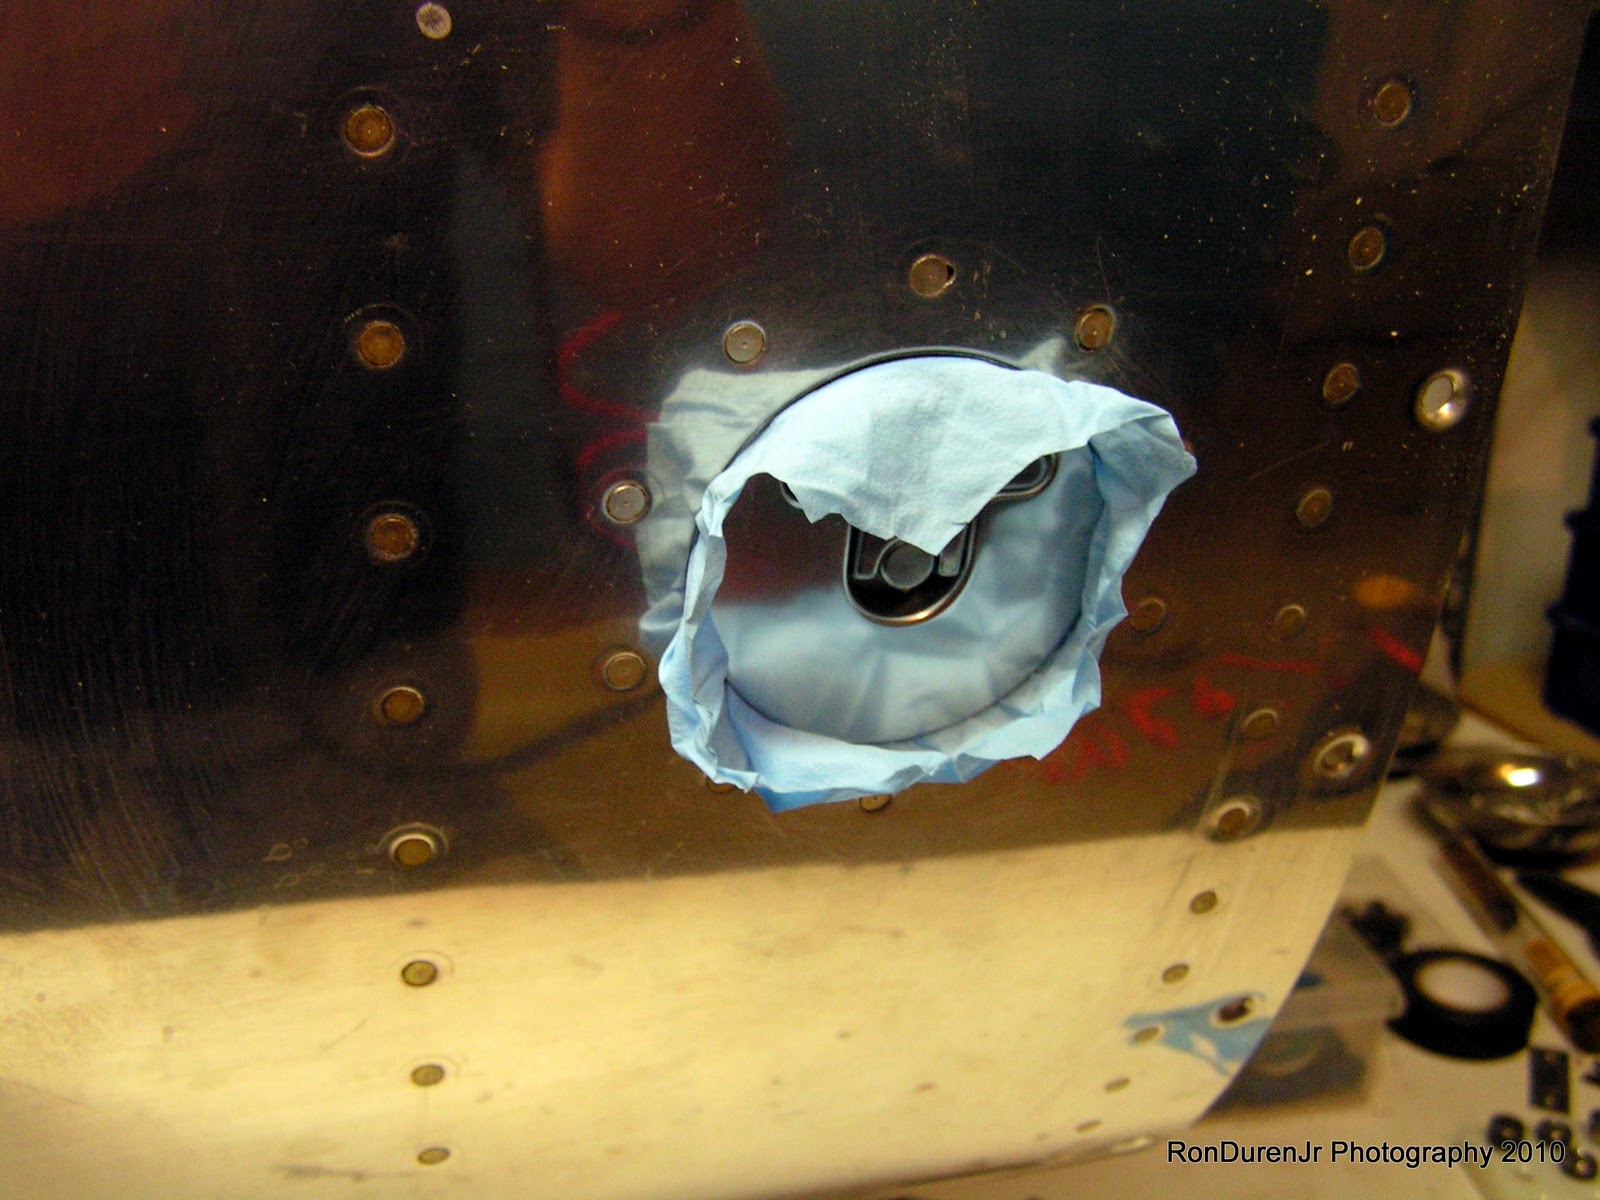
A glove inserted into the fuel cap...

After inserting the glove, I added duct tape. I think this worked ok until the soapy water hit it, then the tape started to peel away. No worries though, the cap is not of consequence for the pressure test and can be ignored.

Fill it up with an ordinary bicycle pump. Do not use your air hose, that is way too much pressure for this. The amount of pressure should be 1.0 psi or less according to Van's...doesnt take much.

Here is my simulated balloon...the finger of a glove. This acts as a sort of safety pressure valve so you dont add too much pressure in the tank and rupture or damage it...that would suck. Worked just fine...the electrical tape holding it in place, not so much! :)

And...although I havent seen other builders do this, I'm sure its been done before, I taped off the tank and threw a coat of primer on the baffle and end ribs. It will obviously add some corrosion protection but it also made it look much more professional...hide all that ProSeal goop.

And of course, dont forget to celebrate the small victories along the way. One of my favorite quotes is by the former tennis champion Martina Navratilova, "The moment of victory is much too short to live only for that and nothing else." Here is a self portrait while I enjoy a Cuban cigar I smuggled back from my Costa Rica trip...dang, that is one ugly dude!! haha! KPR...
Monday, December 13, 2010
Back in the U.S.A. HOBBS 385.5 hrs


Wednesday, December 1, 2010
Costa Rica HOBBS 385.5 hrs

I was hoping to do a pressure test on my left fuel tank but its not looking promising that I'll have time to fit that in before I depart. So, the blog will be on hiatus for a while longer, sorry about that. I am itching to get back at it though, so I expect it to be fast and furious once I return. I'll have a month long break from school until the spring semester starts in the new year. Here are some pics of Costa Rica that I found on the internet...yeah, I'm trying to make ya jealous! ;) Dont let my vacation haitus stop you from pounding some rivets however.


Subscribe to:
Posts (Atom)