Ron's RV7 Aircraft Factory


Welcome to my personal blog. This site was created as an informal description of my build progress in the construction of a Van's RV7 aircraft. A place where family/friends/builders/curiosity seekers can follow along. It is not intended to be a detailed description of every step in the building process as that would be much too time consuming. There are plenty of sites that do a great job in that arena, that is not my intention with this site. My intention is for this to be a philisophical/motivational/inspirational account of the emotional ups and downs of the life changing journey...and it will change your life. I hope this will give you an idea, through my eyes, of what its like to make this transformation. A note to other builders, I am not an expert so do not put your safety at risk by attempting anything you see on this site until you have done your own research, or send me an email so we can discuss it. Any deviations from the plans are not approved, nor endorsed by Van's Aircraft or myself. Thanks for visiting.


Showing posts with label Fuel Tanks. Show all posts

Sunday, January 9, 2011

Right Tank Closed Up HOBBS 426.0 hrs

Today closed a very productive weekend in the factory. Today I started the morning with more work on the left leading edge/ER tank. After a few hours of that I switched over to the right fuel tank that has been sitting in the corner collecting dust...to finally finish that puppy off.

It was just needing a few interior ProSeal details, final visual inspection cleaning, continutity check on the capacitance plates and finally close it all up with the rear baffle. Even though I have done this before on the left tank and know what I'm doing, it still took me two busy hours to attach the rear baffle.

Its a pain, I gotta tell ya, that might be my least favorite part of the fuel tanks? Lots and lots of rivets, pull rivets, tank attach brackets, etc. You  gotta work fairly fast to get it done before the ProSeal sets up which only adds to the pressure. Anyhow, glad to have it behind me!! Pressure test in a few days after the ProSeal has set up and of course I still have two ER tanks to do but they should be quite a bit easier. But the main tanks are done...and good riddins!! Glad to have it in my rearview mirror...onward!


Match drilling the tank attach brackets to the rear baffle for the left ER tank


Here ya go...a 9.5 gallon leading edge fuel tank...kinda cool


I did a very careful layout...I must've checked my dimensions 6 or 7 times before finally drilling the main spar for the tank attach holes. This would be an EXPENSIVE mistake so use due diligence. I think I am good to go. I will match drill the tank attach brackets when the leading edge is clecoed in place later.

Tuesday, December 28, 2010

Access Cover HOBBS 398.0 hrs


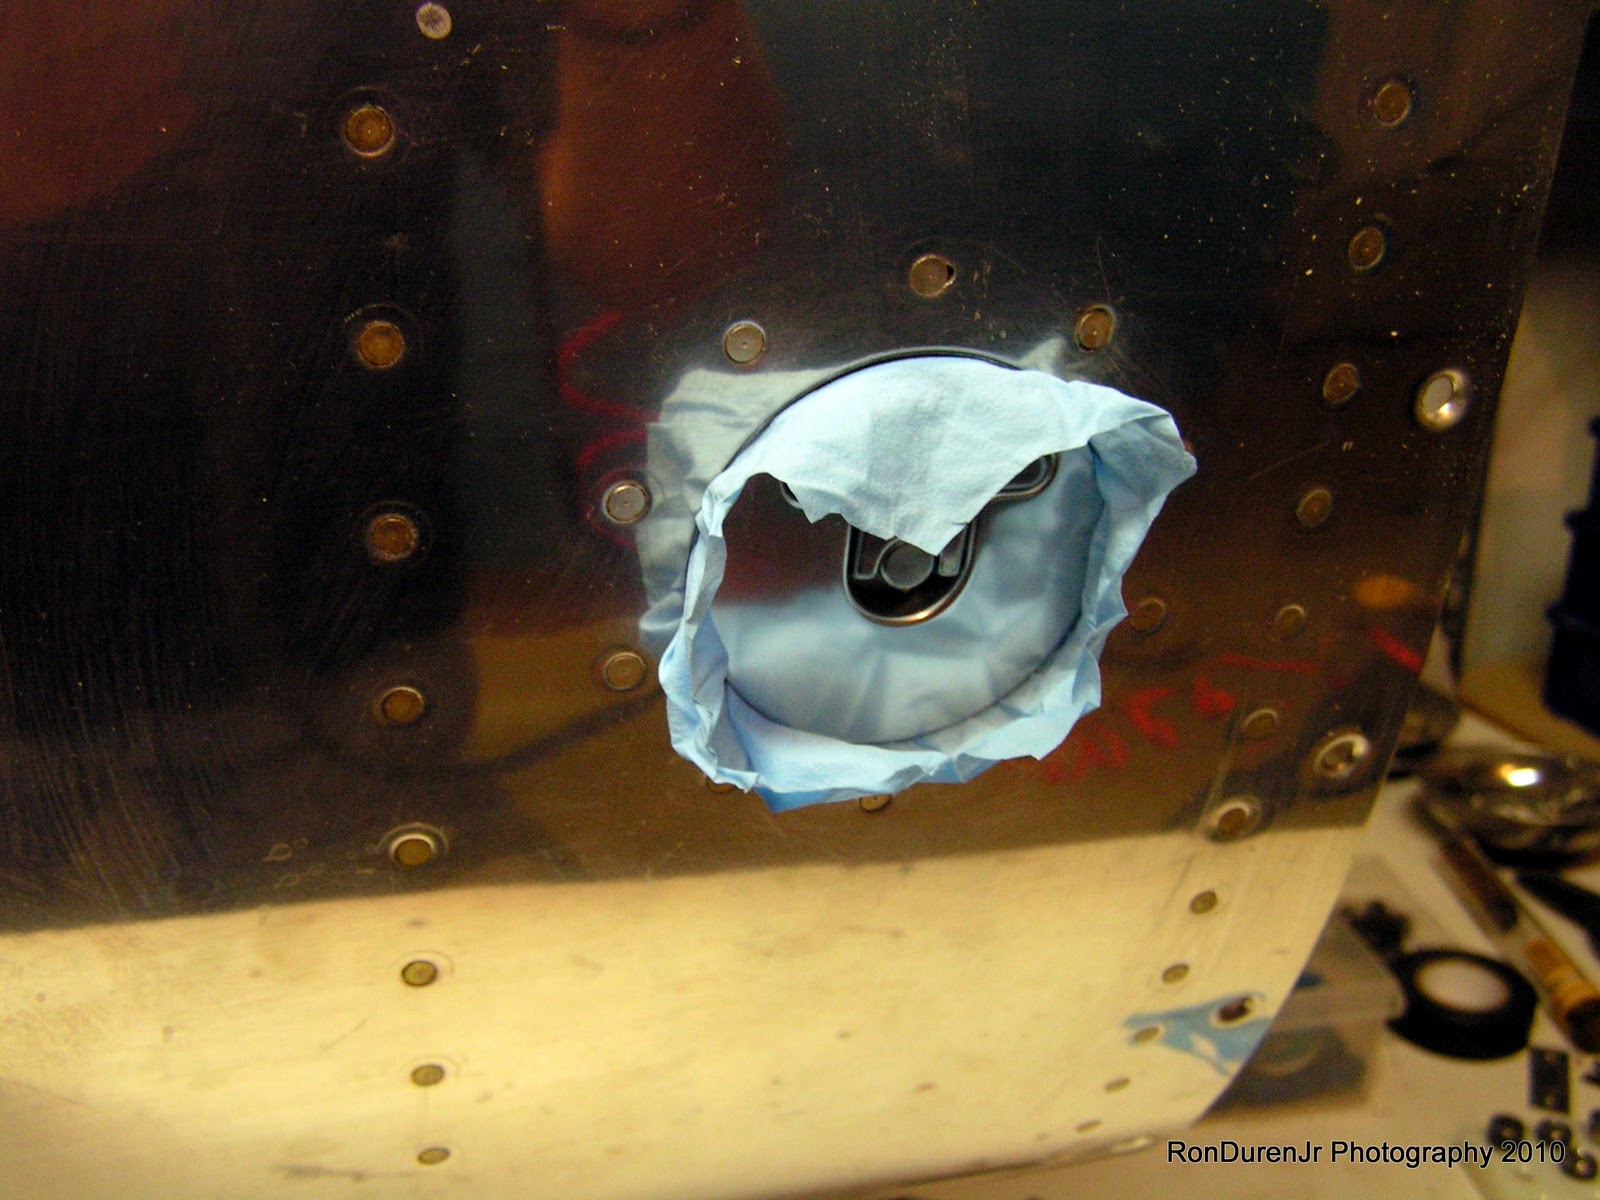
Last night I ProSealed my access cover into place. This picture will look a little different than a standard install. The 'extra' hole you see is where my original vent line was before I decided to do ER tanks. Consequently, I plugged that hole with a nut/bolt and sealed it up. Also, the screws are 10-32 black stainless steel--also not standard because of my earlier mistake of not installing the right nut plates. Of course, like I did with the other tank I will spray this with primer when I am done to hide that ProSeal application.

So now, the baffle is the only thing left to finish this puppy up! Before closing it up, I will take pics of every bay for documentation purposes, wipe it out with MEK so its nice and clean (no construction dust) and test the capacitance plate continuity one more time. I've also started on the right flap.

Wednesday, December 22, 2010

Right Tank...S'more HOBBS 396.0 hrs

And s'more work on the right fuel tank. Wired up the capacitance plates, continuity-tested 'em...thumbs up. Riveted/ProSealed the last end rib in place. Installed the modfiied (because of my ER tanks) vent tube. And then just some misc ProSeal work getting ready to close it up with the rear baffle being the last component...same song and dance as before...plenty of repitition on the wings.

Although I still contend the fuel tanks arent that bad, I wont lie that I am looking forward to having them in my rearview mirror! :) ...then I have to do the ER tanks, but that's another day.

Thursday, December 16, 2010

Tank Success! HOBBS 390.0 hrs

I finally got around to doing my left fuel tank pressure test. And low and behold, we have SUCCESS! That was a good feeling for sure. But it didnt come without some sweating.

I had purchased the tank pressure test kit from Van's so I was using that to conduct my test. It is cheap and a pretty simple setup, it includes a plug for the fuel pickup fitting and a bicycle style valve that screws into the fuel drain sump. I then inserted a glove into the cap to help seal it better, taped over it with duct tape and then attached a 'balloon' to the vent line. I didnt actually have a balloon handy so I just cut off a finger from a rubber glove and used electrical tape to attach it. It worked just fine...well, sort of.

For some reason I thought I was supposed to pressurize the tank and leave it overnight to see if the balloon stayed inflated. So I pressurize the tank...no problem, set the tank off to the side and start doing something else. I checked back about ten minutes later and the balloon was already deflating. Are you kidding me right now?!! Let me just tell you, a feeling of dread came over me at the sight of that! Ugh!

Well, so not to throw my arms in the air and panic, I decide to work the problem. I went back and read the directions that Van's supplied with the kit in their entirety. Sure enough, it says to pressurize the tank and then use soapy water to check for leaks. No need to leave it overnight. So, extra soapy water it was...and sure enough it was leaking pretty darn good around my electrical tape holding the balloon in place so that concept didnt work too well. But, I checked the rest of the tank and besides the fuel cap...it was all good! woohoo!

So, I think I have a good seal on my tank. I personally wont be 100% positive though until I fill it with fuel and use it for awhile, that will be the real test. But for now I will accept this victory and move on to the next one.


A glove inserted into the fuel cap...


After inserting the glove, I added duct tape. I think this worked ok until the soapy water hit it, then the tape started to peel away. No worries though, the cap is not of consequence for the pressure test and can be ignored.


Fill it up with an ordinary bicycle pump. Do not use your air hose, that is way too much pressure for this. The amount of pressure should be 1.0 psi or less according to Van's...doesnt take much.


Here is my simulated balloon...the finger of a glove. This acts as a sort of safety pressure valve so you dont add too much pressure in the tank and rupture or damage it...that would suck. Worked just fine...the electrical tape holding it in place, not so much! :)


And...although I havent seen other builders do this, I'm sure its been done before, I taped off the tank and threw a coat of primer on the baffle and end ribs. It will obviously add some corrosion protection but it also made it look much more professional...hide all that ProSeal goop.


And of course, dont forget to celebrate the small victories along the way. One of my favorite quotes is by the former tennis champion Martina Navratilova, "The moment of victory is much too short to live only for that and nothing else." Here is a self portrait while I enjoy a Cuban cigar I smuggled back from my Costa Rica trip...dang, that is one ugly dude!! haha! KPR...

Wednesday, November 24, 2010

Left Tank Closed Up HOBBS 385.5 hrs

Over the weekend I tackled those fuel tanks once again. I was determined to get at least one of them closed up and ready for a pressure test. I was successful, finishing off the left tank and starting the finish-up work on the right.

The last steps were screwing the access cover in place and sealing it up followed by the rear baffle and tank attach brackets. All went pretty well, its pretty straightforward but it was still a fair amount of work to do those tasks. I then came back later and added ProSeal to all of the shop heads on the baffle and the pull rivets on the tank brackets.

I have been letting the ProSeal cure for the last couple days so it is now ready for a pressure test. Unfortunately I am leaving town tomorrow to visit the folks out in WA and eat some of dear ol' Mom's good cookin'! So, the pressure test will have to wait 'til after turkey day.

All together now, lets chant..."no leaks...no leaks...no leaks!" We shall see...

Have a safe Thanksgiving, and as one of my builder friends, Sean told me the other day..."we've got much to be thankful for...don't we?" He's definitely right on about that.


Here is a shot of the left tank mounted on the wing (looks cool eh?). I wanted to do a fit check after I got it sealed up just to give me a warm fuzzy because there is not much I could do at this point if it didnt fit. I will tell ya I was nervous for a minute as it was a pretty tight fit. The buildup of primer on the attach brackets along with the ProSeal most likely contributed to this. So, my advice is keep it to a minimum if you are doing it like I am. But, tight is good...as my old construction boss, Buster used to say, "tight is right". :) I attached the tank and let the ProSeal dry like this overnight. Not sure if that made any difference...but thats the way I did it.

Tuesday, November 2, 2010

Shampoo HOBBS 361.5 hrs

Building a symmetrical airplane is much like shampooing your hair...lather, rinse, repeat. I spent a couple hours on the right aileron and the right fuel tank tonight...and I somehow had to wonder, havent I seen this movie before? ;) Groundhog day. No pics, you've already seen 'em! KPR!

Sunday, October 31, 2010

Productive Weekend HOBBS 358.0 hrs

Happy Halloween 2010! It was a productive weekend in the factory, the best I've had in awhile. Its kind of ironic, I was invited to two parties this weekend and turned them both down because I have been feeling a little under the weather. What a great oppurtunity to spend some quality time with the "Aluminum Mistress!" This thing aint gonna build itself after all. :) I spent 10 total hrs pluggin' away at the left aileron and the right fuel tank. Except for a 10-32 nut plate, the left aileron is done (need to order some more from Van's). And the bulk of the right fuel tank is now done. It was a lot of work, but very satisfying to see some good progress.

I had heard that as you progress in the build, Van's kind of stops 'holding your hand' and leaves more and more of the details up to the builder. Well, with the aileron I started to see this transition. I had to fill in the blanks with a few things on this sub assembly. That slowed me down a little and caused some head scratching and even a couple minor mistakes. The right aileron will go much quicker now that I know the process. Here are some pics for the weekend's work....


All interior parts acid etched, alodined and primed...you know the drill by now


Stiffeners back riveted into place, these babies really do a great job stiffening up the structure


All stiffeners are numbered and marked so that they go in their correct location where they were match drilled


One of the many fit checks...cleco it together, match drill, check fit and plan your assembly order


A shot of the nose rib interior structure with the water pipe counterbalance


Be sure to follow the instructions here, blind rivet the counterbalance pipe FIRST before riveting to the main spar...ask me how I know?


Van's was kind of vague about how to get these countersinks in the leading edge for the counterbalance. From what I could tell, they just said to install the blind flathead rivets and they would pull the material into a dimple?? I cleco-ed the counterbalance pipe (which has machine countersinks) in place, then took my dimple die...inserted it in the hole and smacked it with a soft mallet. Worked slick.


The result, a pretty flush flathead rivet considering where it is located. I can live with this.


Attach bracket in place for fit check, all systems go!


And there ya have it, an aileron. I gotta add the nut plate and tweak the trailing edge but other than that, its done.


And a shot of my right fuel tank...spent about five hours on it sunday. All interior ribs and one end rib done. Still have to install the capacitance plates, vent tube, end rib, access cover and the baffle/attach brackets but the hard part is over.

Wednesday, October 20, 2010

Right Tank HOBBS 341.5 hrs

I'm bouncing around in sequence a little bit right now. Haven't finished the left tank, its complete except for the rear baffle but I need to order some nut plates (I mistakenly put the wrong ones in the access cover...oops) for the Z-brackets so that is on hold for the time being. So I started on the right tank, did the stiffeners, the fuel access hole and fuel drain. Same song and dance as the left.

I realized its kind of hard to squeeze in short work sessions as time permits when you are doing ProSeal. So to alleviate this, I started on the left aileron tonight. I can use that project as a work filler...its all about being efficient in the shop. Here are some various pics of my latest progress...


ProSeal fillets on the ribs


Twisting the capacitance wire around the vent line (one vent line...and a reflection, not two)


My vent line terminated in the last bay since I am doing the ER tanks. This is not how a standard tank will look.


Goop up all the wire connections for the capacitance plates


Getting the aileron parts prepped and ready for assembly...more stiffeners!! woo hoo!

Tuesday, October 12, 2010

Capacitance Plate Continuity HOBBS 336.5 hrs

I installed and wired my capacitance plates into the left tank. I twisted the wire around the vent tube to take up the slack and secure it in place. I will goop it with ProSeal for added security before closing the tanks. I then used my new Craftsman multi-meter to test continuity in the capacitance plate system. I also checked that the plates were isolated from the rest of the tank. All systems go! I was happy to hear the continuity alarm sound, but I think it would be rather hard to screw this up...its a very simple system and simple is always good, especially in aviation.

Next step is riveting the baffle in place and finally closing up the tank with the access cover. After that it will be time to test for leaks. Its coming along, although I have gotten bogged down with the ER tanks. When you deviate from the plans, things get interesting, lots of thinking...planning, and less actual progress. I will say, the tanks arent difficult, but they are a black hole for labor....very labor intensive! A whole lot of details go into one of these.

Monday, September 27, 2010

Sealing the Left Tank HOBBS 328.0 hrs

Sunday morning...7am...garage nice and cool at 70 degs...lets tackle this tank! I used one of my two 3.5 oz tubes for the task of doing all of the interior ribs. If you read my posts, you'll know that over the summer I had some SoCal RVators stay with me on their way out to OSH. One of them, Sean Farrell, gave me a good tip I will pass along. Sean has built several tanks and at least two RV's himself. He said, use the 3.5oz tubes exclusively when doing tanks. With a special dispenser gun from Vans, it makes life so much easier. I can now say from experience, it is so much more efficient and clean to do it this way. If I were to do another set of tanks...I think I would pay a little extra and just buy the tubes. You might need about six of them I am guessing to do two tanks?

Now that the hard part is over, I still stand by my words...sealing the tanks is NOT that bad. I still have to do the end ribs and the baffle, but I should be able to use my pneumatic squeezer on those so that should be a snap. I will say, having your riveting skills down pat and the gun set up properly helps alleviate stress as well. I only had to drill out one rivet during this process and that was huge.

Let me just say, the only way I can boast that it isnt that bad is the fact that I have leveraged all of the great knowledge and tips from builders who have gone before me. Without that, it probably would be a bitch...that makes all the difference. Builders nowadays have a wealth of experience at their fingertips to be more efficient. And for that, I am thankful.

This is the process I used and it worked good for me.

1. Have the tank cleco-ed together and ready to go before mixing your ProSeal.
2. Respirator on, remove a rib...scotchbrite mating surfaces, blow off debris with air hose, clean with MEK
3. Use your gun to apply ProSeal to the skin
4. Cleco the rib back in place
5. Move to the next rib and repeat
6. Get them all ProSealed and cleco-ed in place before switching to the rivet gun
7. This is where I deviated a little...I now removed my respirator and did all of my riveting. I am not recommending this...just saying this is what I did and had good results. The ProSeal is actuall pretty benign, didnt bother me at all. To be able to remove that mask made things much more enjoyable for me

I used most of the tube contents on this task and it took me about 2 1/2 hrs from start to finish. Kind of like a fire drill...I kept a good pace, worked with purpose, but also didnt rush or be frantic. The working time for a batch of ProSeal is supposed to be 90 mins max I think so I really stretched it. At the end of that time, it was starting to set up pretty good so I would say that was just about a maximum for my shop temp and humidity. This was a pretty amibitious work session...I've read about a lot of builders doing one or two ribs at a time.

After the task was complete, I spent about an hour cleaning up...removing ProSeal from cleco's, tools and work area. Thats kind of a pain and I did put the respirator back on for this since I was using MEK again.


Hardly anyone takes any pics while doing ProSeal since no one wants to gunk up their camera. I dont blame them...but my process was so neat I actually took a couple. So here is one (not very clear) showing how I did my ProSeal before installing the rib. I didnt do the whole mating surface as I think that is overkill...I just paid attention to the actual rivet holes. Make sure to completely encircle the holes and get some in the actual hole itself so it will ooze out a little bit. That way, if you do it properly, you wont need to add ProSeal to the rivet or exterior hole. There will be enough to fully envelop the factory head when you set the rivet. Below is a shot of my gun/tube.

Sunday, September 26, 2010

Factory is Humming! HOBBS 324.5 hrs

Spent most of my day saturday working on the left fuel tank. Finishing up last minute details like running the vent line and the wiring for the fuel sender capacitance plates. I thought these were just small details, but it took me most of the day to do this. It was fun though, I enjoyed this task. I wanted to get everything ready for an early morning start, before the heat of the day, on sealing the tanks. I accomplished that. Lots of pics in this post, see descriptions below.


Flop tube installed, torqued and safety wired in place. I will add ProSeal later to seal up the openings...this is not done yet in this pic. Just prepped for final assembly. You can see my orientation of the flop tube...pretty much straight out...kind of splitting the difference between normal and inverted flight but biased toward normal flight (if that makes sense?).


Bought a pound of 'no clean' solder (expensive stuff, $28), a large syringe and some tongue depressors for mising ProSeal.


Here are my 'AN' fittings safety wired on the flop tubes. It was the first time I have safety wired anything since I worked at Las Vegas Propeller way back in the early 90's. It wasnt my best effort as I was quite rusty...but not too bad either. This safety wire is a realitively new recommendation (SB) by Van's...apparently there were times when these would loosen. I torqued these with the 'quarter turn' method shown on the Van's website.


Vent line routing...


Wiring laid out for connecting the capacitance plates. I will attach a terminal and shrink tube to this later.


This is where the vent line 'terminates' in the tank.


I had to use my rigid tube bender to make an 'S' turn in the tubing to match up with the AN fitting in the end rib. This was a little tricky to get it just right. I certainly need practice on this before doing fuel lines. You really want to be sure you have a nice square mate for a good seal.


I used my Parker Roto flare tool for the first time. I practiced by doing this a handful of times before tackling the real thing. Good thing too, because I didnt do so hot the first couple times as you can see from the pics. I used my Aviation Mechanic Handbook to see how to do this correctly.


Several iterations of my practice parts...went way too much on my first one as you can see but kept improving with each one until I was ready for the real thing.


And here it is ready for install...pretty good matchup. Dont forget to put your sleeve and nut on BEFORE doing the flare!


Screwed into place for a test fit. I will remove the blue protective coating off the washer during final install.


The other side...I removed the end rib and let the excess tube hang over the edge. The other side has the 'S' bend and the AN fitting and is more critical. Get that side done...then mark this end and cut if off as needed. Worked good this way.


Soldered the coaxial connector to the wire that attaches to one of the capacitance plates. Van's says to solder this and then just goop it up with ProSeal to cover the exposed wire. I'm sure that will work fine since most builders do it this way but there was no way I was going to leave the strain relief to the ProSeal. I installed two piecs of shrink tube to take the stress off the solder joint. I will then cover it with ProSeal later. This looks much more professional.


First piece of shrink tube installed...


And now a second piece of shrink tube. Looks nice eh?


I did a complete 'dry' run with everything installed before ProSealing. I wanted to get everything just right now before the clock is ticking on a batch of ProSeal. I am now ready for action!! Bring on the ProSeal!