Ron's RV7 Aircraft Factory


Welcome to my personal blog. This site was created as an informal description of my build progress in the construction of a Van's RV7 aircraft. A place where family/friends/builders/curiosity seekers can follow along. It is not intended to be a detailed description of every step in the building process as that would be much too time consuming. There are plenty of sites that do a great job in that arena, that is not my intention with this site. My intention is for this to be a philisophical/motivational/inspirational account of the emotional ups and downs of the life changing journey...and it will change your life. I hope this will give you an idea, through my eyes, of what its like to make this transformation. A note to other builders, I am not an expert so do not put your safety at risk by attempting anything you see on this site until you have done your own research, or send me an email so we can discuss it. Any deviations from the plans are not approved, nor endorsed by Van's Aircraft or myself. Thanks for visiting.


Monday, September 27, 2010

Sealing the Left Tank HOBBS 328.0 hrs

Sunday morning...7am...garage nice and cool at 70 degs...lets tackle this tank! I used one of my two 3.5 oz tubes for the task of doing all of the interior ribs. If you read my posts, you'll know that over the summer I had some SoCal RVators stay with me on their way out to OSH. One of them, Sean Farrell, gave me a good tip I will pass along. Sean has built several tanks and at least two RV's himself. He said, use the 3.5oz tubes exclusively when doing tanks. With a special dispenser gun from Vans, it makes life so much easier. I can now say from experience, it is so much more efficient and clean to do it this way. If I were to do another set of tanks...I think I would pay a little extra and just buy the tubes. You might need about six of them I am guessing to do two tanks?

Now that the hard part is over, I still stand by my words...sealing the tanks is NOT that bad. I still have to do the end ribs and the baffle, but I should be able to use my pneumatic squeezer on those so that should be a snap. I will say, having your riveting skills down pat and the gun set up properly helps alleviate stress as well. I only had to drill out one rivet during this process and that was huge.

Let me just say, the only way I can boast that it isnt that bad is the fact that I have leveraged all of the great knowledge and tips from builders who have gone before me. Without that, it probably would be a bitch...that makes all the difference. Builders nowadays have a wealth of experience at their fingertips to be more efficient. And for that, I am thankful.

This is the process I used and it worked good for me.

1. Have the tank cleco-ed together and ready to go before mixing your ProSeal.
2. Respirator on, remove a rib...scotchbrite mating surfaces, blow off debris with air hose, clean with MEK
3. Use your gun to apply ProSeal to the skin
4. Cleco the rib back in place
5. Move to the next rib and repeat
6. Get them all ProSealed and cleco-ed in place before switching to the rivet gun
7. This is where I deviated a little...I now removed my respirator and did all of my riveting. I am not recommending this...just saying this is what I did and had good results. The ProSeal is actuall pretty benign, didnt bother me at all. To be able to remove that mask made things much more enjoyable for me

I used most of the tube contents on this task and it took me about 2 1/2 hrs from start to finish. Kind of like a fire drill...I kept a good pace, worked with purpose, but also didnt rush or be frantic. The working time for a batch of ProSeal is supposed to be 90 mins max I think so I really stretched it. At the end of that time, it was starting to set up pretty good so I would say that was just about a maximum for my shop temp and humidity. This was a pretty amibitious work session...I've read about a lot of builders doing one or two ribs at a time.

After the task was complete, I spent about an hour cleaning up...removing ProSeal from cleco's, tools and work area. Thats kind of a pain and I did put the respirator back on for this since I was using MEK again.


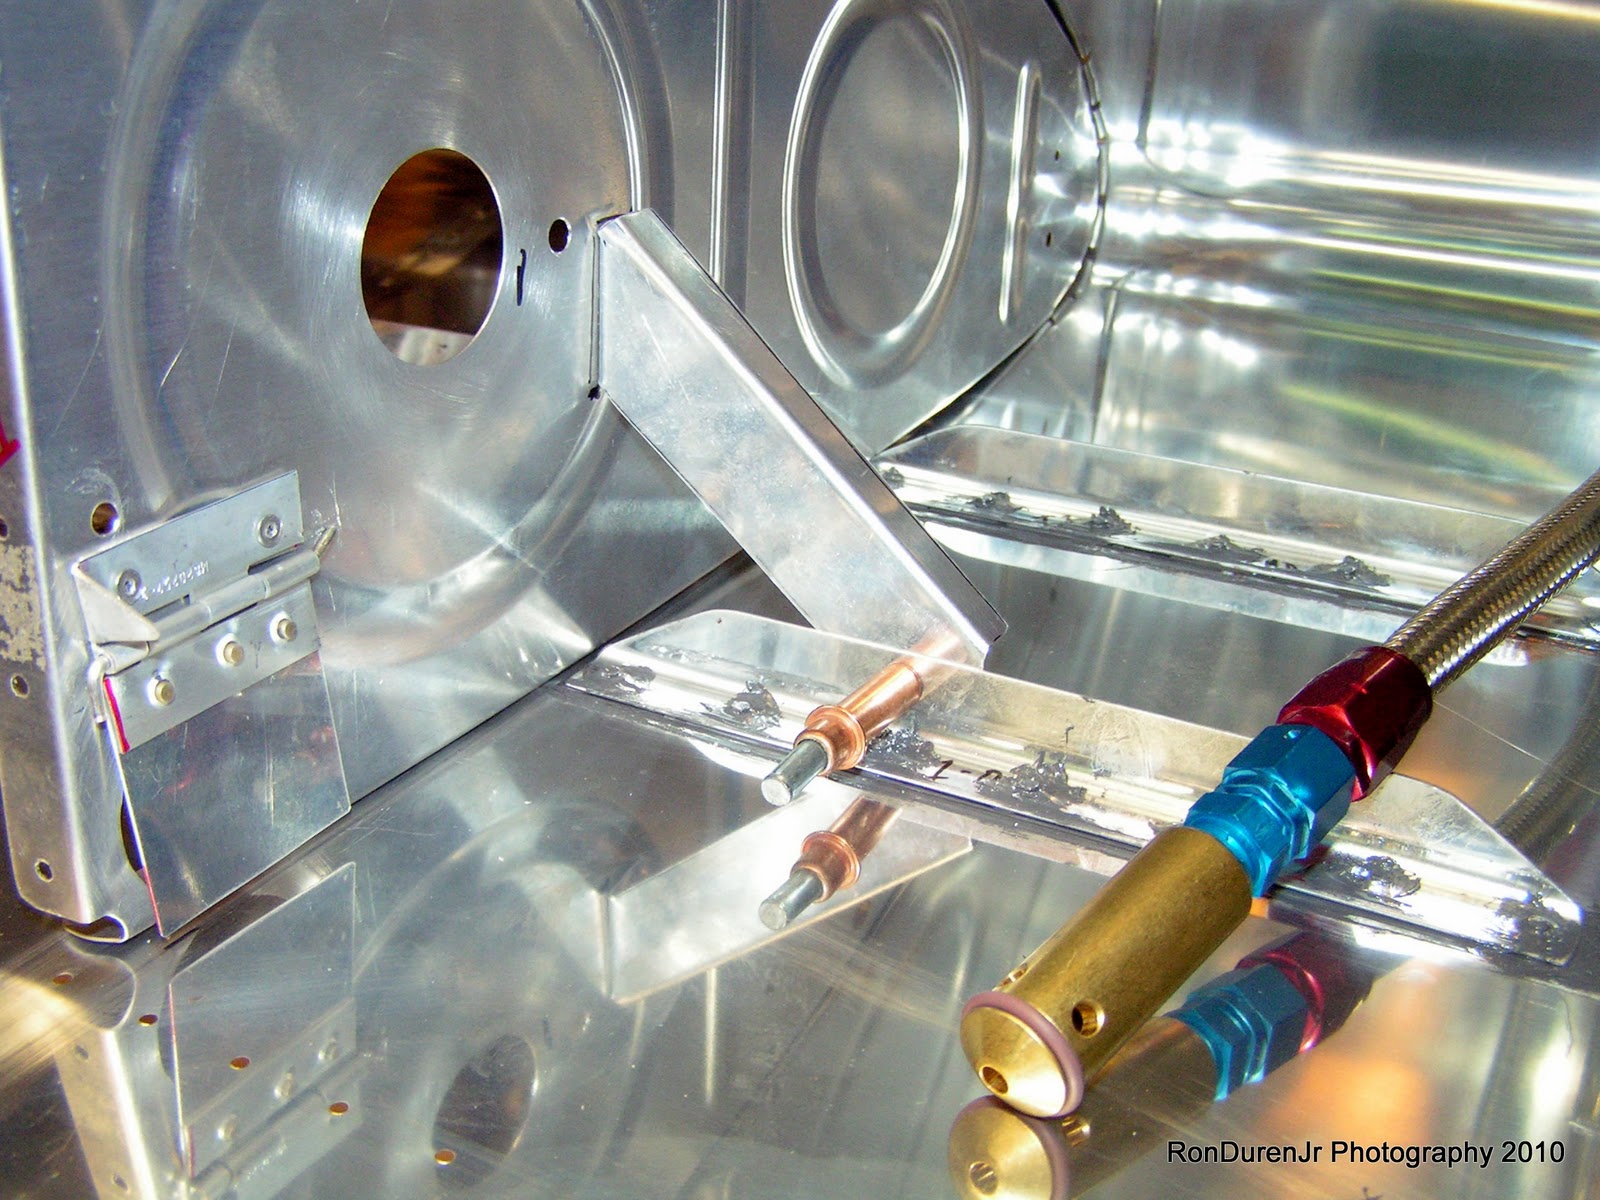
Hardly anyone takes any pics while doing ProSeal since no one wants to gunk up their camera. I dont blame them...but my process was so neat I actually took a couple. So here is one (not very clear) showing how I did my ProSeal before installing the rib. I didnt do the whole mating surface as I think that is overkill...I just paid attention to the actual rivet holes. Make sure to completely encircle the holes and get some in the actual hole itself so it will ooze out a little bit. That way, if you do it properly, you wont need to add ProSeal to the rivet or exterior hole. There will be enough to fully envelop the factory head when you set the rivet. Below is a shot of my gun/tube.

Sunday, September 26, 2010

Factory is Humming! HOBBS 324.5 hrs

Spent most of my day saturday working on the left fuel tank. Finishing up last minute details like running the vent line and the wiring for the fuel sender capacitance plates. I thought these were just small details, but it took me most of the day to do this. It was fun though, I enjoyed this task. I wanted to get everything ready for an early morning start, before the heat of the day, on sealing the tanks. I accomplished that. Lots of pics in this post, see descriptions below.


Flop tube installed, torqued and safety wired in place. I will add ProSeal later to seal up the openings...this is not done yet in this pic. Just prepped for final assembly. You can see my orientation of the flop tube...pretty much straight out...kind of splitting the difference between normal and inverted flight but biased toward normal flight (if that makes sense?).


Bought a pound of 'no clean' solder (expensive stuff, $28), a large syringe and some tongue depressors for mising ProSeal.


Here are my 'AN' fittings safety wired on the flop tubes. It was the first time I have safety wired anything since I worked at Las Vegas Propeller way back in the early 90's. It wasnt my best effort as I was quite rusty...but not too bad either. This safety wire is a realitively new recommendation (SB) by Van's...apparently there were times when these would loosen. I torqued these with the 'quarter turn' method shown on the Van's website.


Vent line routing...


Wiring laid out for connecting the capacitance plates. I will attach a terminal and shrink tube to this later.


This is where the vent line 'terminates' in the tank.


I had to use my rigid tube bender to make an 'S' turn in the tubing to match up with the AN fitting in the end rib. This was a little tricky to get it just right. I certainly need practice on this before doing fuel lines. You really want to be sure you have a nice square mate for a good seal.


I used my Parker Roto flare tool for the first time. I practiced by doing this a handful of times before tackling the real thing. Good thing too, because I didnt do so hot the first couple times as you can see from the pics. I used my Aviation Mechanic Handbook to see how to do this correctly.


Several iterations of my practice parts...went way too much on my first one as you can see but kept improving with each one until I was ready for the real thing.


And here it is ready for install...pretty good matchup. Dont forget to put your sleeve and nut on BEFORE doing the flare!


Screwed into place for a test fit. I will remove the blue protective coating off the washer during final install.


The other side...I removed the end rib and let the excess tube hang over the edge. The other side has the 'S' bend and the AN fitting and is more critical. Get that side done...then mark this end and cut if off as needed. Worked good this way.


Soldered the coaxial connector to the wire that attaches to one of the capacitance plates. Van's says to solder this and then just goop it up with ProSeal to cover the exposed wire. I'm sure that will work fine since most builders do it this way but there was no way I was going to leave the strain relief to the ProSeal. I installed two piecs of shrink tube to take the stress off the solder joint. I will then cover it with ProSeal later. This looks much more professional.


First piece of shrink tube installed...


And now a second piece of shrink tube. Looks nice eh?


I did a complete 'dry' run with everything installed before ProSealing. I wanted to get everything just right now before the clock is ticking on a batch of ProSeal. I am now ready for action!! Bring on the ProSeal!

Thursday, September 23, 2010

End Ribs HOBBS 317.5 hrs

Just a quick post to show my progress from a couple hours last night. Built my flap door and assembled the end ribs. The instructions dont require that you ProSeal the rivets in the access hole mounting ring but it just didnt seem consistent not to. If you say you need to ProSeal all of the rib rivets, why not these? Most builders follow the instructions without problem...I just must be a glutton for punishment?

I will say, now, after two sessions of working with ProSeal. Its not really that bad, the worst part by far is being all gloved up and under a respirator while working. After a couple hours I just want to rip that thing off my face! :) Also, everything is sloooooow going when doing ProSeal...patience is a must.

Its not the ProSeal that concerns me, as the fumes from that arent that bad, its the MEK (Methyl Ethyl Ketone) that I use to clean everything. Although I like the smell of it, (it's a nice clean solvent smell) it is rather toxic and protection needs to be worn. It eats through two pair of gloves in short order, just to give you an idea.


Here are some shots of my 'flap' door. This is recommended by Van's and fabricated by the builder. The purpose of it, from what I can tell is to slow down the flow of fuel from this bay when rolling the aircraft or knife edge flight. As you can see there are two holes, the flapper only covers one so you still get fuel flow but just not as fast. Other builders have questioned the real effectiveness of this, as do I, but Van's knows a lot more about this than I do...so there ya go. On a side note, I wasnt too pleased with my craftmanship on this...could've done a better job. Effective, but not pretty...we always like 'pretty', it always trumps 'ugly'. ;) 


Finally found some 'popsicle' sticks. But they arent 'popsicle' sticks...they are 'Craft' sticks. Who knew? Anyway, found them in the local grocery store in the school supplies/crafts section. I will need these to do my fillets in the corners of the ribs.


Here are a couple shots of my finished end ribs with the tank attach brackets and the anti hang-up brackets installed. These have been ProSealed...including all rivets. Believe it or not, this little task took me two hours! Also below, you can see my strategy on using universal head vs. flathead rivets where the flop tube will install. This was done for nut clearance.

Monday, September 20, 2010

SportAir Electrical Project HOBBS 315.5 hrs

Just wanted to quickly post some pics from my SportAir Electrical and Wiring class last weekend. This is my third SportAir class and once again I felt like I got my money's worth. The 'hands on' time is worth it all by itself. I really enjoyed this class since it was a topic I know the least about. A pretty funny coincidence but Sean Blair, whom I just met at the Rocky Mt. airshow was one of my classmates. After class I had mentioned that I wanted to purchase a copy of the excellent text AeroElectric Connection and he said...I have an extra copy, I'll mail it to you! Very cool, and big thanks to Sean. This will be handy to build on my skills that I learned in class.

So, we ended up doing three hands on projects in class. Terminated a coaxial cable, built an intercom harness, and the big project was a simple system with a battery, two bulbs, a dimmer switch, a 'master' switch and a fuse. This included learning skills such as crimping connectors, working with shielded cable, soldering, etc. Here are some pics, you get to take your projects home with you. Dont forget, you can click on the pic for an enlarged view.


Sunday, September 19, 2010

ProSeal Dance HOBBS 314.5 hrs

Yesterday was a very productive day as I logged 5 hrs in the shop before heading off to the Great American Beer Festival with my little sis and some of her friends. I finally introduced myself to ProSeal...well, thats not entirely true as I used it on my rudder trailing edge. However, when I did the trailing edge I used a cartridge that mixed inside so it wasnt as messy. This was the first time I had to weigh it out and actually mix it in a cup.To those who dont know, ProSeal is a two part polysulfide that is commonly used to seal fuel tanks. Its dark gray sticky stuff. There are plenty of horror stories out there that builders have regarding this evil concoction.

So the first step in the process is riveting and sealing the tank stiffeners, the fuel cap access hole and the fuel drain. Its a good first introduction to the process without getting overwhelmed as this is the easiest of the tasks to come. All in all, my general thoughts are it isnt that bad. Check back when I finish however, rumor has it, it only gets worse from here.

For this batch I did 60 grams (white) to 6 grams (black) (10:1 mix ratio) and quite honestly it was a perfect amount for this task. I used every drop I had and didnt feel like I was shorted on anything. Of course, this was my with my application 'style'...other builders may use more or less. I'm not sure but I think I was on the light side with my application. Most builders put much more on the first tank than the second so I am keeping that in mind as I work. I dont believe quantity is as important as quality and paying attention to the areas that really need it. We'll see if I'm successful with this strategy when I check for leaks at the end.

Some random thoughts and observations after day one...

1. Anticipate that you will need to do something you didnt expect...like drill out a bad rivet, have those tools ready...I didnt. It got a little stressful since the clock was ticking.
2. The shop was at a nice 72 degs, I had a good 90 mins working time with my batch. If its warmer, expect to have less time.
3. Cover anything and everything you can to keep it clean...within reason
4. Cleanup is not that bad with MEK...even 24 hrs after the fact
5. Wear two pair of gloves, it makes it easier to swap out clean ones (Thanks to Sean Blair for that tip)
6. Try to be neat, but in the end, this is about functionality...its not a craftmanship contest. Nobody will ever see the inside of your tanks so dont stress about how it looks too much.
7. Be smart about your application of ProSeal...what exactly am I trying to do? Where is it going to leak (rivet holes)? Focus on that first, the 'extra' stuff (mating surfaces) is just insurance.
8. Do a good layout of tools that you'll need before starting...be organized.
9. Do a 'dry run' on how you will rivet parts and tools for the job before mixing the ProSeal...squeezer? rivet gun? is there enough room? etc, this will cut down on stress. Have a plan. Just like flying...think ahead and be prepared.
10. ProSeal is the consistency of fresh really sticky taffy, if you havent experienced it.
11. I didnt need rivet tape when I backriveted...the ProSeal held the rivets in place pretty good.
12. Use the stickiness of the ProSeal to your advantage if you can. I got to the point where I could 'stick' a rivet to the end of my finger and then insert in the hole.
13. I didnt apply ProSeal directly to the rivets, but dabbed it in the hole before inserting the rivet. Either way would work.

Here are some pics from day one of the ProSeal dance...


Maybe a bit of overkill, but I used a sharpie to lay out my areas for scotchbrite..this is where I will scuff the alclad (dont forget to do both surfaces) for good adhesion of the ProSeal. I dont want to go crazy with this scuffing because once you take off that alclad it has no corrosion protection. I havent heard of tanks having interior corrosion problems but I still will be conscientious of this as I work.


After scuffing...then clean with MEK to complete the surface prep


Apply electrical tape to keep these areas clear of ProSeal...this is where the ribs reside. The tape works great and is the perfect width.


Fuel drain...same layout idea for prep. Although the drain will sit on the outer surface of the skin.


This was a good tip that I picked up from other builders. Cut down the bristles on these brushes to use for application. You have to watch for bristles coming loose, but otherwise it works great. Quite honestly, I couldnt find popsicle sticks and used these exclusively. Both would be nice however...I need to find some.


Protect your stuff from the goop. I used press'n'seal cling wrap to cover my scale and chemical bottles. Here is a shot of my digital scale I bought at Harbor Freight...$20. Worked great. Dont forget to tare the scale for your mixing cup.


Pre-soaking the rivets in MEK to make sure all chemicals/coatings/dirt/oil are removed so you get good ProSeal adhesion.


Interior view of the fuel drain all sealed up. A little overkill here since the rivets are the only real source of leaks. But hey, a little extra wont kill ya either....but certainly not needed.


Kinda ugly...but it should do the job.


Here is the inside of the fuel cap access hole (the 'money' hole). I really paid a lot of attention to this area to make sure I sealed it up good.


A shot of the finished product...a good start.

Thursday, September 16, 2010

Anniversary HOBBS 309.5 hrs


Today was the three year anniversary of my first solo flight. On a gorgeous fall morning three years ago, I took up my trusty Skyhawk 362ES up for four touch and goes alone for the first time. Its amazing how fast three years flies by...it seems like it was just yesterday. So, each year, I try and get up in the air and remember that day. I rented the DA20 for a short 30 min flight after work. Always nice to get some distance between myself and the ground.

I have a story that ties into this whole topic. You'll learn that I've got a quite a lot of stories...my belief is that the real wealth in life is in the memories and stories that you can recount.

Last year at Oshkosh, Samira, Bryan and I went to the beer tent for a few beers after a long day of walking the grounds. It was a lively night and we ended up running into a boisterous group of pilots from Zimbabwe. These guys were a hoot and we had a great time talking with them! They were quite foul mouthed and drunk we soon discovered, but a lot of fun nonetheless.


They were on a summer trip to visit Oshkosh followed by a jaunt over to Sturgis for the motorcycle rally. Not a bad summer in America in my humble opinion. They had a large stack of 20 billion dollar bills...I kid you not. They sure looked like real money. They were handing them out to whoever would take them. This was when their country was in some kind of monetary turmoil and their money wasnt worth the money it was printed on. Anyway, they were quick to tell us they were useless and wanted everyone to know how screwed up their country was. It was actually quite comical listening to them go on and on in their thick accents.

So, the tie-in was...Bryan asked them if they remembered their first solo. And one of them loudly and proudly proclaimed..."a pilot will forget his first $%^# before he will forget his first solo!!" hahaha! I was rolling laughing...I probably would have been a little more eloquent about it, but he was spot on!

The day I first soloed an airplane is a day I wont ever forget....

Wednesday, September 15, 2010

Here we go! HOBBS 309.5 hrs

After a long absence, I got back in the shop tonight. Only logged a quick hour as I had some homework to do earlier, but it felt good to get back at it. I dimpled the right tank skin...which completes all of the dimpling for both tanks. No pics, you've seen this before and its not that exciting.

Action items: I need to fabricate the two flap doors and two more anti-hang up brackets to finish up the tank prep. Once that is done, its time for the 'ProSeal dance'!! woohoo! I hope to spend some quality time with the mistress this weekend. I dont see anything that would prevent me from starting to seal the tanks. I also need to make a run to HF to buy a postal scale for weighing the ProSeal. Gonna make a trip to a nearby farm/ranch supply store and see if I can pick up a syringe for ProSeal application. I heard this is a clever way to apply ProSeal to the rivet holes.

Monday, September 13, 2010

Center Console HOBBS 308.5 hrs

I wish I could tell you I had a progress report...sorry. Man, have I been busy lately. With grad school in full swing and going well, camping last weekend, a SportAir workshop (more on this later) this weekend and three Rockies games in seven days the schedule has been full to say the least! Its all good though, the plate of life is full and the "food has been very appetizing"....having fun and learning lots! However, I've been itching to get back on the plane, so as soon as some dust settles a little I'll get back cranking away.

Here are some more shots of Jon Clements cockpit and more specifically his center console. If you follow my bog you'll know this is almost identical to the design I am working on in SolidWorks...just picture it in red/black instead of orange.

With a quick glance you might guess Jon is an Architect. The aesthetics of this design are the best I have seen in an RV. Jon and I exchanged a few emails and he was very gracious to answer some of my questions. Beyond the aesthetics, he really put a lot of thought into the functionality of the design. Bravo to him for a job well done. Jon lives in Australia and is currently flying off his initial 25 hrs of flight test...and it goes without saying, he is LOVING his new baby!