Ron's RV7 Aircraft Factory


Welcome to my personal blog. This site was created as an informal description of my build progress in the construction of a Van's RV7 aircraft. A place where family/friends/builders/curiosity seekers can follow along. It is not intended to be a detailed description of every step in the building process as that would be much too time consuming. There are plenty of sites that do a great job in that arena, that is not my intention with this site. My intention is for this to be a philisophical/motivational/inspirational account of the emotional ups and downs of the life changing journey...and it will change your life. I hope this will give you an idea, through my eyes, of what its like to make this transformation. A note to other builders, I am not an expert so do not put your safety at risk by attempting anything you see on this site until you have done your own research, or send me an email so we can discuss it. Any deviations from the plans are not approved, nor endorsed by Van's Aircraft or myself. Thanks for visiting.


Tuesday, September 27, 2011

Electric Flap Assembly HOBBS 848.0 hrs

I spent some time this weekend working on the electric flap motor actuator assembly. This resides in between and behind the two seats. Its been a fun sub-assembly to put together.


I bought this digital level a few months ago...and it sure is handy to have in the shop, wish I would've bought it sooner.


Squaring up the mounting angle bracket for the vertical support piece so I can match drill it to the tunnel cover.


There was a very slight bow in the horizontal support that is behind the seats, I wanted to get this straight before match drilling it. A minor detail, but important to me.


Here you can see the welded steel flap actuator in place. The electric motor will attach to this in the center and then each side will have a 5/16" diameter flap push rod linkage that moves the flaps up and down.


A pic of the electric motor as I match drill the mounting brackets that I fabricated. This is the piece that will sit in between the seats. The motor assembly seems like a nice piece of hardware.


Here's a shot of the side covers cleco-ed in place and match drilled. If you look closely, you will see they dont look straight...apparently thats the way they are designed to fit? Not sure why?

Bee Movie HOBBS 841.0 hrs


Saturday night we had a movie night out at the Mills/Zilik hangar. It was a sub sandwich platter for dinner with homemade salsa from yours truly on the side. For this particular rendition of movie night, we decided to do an animated movie for the kids, Bee Movie...of course, it still had to have some aviation theme to it. As you can see from this screenshot...it satisfied that aspect just fine. Thanks to everyone who pitched in to make it happen...especially the Mills' and Zilik's!


Deb, Caroline and Brenda socializing before dinner...


Mr. Zilik looking slim and trim, in fighting shape! Gary has been getting into triathlons lately as a new hobby and has really got himself in good shape...nice job Gary!


Scott (G-dad) discussing his chalk work with his grandson 'Kota


Dinner is served!


Great Colorado sunset on our walk over to Chuck's hangar to see his new RV10


I really love the way the tip up's look...

Wednesday, September 21, 2011

End of Summer HOBBS 841.0 hrs

Tomorrow officially marks the last day of summer, so it caused me to reflect on what I've been able to get done...both on the project and personally the last three months. I had a few goals in mind coming into summer that I wanted to get checked off and was largely successful. Although I knew I wasn't going to be done with the fuselage by now, I did want to get substantially into it...I think I accomplished that, I estimate I am about 2/3 of the way done.

On a personal note, I finally installed a fence in my backyard...that was nice as it was something I have been putting off for several summers now, and yes, I frequently think about what I could've bought for the airplane with that money!! ;)

And then there was the flying part...I became a tailwheel pilot, and that was VERY cool...the highlight of the summer for me. In addition, I attended a mountain flying ground school and made two mountain flights to Granby and Leadville to get a "mountain flying" signoff in my logbook. All in all, some good training, I learned a ton...I feel like I am a much better pilot because of it. I hope your summer was just as good or better!

Ok, back to the project status...still dinking with the baggage compartment. I need to have Deb help me do some riveting on the bottom skin before I finish this up...so for now it will wait for that effort. So, to keep moving I switched gears to the aft deck and finished that up...I was a little behind in the checklist in getting that done. After that, I moved to the flap assembly...and am just getting into that now. Here are some pics...


I realized I almost screwed this baggage panel up when I match drilled it. Make sure you cleco it in place along the bottom BEFORE match drilling it to the bulkhead. The bottom cleco's will properly place it nice and straight. I didn't do that and my panel is just slightly crooked, hardly noticable...luckily it lined up enough to install it ok. Just a silly oversight on my part.


Here is a pic of one of my hidden compartments...looking good. I haven't selected a latching mechanism yet...I want something I can lock up, so I need to research some options...I'm thinking about a cam lock of some kind. I'll do that later.


The plans call out for some 'wear blocks' for the seat belt cable as it goes through the corrugated panel. I could not find the material for these things anywhere in my pile of parts...!! Not sure where they could be? So I had a piece of 1/8" nylon sheet laying around and used that...it'll work just dandy, although 3/16" thickness probably would've been better.


The plans say to use pull rivets to secure these in place. Something about the description of 'wear blocks' made me want to install screws/nuts instead. If I have to swap these out a couple years from now, I'd rather have screws than drill out rivets...weight addition is minimal.


On to the aft deck...need to fabricate a couple spacers out of 1/8" sheet.


In place for a test fit before match drilling and priming...


And the finished product after riveting...now that looks HOT doesn't it? I know...I'm a dork! ;)


If you look closely you can see where, in my attempt to use the rivet squeezer in this tight space, I dinged the edge of the aft deck in a couple places. I broke out one of my small files and dressed these just like you would a ding in your prop blade. Its imperative to eliminate any sharp edges that are stress risers...cracks will form if not.


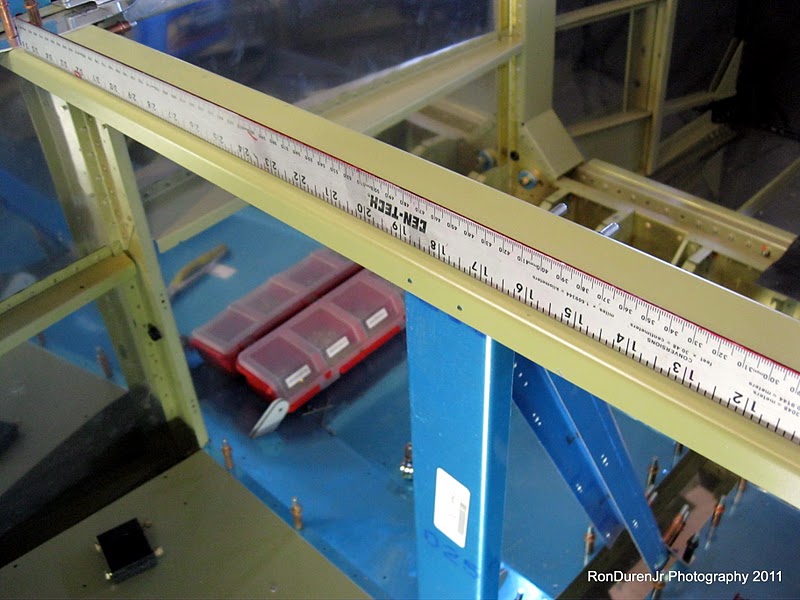
Now to the flap assembly. I spent a good half hour just studying this drawing to get a feel for how the assembly goes together....its kind of a 'busy' drawing. I started by cutting to size, notching, drilling and then finally cutting in half the center bearing shown here.


Be careful here...the plans say this is a 'full scale' detail view for this attach bracket...but as you can see, its not...3" doesn't translate to 4"...at least not in the math I learned. :) The 4" dimension is correct, as are all of the dimensions....its just 3/4 scale rather than full scale. Not a big deal...momentary confusion is all.


And here you can see a properly done full scale view...just lay that puppy right on the drawing and it should match up exactly. Always look for that 'full scale' note on detail views...it is kind of handy when they do that for you.


Here I am...Saturday night...watching a little college football and having a beer after a productive 6 hr work day. Sometimes I just like to hang out in the shop when I'm done and admire my handiwork...gotta enjoy the journey...once again, I know, I'm a dork! But I bet you can relate... :)

Friday, September 16, 2011

Around the World in an RV7 Documentary HOBBS 831.0 hrs

I am frequently asked by people who dont know anything about general aviation, "how far can you fly that airplane you are building?" When I tell them some have flown an airplane like this around the world...they look at me kinda puzzled and say "really?". Yup...take a look at this DVD trailer...all in an RV7 just like mine. It will fly as far as your dreams and imagination will take it! Have a good weekend. KPR!

Citabria Solo! HOBBS 831.0 hrs

My 'girl' awaiting our first date...

Today is the four year anniversary of my first solo, what an exciting day that was, and certainly one I wont ever forget. As luck would have it, today...I also soloed the Citabria! Kinda sweet how the timing of that worked out...I always try to take a flight on my anniversary date, but this one was extra special because of the circumstances.

I think most pilots would agree...although I love taking people for rides and have mostly enjoyed my instructors, there is something simply magical about being in the airplane alone...its like finally getting your best girl alone--just you and her, exploring the sky together. Very therapeutic...

As for the project, been plenty busy with other stuff this week so I have only logged a few hours. Still tying up the baggage compartment details...match drilling into the bulkhead and installing nutplates.

Monday, September 12, 2011

Baggage Compartment HOBBS 828.5 hrs

Had a very good week in the shop...logging 18 hrs on the project, not bad considering it was a shortened holiday week. Lately its been one of those times in the project when I cant wait to get back out there and make more progress. Its exciting to see things really coming together on the fuselage and its looking more and more finished with every work session. I have to keep my enthusiasm in check however, since I know I still have a long ways to go. But...I am still enjoying it. :) And on a side note, I also finally signed up for a satellite radio subscription...and now have a sound dock in the shop...enjoying that little perk too.


Fitting the top/aft fuse skins...sure does look cool...I told my girlfriend, these curves are only second to yours! That's a sexy looking airplane! ;) As cool as this is, the plans say to fit them...remove, dimple, deburr and then set them aside until later. There is no hurry to riveting these in place since they just make it harder to get into the aft fuse. Although, there shouldn't be much I have to do back there...wire routing, static line and the servo motor (which I don't have yet). I'll get those items knocked out shortly so I can rivet these bad boys in place.


Moving onto the baggage compartment and bulkhead...and taking care of the details there. This lower corrugated panel is straightforward, just match drill it to the bulkhead. I'll add nutplates later.


The top corrugated panel is a little different however...you have to radius the corners at 8 1/2". I have a drafting compass, but it doesn't go as large as 8 1/2"...so this task left me pondering things for a second. How will I create the radius? I don't have a nice 8 1/2" coffee can laying around. ;) Probably many ways to do this if you use your imagination. I first sketched out some rough guidelines with my ruler. Then I fashioned a piece of string at 8 1/2" and drew a nice radius outline with my sharpie...I used to do this little trick back in my carpentry days, with a steady hand and some practice, it works fine for a somewhat non-precise radius such as this...it doesn't have to be perfect. I just wanted it to look nice and professional...


Rough trimming...for a last minute, sanity/fit check on the plane before cutting to final size.


And voila...turned out real nice, once I filed down the edges and deburred it, as you can see it had the professional look I was hoping for.


And here it is cleco-ed in place...also notice I added the notches for the seat belt cables that run to the aft fuselage. I still need to add some wear blocks to this panel...next session.


Working on the details of my two oil/tool/misc hidden compartments under the baggage floor. Not quite there yet on these but I'm getting there.


And here I bounced around a little bit in tasks--tying up some loose ends. I riveted the arm rests and the cap strips in place. The plans aren't real clear about when to do a lot of this stuff...so you just have to be real careful that it isn't going to severely inhibit installing other items later before riveting. By doing these now, I don't think it will effect anything later...we'll see how it goes...

Wednesday, September 7, 2011

Its Official! HOBBS 810.5 hrs


Yesterday afternoon, after work, on a rare drizzly overcast day here in Boulder I went around the pattern 8 times in exactly one hour of flying time with my instructor Lyn in the backseat of the Citabria. And with that, I have now flown off my 15 hrs required for solo flight in the Citabria! I also got signed off for my tailwheel endorsement as the last formality. I expect Lyn would've signed me off long ago but since I couldn't fly solo for insurance reasons, we saved the signoff until the end. Either way, it was pretty cool...I am now officially a tailwheel pilot and I have to admit it feels pretty darn good! My choice to go with an RV7 has been completely and absolutely justified in my mind...tailwheel flying is a ton of fun to this ol' boy!

It was fitting that my last hour was easily my best hour. We practiced short field techniques, every landing was whisper smooth, and it was a kick in the pants. Days like that are what keep us pilots coming back for more. I was able to plop that plane down softly and get stopped before reaching the first taxiway on Rwy 26 at Boulder. Not sure exactly how far that is?...but as we went around the pattern we took a look from our lofty perch at 1000' and lets just say it wasn't much real estate...it looked like a postage stamp. Felt quite a bit of pride in my piloting skills when I seen it from above--of course with an assist from the airplane design and the 5 knot headwind.

Looking back on my training...wow, it was a steep learning curve and I cant help but think I've come a long way since that first flight. I still remember hoisting the tail on that first takeoff roll and watching with horror as the nose of the airplane veered to the left like it was a possessed predator chasing some imaginary prey off the side of the runway. As I was flying yesterday, I couldn't help but think how docile things have become...whats the big deal, the airplane now wants to track straight down the runway centerline all by itself, like an obedient horse with blinders on. Who learned...me? or did the airplane just magically decide to cooperate? ;)

The airplane no longer has a mind of its own, it now is an extension of my mind...and that's cool! It should be the aspiration of every pilot to be 'one' with his/her airplane, its not easy, and for maybe the first time I feel that way. I highly recommend tailwheel training to all pilots if you want to improve your piloting skills...I promise you, whatever your views are on this topic of tailwheel vs. tri-gear, it will make you a better pilot.

Tuesday, September 6, 2011

Steamboat Springs Air Fest HOBBS 810.5 hrs


My girlfriend Deb, posing with a nice looking RV7

Over the holiday weekend, I spent it in Steamboat Springs, CO and had a wonderful time...weather was simply perfect as was the company. Its become sort of a tradition for me the last three Labor Day weekends to spend it in Steamboat. One reason is that Steamboat has long been my favorite Colorado mountain resort area since I moved here 18 yrs ago...but also because they have an 'Air Fest' every year during that weekend. Its not much...rather small, mostly just static displays, airplane rides in a Stearman, C-47 and a Piper Cub (I did the Cub ride a few years ago) and some fly-by's but hey...its airplanes! And there were 3 local RV guys that were doing some nice formation fly-by's including a 'missing man'...the group consisted of a real nice looking blue/polished RV8, an RV6 and a -4. Here are a few pics of a pretty nice looking RV7 on static display...not sure of the owner?


A well appointed panel...nice clean layout


I keep taking photos of the CAD interior package that I plan to put in my seven...here you can see the side panels and rear bulkhead covers.


A lot of builders are doing really nice seals on their windscreens...either with ProSeal or Sika, here is a great example...looks very professional.


This looks like an added air scoop...'Sam James'-style...interesting.

Left Skin Complete HOBBS 810.5 hrs

I spent the weekend in the mountains, or the bulk of it so I didn't get much time with the 'mistress.' I also got to see a few RV's over the weekend....more on that later. But, I did however finish up the left side in short order on Monday...about 4 hrs start to finish including the ProSeal...compared to about 6 hrs for the right side. After getting that done, I completely cleaned and organized the shop and hosed it out...it needed it and I wanted to free up some room as things are getting cozy in my small two car garage. I feel like this is sort of a transitionary period in the project. The metal work is coming to a close...all that's left is the top fuselage skins. I am a long ways from being done mind you, but airframe metal work is winding down.


I spent some time tying up some loose ends...riveted these bulkhead gussets and the remainder of the rivets in the aft side skins up to the longerons...leaving the top row empty for the top skin overlap coming later.


And an obligatory shot of the left side skin essentially complete...looking good!


Firewall gusset...always like how a nice row of rivets look...


I had to put a pop rivet in this location...click to enlarge. I'm not sure if I missed a note in the plans that would allow me to put a solid rivet here but there was no way I could get a bucking bar in there as it is. You may want to read up on this area if you hope to avoid this on your plane. I will do a cosmetic fill job later and hopefully you wont even know its a pop rivet...build on!