Ron's RV7 Aircraft Factory


Welcome to my personal blog. This site was created as an informal description of my build progress in the construction of a Van's RV7 aircraft. A place where family/friends/builders/curiosity seekers can follow along. It is not intended to be a detailed description of every step in the building process as that would be much too time consuming. There are plenty of sites that do a great job in that arena, that is not my intention with this site. My intention is for this to be a philisophical/motivational/inspirational account of the emotional ups and downs of the life changing journey...and it will change your life. I hope this will give you an idea, through my eyes, of what its like to make this transformation. A note to other builders, I am not an expert so do not put your safety at risk by attempting anything you see on this site until you have done your own research, or send me an email so we can discuss it. Any deviations from the plans are not approved, nor endorsed by Van's Aircraft or myself. Thanks for visiting.


Thursday, January 31, 2013

Time to Move! HOBBS 1719.0 hrs


Well, the day is almost here...my Dad is flying in tomorrow and the big move should happen Saturday. I am beyond excited about this milestone and the next chapter in the build. Getting to this point has been quite a journey. For 3 1/2 yrs, my garage has been full of airplane parts and a partially completed airframe. Come Saturday, that era will be over...its exciting and bittersweet all at once. I'll talk more about his when the move is complete.

My new hangar mate, Bill Shook (notice the moving truck graphic), who owns a general contracting firm has volunteered the use of an enclosed trailer to haul the fuse. I also have my pickup truck to haul misc items as needed. We should be well prepared. Several people have offered to help or just stop by and say hi so it should be quite a day.

 
Just a couple pics from the week's progress. I finished up my brake lines routing down the gear legs. Van's says to attach these with electrical tape...which just rubs me wrong. I suppose it would work, but not what I would call "professional" looking. So, my first thought was to use Adel clamps like this pic. Nope...they are too big to fit under the leg fairing, which is why Van's says to tape them.

 
I reluctantly gave in to the idea of tape...it did have some merit. But it wasn't going to be electrical tape. Have you seen how electrical tape handles extreme temperature cycling and aging?? Not on my airplane.
 
I've used Gorilla tape before and liked it...it resembles a high end duct tape. I found a 1" roll and I decided to use this...we'll see how it holds up? If it doesn't do well, easy enough to remove it and try something else later. I will post some pics of the final product later.

 
So, last weekend I stopped by the hangar to say hi to the boys and drop off a few misc items. Bob Markert, Sean Thomas and Jim Gray were all working away on Bob (RV8) and Sean's (RV7A) projects. All of this is being done in Jim's hangar, just a few doors down from my new hangar, since its really set up nicer than ours at the moment. It was good to see and talk with everyone, even cooler to know that soon I will be among the crowd out at the airport...its really a great group of guys! I feel like a little kid that gets to hang out with the cool guys. ;)


And of course, when I arrived I seen four of the Renegades parked outside. They had been doing some formation practice and had stopped in to use the briefing room that Jim has in his hangar. How cool is that?....here they are getting ready to depart.

Friday, January 25, 2013

Cockpit Fuel Lines HOBBS 1705.5 hrs

 
Running the fuel lines that will go from the wing tank to the fuel selector was a royal pain in the a$$! I think this was just a cruel joke concocted by Van himself. The problem is you have to run them through the fuselage wall, through two plastic grommets attached to brackets on the spar and then to the selector!
 
And, oh by the way, there are multiple 90 deg bends in that span. I realize mine is a little unique, but even the standard setup would be pretty much the same. I got it done...but not after throwing one of them away because I kinked one of the bends and wasn't comfortable with it. Also, remember I used the 5052 alum tubing from ACS for these...its an upgrade over what Van's sells.

 
Here is how it runs to the wing. I intentionally left it long as I haven't done my wing fitting yet.


The plans say not to use the rubber grommet on the forward attach bracket...not sure why, as you can see it fits real nice. Maybe they want to allow that line to flex...I need to research and think about if I will leave it?


Fuel line routing setup from my boost pump to the firewall. I like how this turned out. The center cover (black), the boost pump and its fuel line will all be one sub-assembly and can be removed as one unit.

 
Adel clamps secure and protect the line from rubbing on the bottom of the fuse.

 
This shows the clearance with my two 90 deg bends...


This is where the line will attach to a steel 45 deg bulkhead fitting (not shown) on the firewall. From there it will go to the engine driven fuel pump.

 
The whole shebang mounted in place...looking good.

 
I had to do some trim work on my floor carpeting to fit around my center console. It made me cringe but came out real nice. Cut it with a razor knife and then use a lighter to clean up the edges.

 
I forget what the term is for these puppies...but they go in the spark plug holes in the engine to absorb moisture during storage. They will start to turn red when they need to be replaced or recharged. Sean Blair pointed out that mine were starting to turn color when he was out last. I just popped them in the oven on 200 degs for about 30 mins and they are restored to their purple color...nothing to it.
 
Lastly, I have set the date for my hangar move....Feb. 2nd is the big day!!!! My Dad is flying out to help and it should be a heckuva day for so many reasons that I'll get into later. So, lots to be done to prepare for the move.

Tuesday, January 22, 2013

More Paint Scheme Ideas HOBBS 1705.5 hrs


As I pass the 1700 hr mark (wow!) in the project and start closing in on my first flight, my thoughts have been wandering back to paint scheme ideas. I have a scheme in mind that I have yet to show. I like it, but I will admit its kind of "busy" and might get to be a little too much ten years from now. So, although I haven't completely abandoned that scheme...I have been thinking about a more conservative approach lately. Although, conservative for me is much more bold than most...there wont be an inch of white on my plane...why, because EVERY plane is white and that's boring to me, and I like color!
 
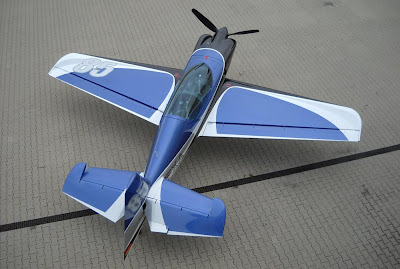
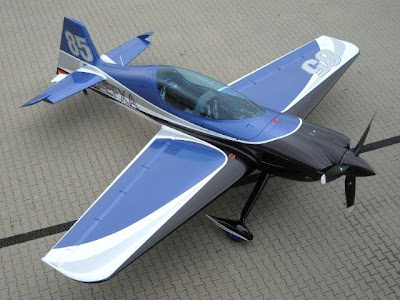
Reading my copy of Flying magazine I saw this dandy of a paint scheme on an XtremeAir XA42. Mostly what I like is the wing and tail details, which are similar to what I was considering to begin with. I also like the added number on the wing...I planned to put a number on my VS, but now after seeing this I want one on the wing as well. It gives it the "raceplane" look, which I like. I want my plane to resemble a high end sports/race car. So picture this with my primary colors of black/red with metallic gray and yellow (like my prop tips) as secondary colors. I am still doing sketches right now.


Lastly, I have to admit I like the paint scheme on the new RV14A demo plane. I am considering my fuselage scheme to look something like this...again, with my colors. I envision a scheme that is a hybrid of these two...stay tuned for more on this as I develop it.

Wednesday, January 16, 2013

More Console Work HOBBS 1695.5 hrs

All of my time has been spent on my center console design the last week...sorry, not many pics to share however. Although its coming along pretty well, I'm doing some head scratching about a few things, which bog down the factory a little bit. The RV build veterans always say, whenever you decide to go "off plan", expect it to add significant time to your build...so choose wisely.
 
 
I really wanted the center console to be large enough to hold an iPad...
 
 
And voila...mission accomplished, fits perfect! You can also see my piano hinge in place for the armrest/door.


I am being careful not to add "extra" material...use the seat pans whenever I can instead of building a fully contained console box. Here you can see the floor of my console...which encloses the push/pull tube underneath. You don't want any access for a pen or screwdriver or whatever you have in your console migrating into that area to jam your controls...this is a safety of flight issue, treat it appropriately with your design.

Friday, January 11, 2013

Hangar Party HOBBS 1682.0 hrs

Last weekend we had a hangar party in my soon-to-be new hangar, owned by Bob and Mary Markert. We had an amazing turnout...there were 30+ people! Scott and Deb Mills and I have been trying to increase the activity and enthusiasm of the Denver metro area RV-ers for several years now and this was by far the biggest turnout. Although Scott/Deb and I weren't directly involved (I acted in a supporting role) in setting it up...that was Brian Beatty's idea, and a great one.

With the graciousness of Bob offering his very nice hangar, chairs, tables and everything else you could need for a party, it was a huge success. I bounced around all evening talking to lots and lots of good people, what a great time.

During the Rocky Mountain Airshow this past summer I seen Stephanie Wells, the only female member of the Renegades (see link on my site) fly. I finally met her at the party and really enjoyed talking to her about flying while we ate dinner. Paint this picture...Stephanie has 13,500 hrs...so this isn't her first rodeo by any stretch.

What surprised me about our conversation is the fact that she recently sold her fixed pitch RV6 to buy a constant speed RV7, her eyes lit up like a little girl as she described the difference between the two as "eye watering". Two things amazed me about that phrase, which she repeated several times...#1, a pilot with 13,500+ hrs in all types of airplanes and flies formation aerobatics could still have an "eye watering" experience in an airplane...and #2, it really strengthened my belief in a CS prop for my plane. Is it "worth" the money?...probably not in dollars and cents, but not much is in aviation...the $$ are usually out of whack so you might as well buy what makes your eyes water.


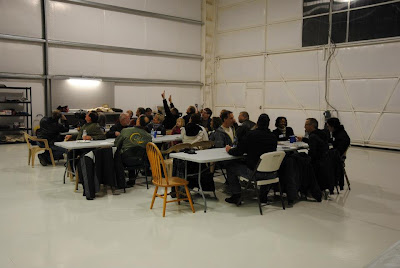
The group having dinner...as viewed from the upstairs "loft"

 
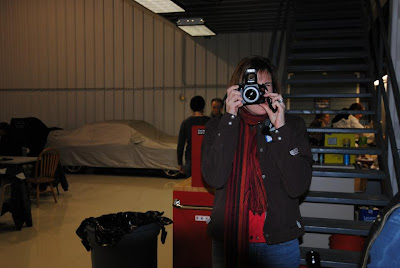
Kristen Beatty trying out her new camera...


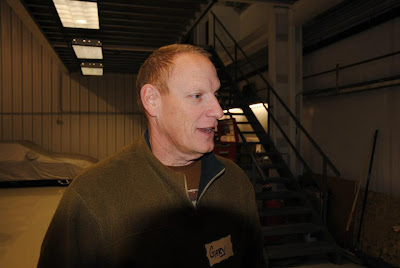
The incomparable Mr. Gary Zilik, no doubt speaking words of humorous wisdom as he always does.


And of course, yours truly, laughing at something...probably listening to Gary! There was a lot of laughter and smiles to go around this evening. I'm hoping this is the start to many more RV social gatherings and flying for us.

Wednesday, January 9, 2013

Console Evolution HOBBS 1682.0 hrs

Almost from the start of my construction on this airplane, I knew I wanted to add a custom center console. There were several reasons I chose to do this that I wont go into here, but mostly it was a desire to make the cockpit my own...to put my personal touch on the airplane.

Let me add, I am pretty amazed at how small the cockpit is for the -7...if you go this route, really take this into consideration if you are a bigger guy. I am 5'9", 185 lbs...not big...and its cozy for me. I have no regrets because I actually like the feeling of 'wearing the airplane', but I just want to make sure you consider it before committing to this kind of design for your plane.

With this in mind, I always had my eye out for other designs that I liked at Oshkosh and on VAF...if not in totality, then at least aspects I wanted to borrow for my own. Here are some examples that I have seen...

 
This is the nicest RV version I have seen, done superbly by Aussie John Clements. If you read my blog, you've seen it posted on my site previously...you'll see a lot of this design influence in my version.


Not really a center console on Chris Sands' plane, but I did like the cup holders and leather wrap...a nice touch.
 
 
And of course, the Diamond-20...I used to fly this plane quite a bit, so I know I like the center console idea. This plane is a very similar sized cockpit to the -7, so it was good to know it can work.
 
Here are some pics from my construction progress...going well, but I have to admit I am kind of winging it. I don't have nicely drawn out plans and ideas...its all in my head, we'll see how it turns out? Worst case...I redo it, not a big deal. Enjoying the shit out of this project though...this is fun!

 
Time to start mounting the DJM throttle quadrant. This quadrant is the perfect size for the RV's...very compact, which you need. You'll notice I have no mixture lever on the quadrant...that is by design. I wanted the fine tuning capability of a vernier for the mixture. It also serves the dual purpose of making the throttle quadrant slightly smaller.
 
 
The cool thing is once I get the overall concept and measurements, I can remove the seat pan and put it on the bench for fabrication. Much easier than trying to do this in the cockpit.
 
 
Fit check with the seat in place and a rudimentary arm rest...its feeling good, very comfy when I sit in it. I'm pretty stoked so far.
 
 
Now its time to start the forward section...which will include the fuel selector, fuel lines, boost pump and inline fuel filter. Using cardboard once again (you have to do this on a project like this) for mockups, I am getting a feel for where I want my fuel selector.
 
It is by design, offset toward the front, which is different than every console I have seen out there. It is influenced, once again, by my Mitsubishi Eclipse (more on this later)...and just gives you a feel of being less cramped. I also put my throttle quadrant a little further forward than most have, to more comfortably fit where my hand will rest...this kind of forces me to move the selector forward as well. But...this was all pictured in my mind from the start so it was anticipated.


I bought the better grade of alum tubing (5052 I believe?) from ACS for the cockpit fuel lines. This is just a better grade of alum than what Van's sells. I'm not saying there is anything wrong with the Van's stuff, but this is noticeably better when you do your flares. It just makes me feel better for fuel lines in the cockpit. And...the cool thing is, it comes in straight lengths, which is real nice.

 
Starting to mount my Andair fuel boost pump and filter. Most installs have the filter attached directly to the pump, but I am trying this configuration instead for space constraint reasons. But I could change it later if I decide to.

 
A rough flat pattern for the fuel selector mount.

 
Formed...I didn't do a very good job with this...the width of the two flanges is off slightly, I will redo this later.