

Running the fuel lines that will go from the wing tank to the fuel selector was a royal pain in the a$$! I think this was just a cruel joke concocted by Van himself. The problem is you have to run them through the fuselage wall, through two plastic grommets attached to brackets on the spar and then to the selector!
And, oh by the way, there are multiple 90 deg bends in that span. I realize mine is a little unique, but even the standard setup would be pretty much the same. I got it done...but not after throwing one of them away because I kinked one of the bends and wasn't comfortable with it. Also, remember I used the 5052 alum tubing from ACS for these...its an upgrade over what Van's sells.

Here is how it runs to the wing. I intentionally left it long as I haven't done my wing fitting yet.

The plans say not to use the rubber grommet on the forward attach bracket...not sure why, as you can see it fits real nice. Maybe they want to allow that line to flex...I need to research and think about if I will leave it?

Fuel line routing setup from my boost pump to the firewall. I like how this turned out. The center cover (black), the boost pump and its fuel line will all be one sub-assembly and can be removed as one unit.

Adel clamps secure and protect the line from rubbing on the bottom of the fuse.

This shows the clearance with my two 90 deg bends...

This is where the line will attach to a steel 45 deg bulkhead fitting (not shown) on the firewall. From there it will go to the engine driven fuel pump.

The whole shebang mounted in place...looking good.

I had to do some trim work on my floor carpeting to fit around my center console. It made me cringe but came out real nice. Cut it with a razor knife and then use a lighter to clean up the edges.
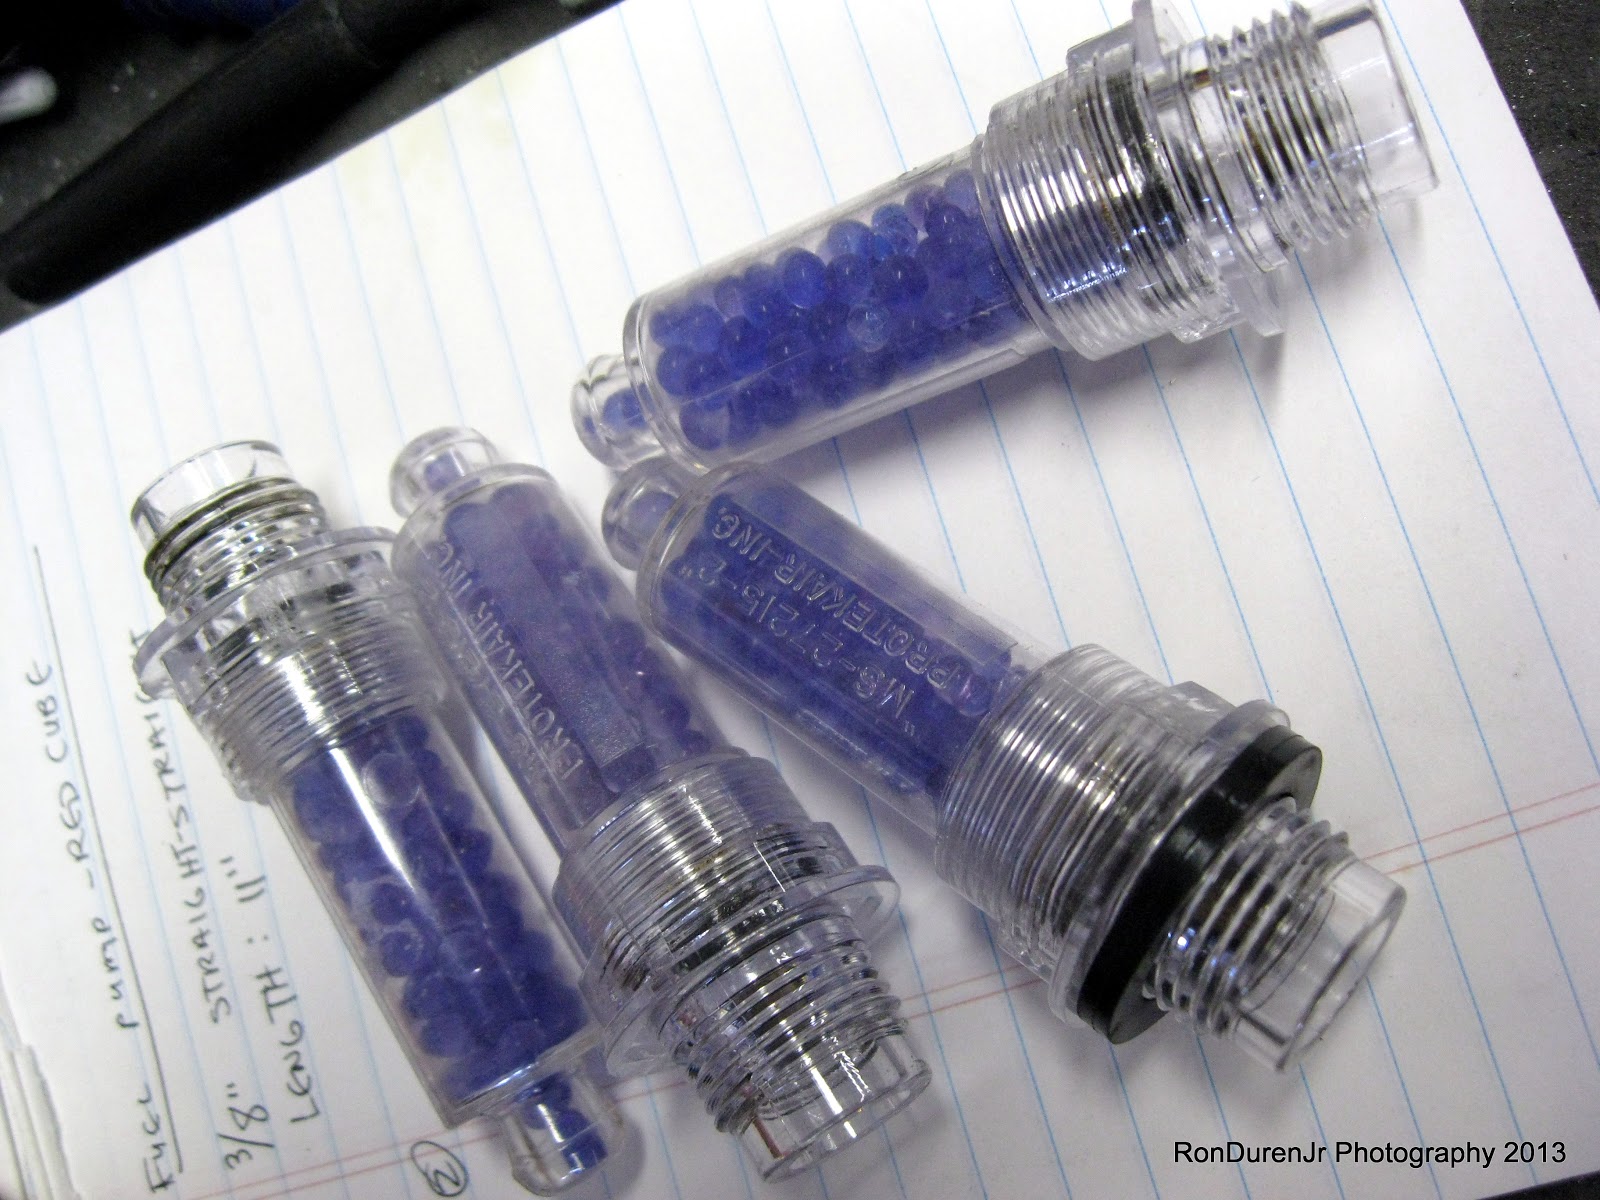
I forget what the term is for these puppies...but they go in the spark plug holes in the engine to absorb moisture during storage. They will start to turn red when they need to be replaced or recharged. Sean Blair pointed out that mine were starting to turn color when he was out last. I just popped them in the oven on 200 degs for about 30 mins and they are restored to their purple color...nothing to it.
Lastly, I have set the date for my hangar move....Feb. 2nd is the big day!!!! My Dad is flying out to help and it should be a heckuva day for so many reasons that I'll get into later. So, lots to be done to prepare for the move.
No comments:
Post a Comment