
Here we are, after another productive week...I'm starting to make a habit out of this....progress has been excellent lately. ;) With the three day weekend (MLK day) I had an extra day to work on the plane. I've been a ball of energy and enthusiasm lately. I keep saying it, and it bares repeating, I am really enjoying this stage of the build...finally starting to do some actual finishing work, building mechanisms, etc...a lot of excitement for sure.
This week I tackled installing some of the features used for the canopy latching mechanism. As you probably know if you're been reading along, I decided to buy an after market latch from JDAir. I have no regrets on this purchase, good product and good customer service.

These are the brackets that will hold my struts in place. I started fabrication of these but didn't get completely finished. I just need to locate the attach points and I should be good to go...that can wait.
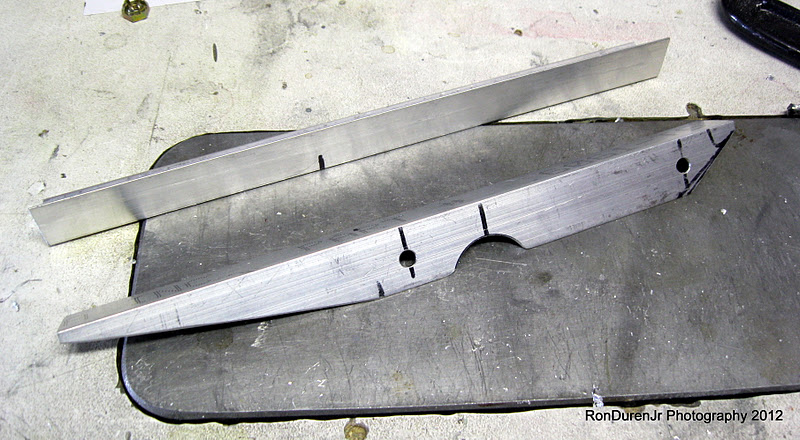
Shifting my focus to the canopy latch. Here you can see the process of fabricating the attach angle brackets that will hold my latch in place. One is done...

For the other, I just did a mirror image and traced the cutout and match drilled the holes. I will note that the 1" diameter hole probably isn't required for both top and bottom brackets (omit the bottom) although I think the plans say to do both. Not a big deal, with side panels it wont be seen on my plane...but it would save you a little work. I will just consider it a weight reduction! :)

I picked up this 1" diameter rotary file at the fly market at OSH last year. It was used and cost me a couple bucks. It was very useful for this little project of adding the 1" cutout and earned its keep already. Handy tool to have in the tool box.

Here you can see the sub-assembly taking shape. This will rivet to the inside of the fuselage. JDAir has .pdf installation drawings on their site for this...and let me add, they are nicely done. My only gripe was that the "full scale" 1:1 template was not actually full scale when I printed it out. Not sure why? Maybe some scaling issues when it was converted to a .pdf. This template is supposed to be used to properly place your cutouts for the latch. It would have been nice to have, but I worked around it...very, very carefully.

Here is the aforementioned cutout layout. I checked everything very carefully...double checked...verified...measured not twice but several times before committing to cutting metal. Yeah, I was a nervous wreck! You just don't "replace" a fuse side skin at this point in the build. It is imperative that there are no mistakes. I could patch a screwup I suppose...but man, I sure didn't want to go down that path.

The cutting into my beautiful fuse skin begins....oh boy! Are we having fun yet! Err on the side of cutting the opening smaller and then open it up gently with a file so you can sneak up on your finish dimensions. Keep doing sanity fit-checks to make sure you are in the right location and have the right size.

Take a jewelers file to smooth out your opening...gratuitious FAA shot.... ;)

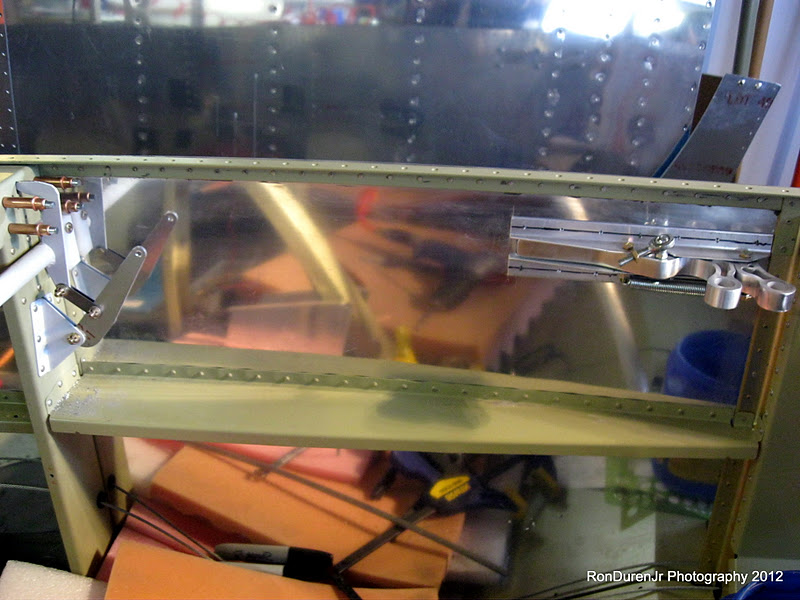
Now that the hole is cut, I have my latch sub-assembly clamped in place. Since the template wasn't working for me, my strategy was to cut the holes for the latch first. Position the sub-assembly precisely inside the openings and then match drill the rivet holes for the attach angles. Worked well. Did I mention to be careful....? Work slowly and deliberately....

Coming together...I still had some very subtle filing to do for me to be happy, but this was pretty close to done in this pic. You can also see I have now drilled my rivet holes. All in all, it came out pretty darn good. It doesn't look like it was machined--it does have a hand-crafted look to it, but I'm ok with that. These are the things that make your plane your own...not a machine's. One other note, realize that your reveals (gaps) will need to account for paint thickness so don't make them too tight.


This is the powder coated hooks that will secure the canopy when the latch is actuated. The plans say to "bend" the hooks if necessary to get them to line up with your access holes. I didn't like this strategy...seemed kinda hokey. First of all, they were pretty darn close with no modification. One side was getting hung up though. My strategy was to file the leading edges to remove the sharp points. By doing this, you eliminate catch points. Worked slick. I'll paint that exposed area later.

Putting it all together before cutting the attachment alum rod (seen in pic below) to length and then tapping both ends.

And the finished product...this was cool, being a Mechanical Engineer, I really enjoyed the Engineering involved in the mechanism and the linkages. And the best part is it worked like a charm! This was a satisfying bit of work...and also one that I am glad to have behind me, it was a little nerve wracking as I mentioned.
No comments:
Post a Comment