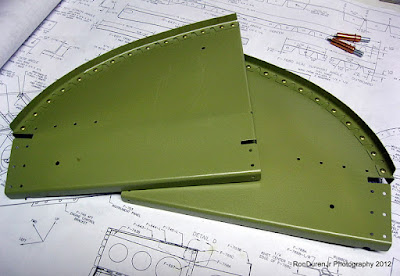
So, once I got the finishing kit inventoried and stored...it seemed logical to dig right into it...I can finish my empennage fairing later! ;) I have to admit, my excitement level was pretty high. A lot of builders say that fitting the canopy is the absolute worst part of the project. I'm not sure if I will agree by the end, but for right now, I am pretty jazzed about this part of the build.
Simply put, its the part of the plane where you can really put your signature on your build...a nicely done canopy is the hallmark of good craftmanship in my opinion and I don't expect it to be easy. In addition, this is the enclosure for the occupants so making it look nice is vital since my passengers and myself will be staring at it for many, many flight hours.
I had four days of vacation left after visiting my folks in WA for the holidays and I really wanted to take a big bite out of the project in that time. Mission Accomplished (seen the new version of this movie over the weekend by the way...and really enjoyed it. The building scene where Cruise is jumping around on a rope 130 stories up made my palms sweaty!). I logged 25.5 hrs in four days...easily my best four day solo stretch yet, and the most since my Dad came out to help my with the wings. I have to admit, it was a little exhausting though...working on it everyday. I was ready for a break yesterday.
Getting started on the forward panel area, I started by riveting my seal flanges in place. A rubber seal will attach to these...this area is the #1 area for water leakage into the cockpit. I am already thinking of ways to improve this.
A little unrelated, but I ordered some longer AN3 bolts for my rudder pedal mounts and had them shipped with the finishing kit. Since I am doing a 3/4" raised false floor...it just didn't feel right when I was playing around in the cockpit with my feet on the pedals so I am going to raise the rudder pedals 3/4" to accommodate for this. I'll do this later...I need to make some spacers first.
Just getting started with fitting my forward canopy skin. Looking cool eh? At this point in the instructions it talks about installing this approx. 100 times before you are done!! ouch! A guy takes notice of a comment like that... :) On the bright side, I already have about 5 of those 100 completed over the weekend!
Release pins for the jettison mechanism. You have to cut the threads off these boys and taper the ends...be careful not to cut them a smidge too short, its easy to do...ask me how I know? Err on the long side...
My jettison mechanism taking shape...I was pretty proud of this until I did a fit check.
Read this detail drawing carefully...the length dimensions for C-621 and C-622 are to the hole centers...NOT the length of the rod. I cut mine wrong so each one is 1/2" too short! dangit! Not paying attention...I should know better, since these are the critical dimensions, it is dimensioned properly...I just missed it. I have some more on order...luckily they're cheap.
As you get ready to match drill through the skin into the round rod in the weldment, I recommend you clamp the support bracket like I did here...they don't say to do it, but it makes good sense.
Here you can see I am getting everything ready so I can drill the hinge brackets. It says to do a 0.020-0.032" reveal between the skins...of course I chose a nice tight 0.020". Looked real nice in this pic...but after I drilled the brackets, to my aggravation, it opened up!! The fun begins...proper fitting is going to be tough I can see. I'll worry about this later, might be a way to hide the larger gap? I have some ideas. Not sure I have any advice as I don't really know why it happened or if this is common?
In this photo you can see I have riveted the splice plate in place. I threw in four extra rivets on the return flange for extra strength. I couldn't understand why Van's didn't do this?? Well, now I know...later you will add some support pieces in that location (see pics in this post at the end). So, don't try to be clever like I did...its not a big deal but kind of a pain.
I used my strap here to get a nice tight fit with the forward canopy assembly before drilling the hinges. Van's says to use duct tape...I thought this worked much better and would recommend it.
Press in brass bushings...Van's recommend a reamer for these holes, which would've been nice. I didn't have one and wasn't going to buy one for just this, so I just just used a regular drill bit. Consequently, they weren't a press fit...I used some RTV to keep them in place.
This was the first shot of my canopy open after drilling the hinge brackets...cool.
Support brackets on the forward canopy. These are new for the RV7's from what I can tell...the 6's didn't have them. I really like this addition...they add some real stiffness to the frame, look cool, and were pretty fun to fabricate. You have to bend these flanges first...more on these later, as I am only part of the way done with them in this pic.


No comments:
Post a Comment