Pretty good week as I close in on the 1900 hr threshold and also get ready for my upcoming Tiger Cruise and transition training. You'll see, as always I am bouncing around finishing up misc tasks I have been putting off...but I am getting more focused on getting the wiring to a point where I can do a power up of the system, which should be exciting...so stay tuned for that, hopefully soon.
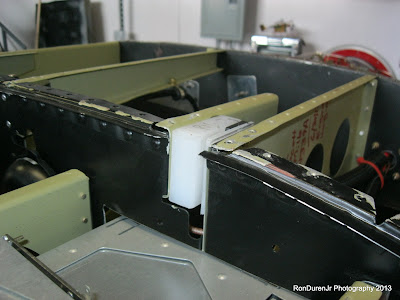
Swapped out my white UHMW plastic blocks for black since all of my sub-panel stuff is, in fact, black. I'll do some touch up on this paint when I am done with my wiring activities.
I came up with this idea for managing my brake lines, I just used some 1" shrink tube I bought at the local electronics store. I then used a couple tie wraps to secure it all.
After some discussion with one of my hangar mates, Bill, I came up with a mounting scheme for the POS12 sensor. Essentially I just mounted this on the support piece (no angled bracket as some do as it wasn't needed in my install). By trial and error I found a location on the bell crank that provided the 1" travel necessary. In this pic, you can see I just used a clamp to move this bracket. I then cycled the motor fully a half dozen times to make sure I had a good location before drilling and riveting.
Finalized and ready to go. A DB9 connector here is a little bit overkill for the POS12, but I installed one anyway.
Originally I had locking latches on my baggage compartments, but decided to forgo the lock and just use these nice Southco paddle latches instead. Brian Beatty brought these to my attention and I really liked them. I also installed a stiffener in each door as these were a little flimsy for my taste, much better now.
I remember seeing other people's blogs while they were doing wiring and thinking, "wow! what a rats nest!" I also thought, it looks so daunting to see all of those wires running everywhere. How do they know whats what? Well, as you can see from these pics...I am now in that mode. It is a little daunting, but amazingly I pretty much know what each and every wire is assigned to. Later as I progress it will start getting cleaned up...but for now, this is it.
Winter is doing its best to hang on out here in the Rockies...temps plunged to -3 degs F with the windchill and we had snow on April 10th, with more forecast next week. Its making it hard to get any flying in with this kind of crazy spring weather!


No comments:
Post a Comment