

I decided to tackle my aileron trim install (or most of it) while I still had reasonable access. Its a Ray Allen servo motor much like (maybe the same one?) as the elevator trim. So, since I was familiar with that install, this one was pretty simple.

You get a nice drawing and instructions included with the kit. You can also see the pile of parts you start with...lets have some fun eh?!


This is where it mounts to the seat ribs. I wont be able to complete the install until later when I put the sticks in and finish up the details with that. For now, I will just set it off to the side. You can see in this pic that you have to drill out some nutplates...if you read this beforehand...don't install those two. Save ya some effort later.

On to the seat belts...or more specifically the crotch straps. These don't have the right diameter hole for the AN4 bolt that attaches them. Some guys press a couple washers into that hole to create a 1/2" through hole. I don't have an arbor press and trying to do that with pliers or a vice is dang near impossible...I tried! So, the other option is just drill a new 1/4" dia hole. Not only was this much easier, it fits nicer in the bracket as well. I like the way this came out.


You can see how it resides in the brackets. I really find this whole design kind of weak...you have this heavy duty steel bracket attached to a double-stitched seat belt harness, and all of that is attached to two thin pieces of alum sheet metal. What do you think is the weak link here? That alum will go before any of the other components in a crash scenario. The only justifications I can think of are #1, its a crotch strap, a 'nice to have'..not a 'must have'...a four point harness is plenty sufficient I think. Second, maybe its specifically designed for this to break loose at a certain 'G' threshold...maybe just slow you down? Think about it...maybe that thing remaining intact is not the most desirable thing, at least not for us male pilots/passengers?? ;) Anyhow, that's the design and I didn't feel like altering it...so there ya go.

Finalizing my static routing...took out some of the adel clamps, moved the junction above the seat belt attach brackets so it doesn't interfere. I added two adel clamps where the 'keeper' rivets reside...that was kind of a pain but works well. I then added some protection (shrink tube and wire protector) where the static line crosses over the longeron. This line vibrating against the longeron during flight could cause some wear and failure. Not sure about this solution though...I could also just add an adel clamp there, but I would like to avoid drilling into the structural longeron if possible. Or maybe I am just worrying about nothing?? Still pondering....


Broke out my Andair fuel pump for some test fitting. This seems to be a nice piece of hardware (ignoring my earlier statement about not doing business with Andair in the future...I would just buy directly from ACS. They have some good products, I just don't care for their customer service.) Its more pricy than the AFP version that Van's sells, but I think it is also smaller, which is nice.
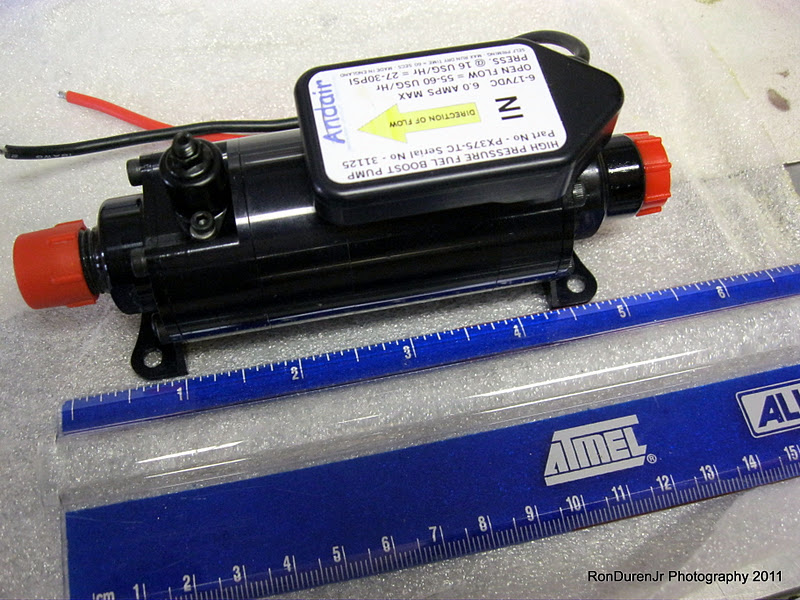

Nice install instructions are available on the Andair website...when you order this from ACS, be sure to order the fuel filter and maybe a gascolator at the same time. ACS has package deals to include all of these...I didnt get either out of pure ignorance of what I needed. Still learning... At the very least get the fuel filter.

And the start of my center console ideas...just using some cardboard to do some preliminary layout right now. Still plenty of thought that needs to be done ahead of time...I will tell you I plan to mostly copy Jon Clement's center console since he did such a great job with his.

No comments:
Post a Comment