
I will just install -426's (flathead rivets) instead and build on, not a factor except I think I need to order some rivets for this task. I also am having a dilema over the decision..."one or two flop tubes." I currently have one installed in the left tank but was considering ordering another one and installing it in the right tank as well. That way I dont have to be on a specific tank for inverted flight. I have heard that flop tubes get stiff over time rendering them ineffective to actually 'flop'. My thought is, they will get stiff in the airplane upright (bottom of the tank) position since this is where they spend most of their time. And if so, they will only be innefective when I go inverted and it will be very evident when the engine sputters from fuel starvation that I need to replace them. I dont see it as a safety issue. I will have to develop a maintenance strategy for these, not sure they need inspection at annuals or not? More research, data points needed before I decide.

An FAA shot...so they know I built it, which is comical to me...when I'm finished with this puppy go ahead and test me, ask me about any part of this airplane and I will be able to talk about it for hours in excruciating detail. :) That should be the test to see if someone actually built their airplane or had someone else do it, not silly pictures...but it is the federal government, what do you expect?
My fuel cap installation, get her centered up and drill some holes...looks cool. This will be the 'money hole' after its flying!

My 'deluxe' fuel cap installed and ready for action!

Fuel tank access hole. This is where you can access the interior of your tank if needed. You have to dril that large approx. 5.25" hole with a fly cutter...that was a little scary, I couldnt get my drill press turned down as far as I would have liked so the RPM's were a little high for my taste. But it worked. You can see I cut it a little bigger than the reinforcement ring.


Here is the little bracket that attaches the vent line to the fuel filler. I used a 0.25" drill bit to take the place of the 1/4" alum tubing.

Here it is in place, wasnt as difficult as I thought it was going to be.

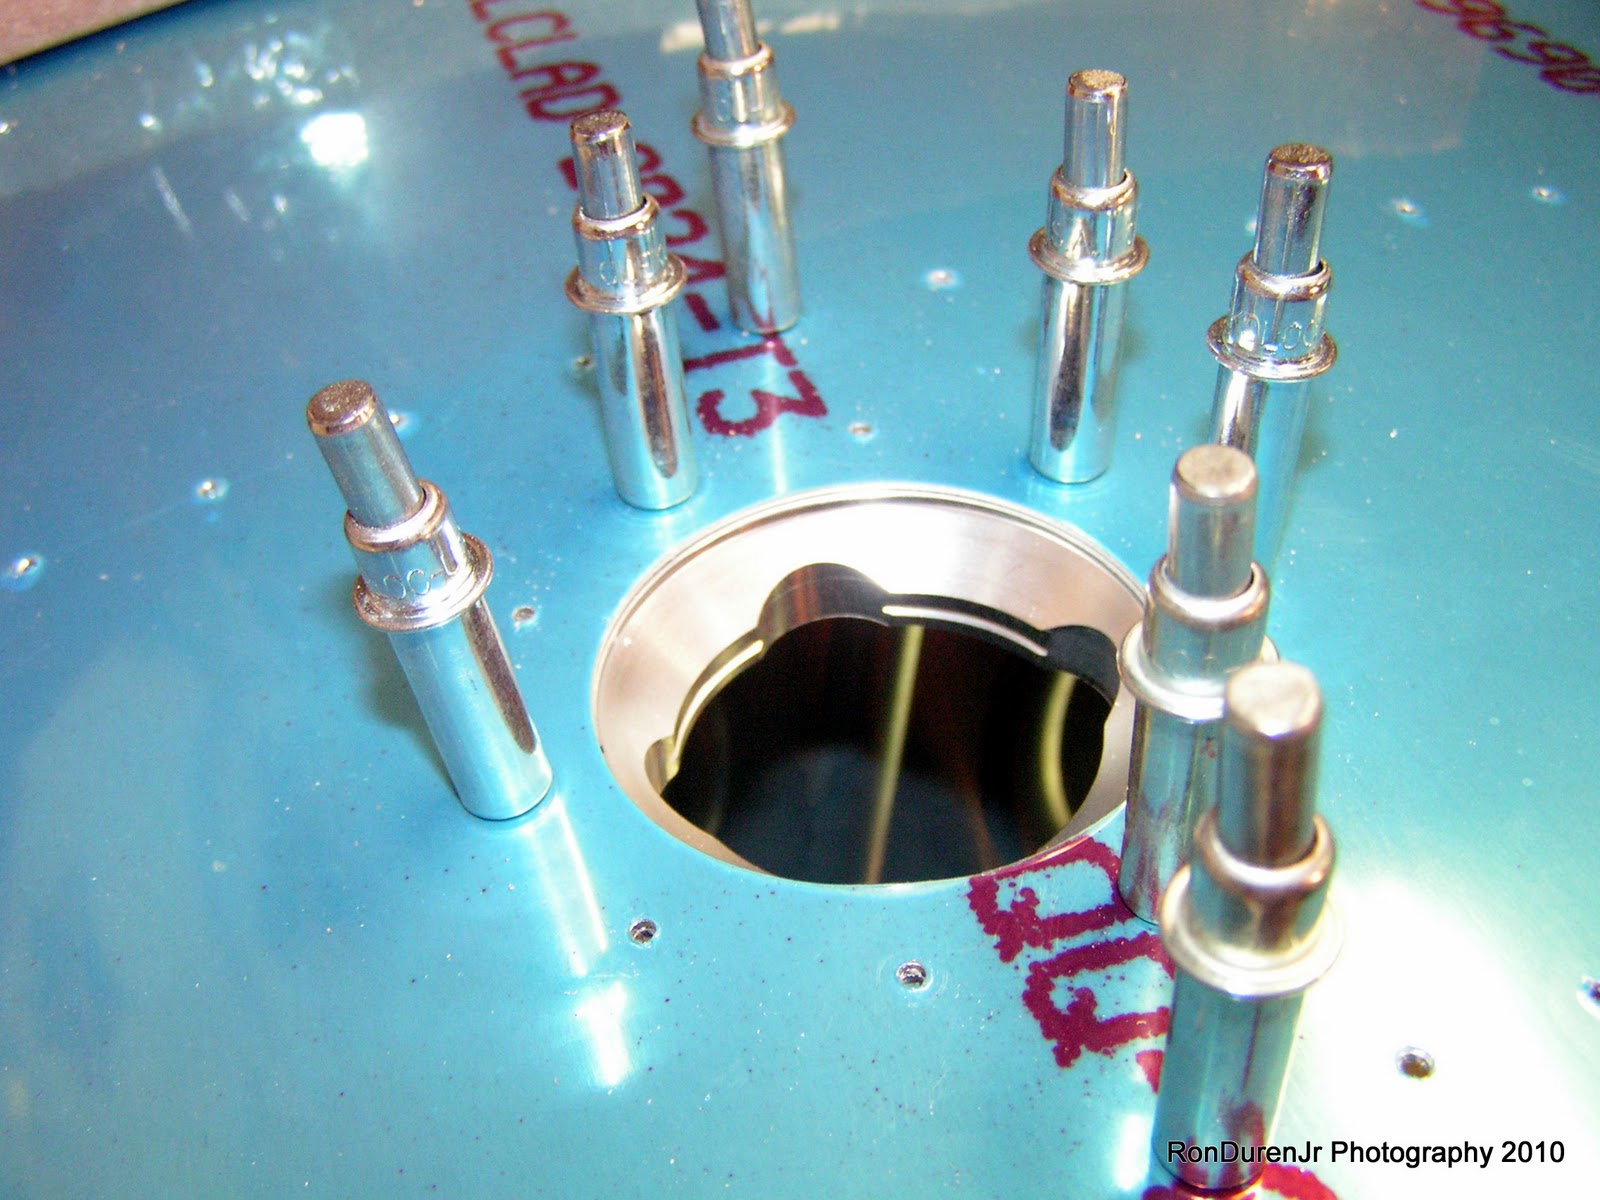
Fuel filler machine countersunk.

A cheapo tube/pipe cutter from Harbor Freight...$5, gotta have one of these for the rigid fluid lines and the pitot/static plastic tubing. It gives a nice clean/square cut which is very important. It works perfectly fine, no need for an expensive one.

Here is my flop tube in place.


This picture shows my interference problem. The holes shown are supposed to take -470 rivets (universal dome head) and as you can see, they would interfere with the nut for the fitting. Its kind of aggravating because Van's makes no mention of this when they tell you to drill those holes. They give no measurements as to where they should be placed...just a generic picture and leave it to you, the builder, to put them in where you want. So...if you are putting in a flop tube, pay attention to the location of these holes. Or you can resign yourself to just do it the way I am, which isnt really a big deal if you have the rivets you need.


Using my fuel tank dimple dies to dimple the tank skin.

whoops...made a mistake, the holes for the fuel sump/drain do not get dimpled.

Not a problem, put my flat dies in and flatten 'er back out...build on. Funny, when I first started building this kind of thing would have made me sick to my stomach. Now, not even a blip on the radar. I really have learned that you should build one of these airplanes at the 'macro' level...instead of the 'micro' level. Keep the big picture in mind...the airplane as a whole, not a single screwed up rivet or single hole, etc....you will keep your sanity intact much better! :)


Squaring up the tank attach brackets (Z brackets). Once squared, mark it with a line so you have a visual sanity check before you start match drilling.

My dog Lakota...she doesnt like the noise of the shop (garage) but she does like to come to the door that I have propped open to keep an eye on whats going on and what Dad's up to.
No comments:
Post a Comment