 |
| http://www.holidaycardcenter.org/aopa/product/2199/as_top_selling_cards |
Let me start by saying, this will be my last post before Christmas. Thanks for reading and I hope you and yours have a wonderful holiday season!! Its funny, when I pause to reflect, I realize this will be my last Christmas as an active builder...at least for THIS airplane. We're getting there... :)
The other night, I am wandering through my local "Aviation Hardware Store" (aka Home Depot), looking for something totally unrelated to my Ram Air unit and I see this little baby in the plumbing section. Immediately, my little light bulb goes off...and I think, hmm.
Almost every time I am in Home Depot I get bombarded (multiple times in the course of five minutes...which really annoys me by the way) with the help asking me..."can I help you find something?" I usually say "no thank you." Why you ask? Because I really don't know what I am looking for until I see it!! :) This was another one of those moments...I had no idea this is what I was looking for.
I had been trying to come up with a clever way to bridge the gap from my Ram Air unit and the alum intake insert. Most guys just use an alum tube...and that was fine, but I wasn't crazy about it. The problem is, whatever you go with can't be permanent...it needs to be easy for the bottom cowling to come on and off. If you do a removable scoop (screwed in place) this task is much easier.
So anyhow, this puppy is a 4" to 3" transition, its an $8 part, is rubber so its flexible, designed for fluid flow and comes with two hose clamps. Sounds perfect for an airplane. The first problem is, its too big for my Ram Air unit. The 3" specification is for pipe size...which is inside diameter, not outside.
I then come up with the idea of buying a section of 3" black PVC ($7). The rubber transition piece with fit perfectly over the top of this pipe since that's what its designed for. But...the challenge continues, the ID (inside diameter) of the pipe is too small to fit over the insert on the Ram Air unit, which measures about 3.2" So, I take my 1" rotary file chucked in my drill and get the ID whittled up to 3.2". Bam...it now fits, progress! Here you can see it in place for fit checking.
I then cut the PVC pipe down to about 1" in length, it really is just acting as a spacer...not an extension. I then installed the rubber transition over the top...I like the way this is looking--professional. Still not there yet however...
I was pretty proud of coming up with this idea, then I was poking around on Rod Bower's website and see that many RV10 guys do something just like this with the bigger Ram Air unit that Rod sells. D'oh! And here I thought I had an original idea...nope, somebody beat me to it. But that's ok, I'm fine with that. I still don't know for sure this is going to work for me...haven't played around with the bottom cowling yet so stay tuned, it shows promise however.
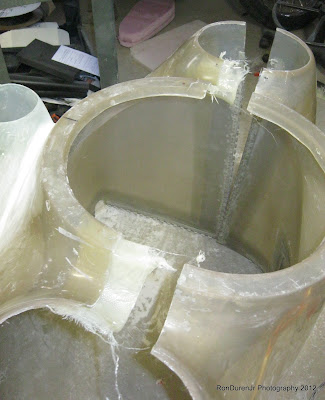
When you are doing fiberglass work, you always need to have other stuff to do. You do a layup and then set it aside and work on something else while it dries, and then come back to it later. I was still working on my cowling while I was messing around with other stuff. Here are my "lips" right after I popped the two cowling halves apart (I used box tape and hair spray on the parts I didnt want to bond to...my usual mold release method). These lips will close up the seam between the cowling halves and also be a place to secure the halves with some screws. I will do some trim work next to clean these edges up. Watch as this evolves...if you cant picture it now, you will see what I mean soon and it will make sense.
I am almost done with my plenum/baffle work...been doing that as a filler project while I worked on the cowling. These pics show my strategy for closing up this gap above the oil cooler. Some guys just extend the fiberglass...I decided to just fabricate a piece of alum to do the same thing.


No comments:
Post a Comment