
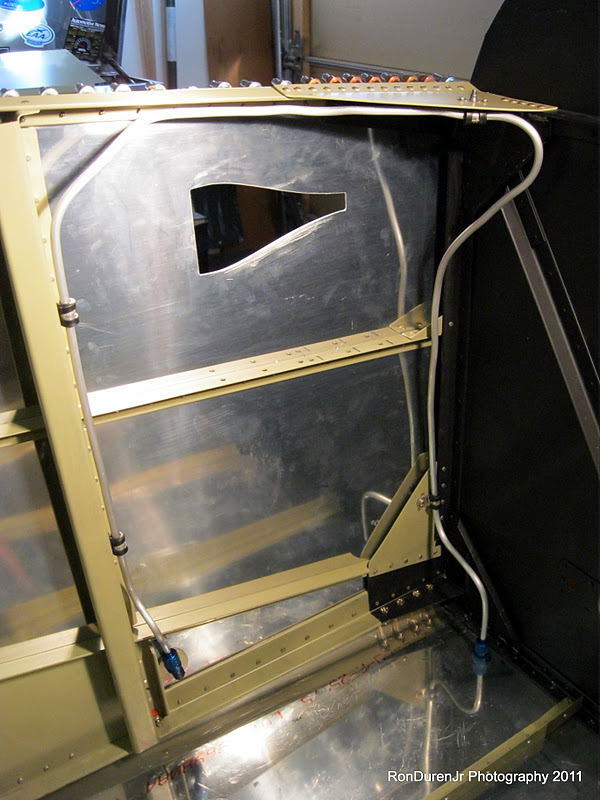
Fuel tank vent line...this was a heckuva lot of fun to do. Lots of bends...the hardest ones being where it goes around the rudder cable. This isn't perfect and not as pretty as some I have seen, but I was proud of the fact I did both sides on my first attempt.

I added these mounting tabs to my false floors.

3/4" sound/vibration matting cut and in place for a test fit of the completed floors.

And there ya go...installed, looks pretty cool. I get a lot of satisfaction over seeing something I did from scratch...even something as simple as this. ;)

Here you can see where that afore mentioned mounting tab is located

Remember in a previous post when I said...I don't know how the heck you are supposed to get a bucking bar in to do this rivet?? And I just gave up and put a pull rivet instead? Well, while I was visiting Sean...I mentioned this to him and he said, you aren't supposed to rivet the attach angle in place until after you rivet the skin. I thought...I remember the instructions saying that...hmm, head scratching as I was confused? I get back and look at my project....and had one of those, "golly, I am stupid!" moments....read on to see why I said that.

In this pic, you can see...sure enough, I actually DID follow the plans and left this mounting bracket cleco-ed in place...just needed to remove it to get access to the rivet. Such an idiot that I didn't even notice this when I looked at it before. Sometimes you just don't see obvious things after looking at something for hours and hours. I will remember that when it comes time to look my plane over before the first flight....its a good lesson.

Fixed...I feel better now...thanks Sean....

On to mounting the tail feathers...this is gonna be fun...and nerve wracking at the same time!

First order of business is drilling the elevator control arms...nice and square. I think I was successful...I followed Van's instructions to the letter.

I did my own thing here (I am not recommending this, this is a deviation from the plans...proceed at your own risk). It calls out two small spacers here for each side. I decided to span the entire width, and also add a mounting bolt in the center.

In this shot, you can see my custom spacer bolted in place with five rather than four bolts

I still need to get my VS primed...as soon as I am done fitting it I will get this taken care of

Gotta cut 5/8" off the bottom here...not really sure why they just don't cut this to length at the factory??

Cutting and fabricating the elevator push/pull control rods, nothing to it...easy, peasy. Don't forget to prime the insides


Test fitting the control rods...very cool, everything moves as smooth as silk!


Make sure you remember to offset the VS 1/4" to the left when mounting it to the fuse...yup, the VS is NOT straight...by design. This is an aircraft design technique to help offset the left turning tendency of the airplane. There are various ways to do this, this is just one version.

Installing the rudder cables...as you can see, the cable doesn't actually fit in the -625 bushings!! I scratched my head for a while on this one. Then I read Jason Beaver's blog and learned you just need to remove them, force the cable through (yes, it will go with some coaxing) and then re-install.

No comments:
Post a Comment