Leaving for Oshkosh in the morning for my 2010 trip. I was looking through my old blog posts and I think I was at 95.0 hrs and working on my empennage when I paused for OSH last year. A lot has changed personally and I havent come as far as I'd have liked on the project by now, but progress is being made so its not all bad. Going to OSH takes on new meaning when you are an active builder, you can bet I'll be taking a lot of wing pictures this year...last year was empennage pics. :)
I'll be scouting for quite a few items this year at the show. Pitot mast, static/pitot kit, tank dimple dies, landing/taxi lights and misc hardware and tools...anything that I need and can get a bargain and/or save on shipping costs. I also really want to take a close look at the Dynon products: Skyview, pitot, autopilot, AOA, transponder, etc. I have the nice luxury of being able to send anything I buy home with Bryan also (thanks Bryan). I should be seeing the gang tomorrow...Scott, Deb, Gary, Carolyn, Bryan...looking forward to it.

Tuesday, July 27, 2010
Monday, July 26, 2010
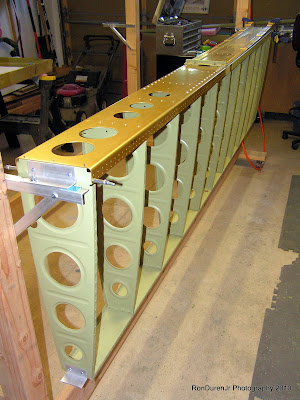
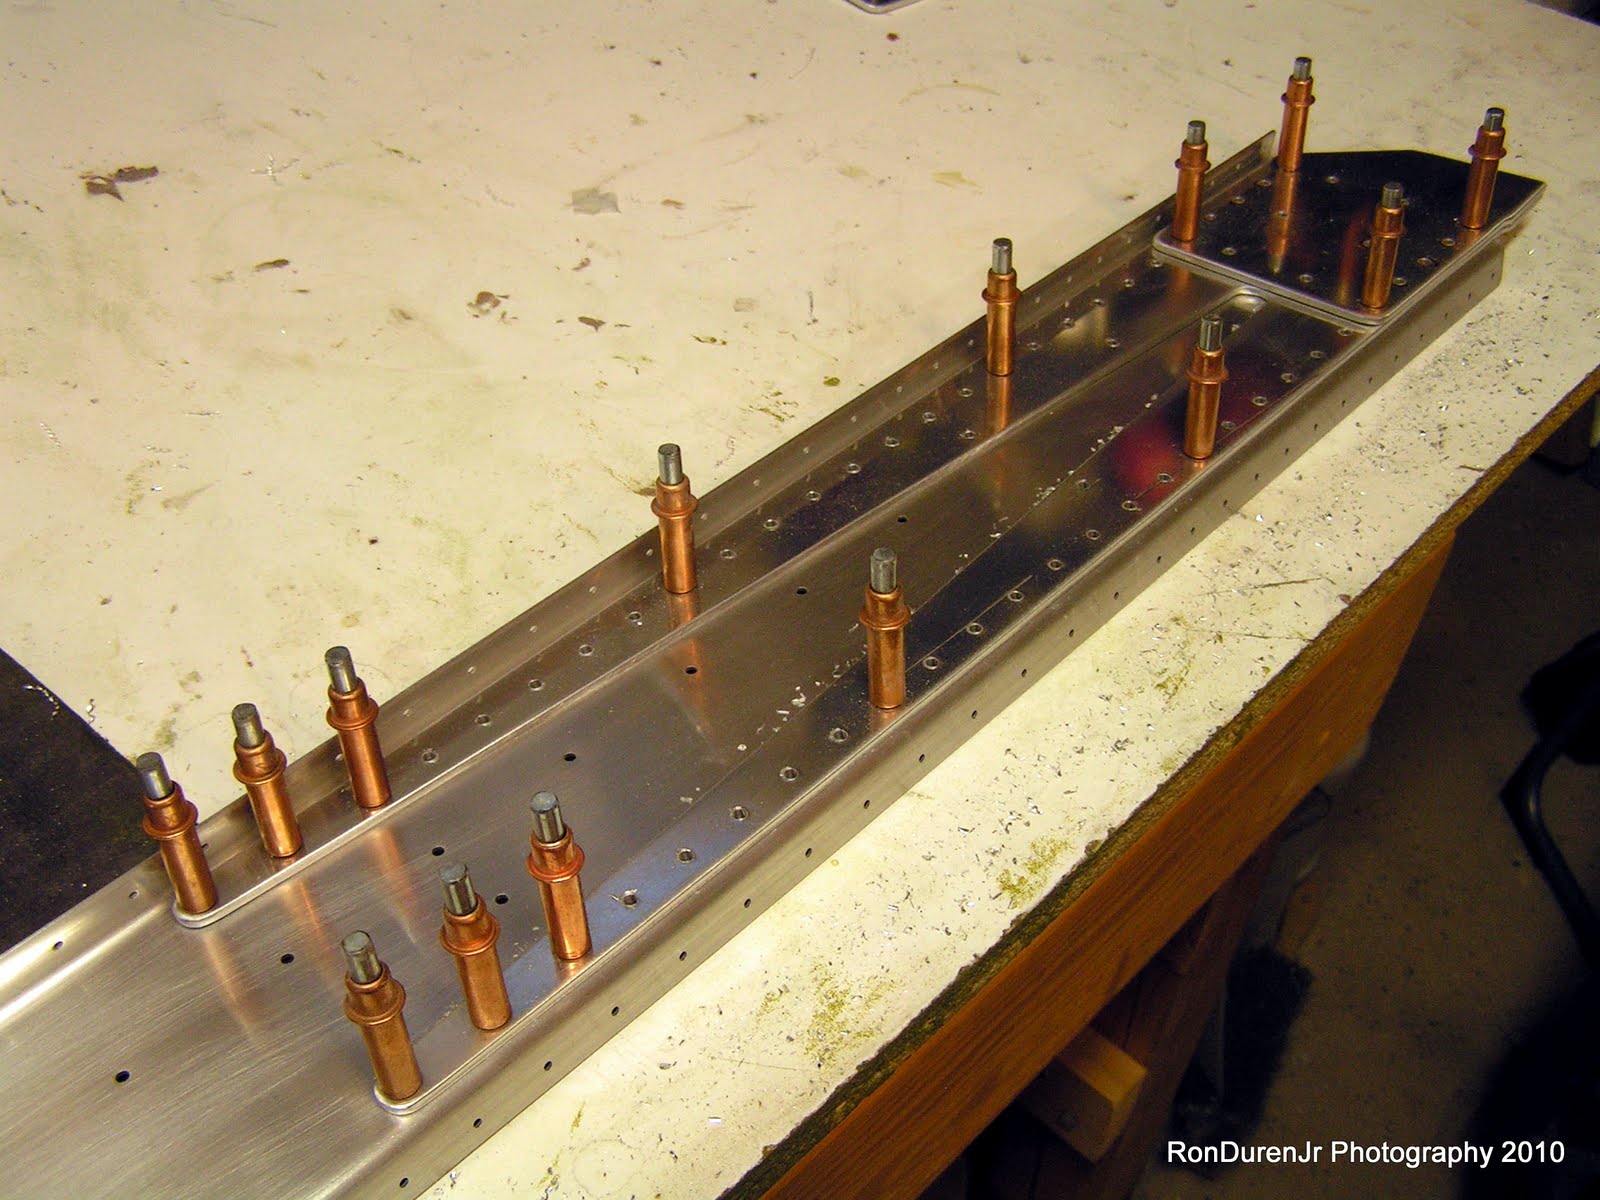
Left Wing Hanging HOBBS 262.0 hrs
I had a milestone of sorts, I finished riveting the left wing and got it partially mounted in the wing stand. I mounted it, leveled the ends but I still need to add a support in the middle to take out the sag and also remove any twist. I'll finish that up soon, in the meantime I finished all the riveting on the right wing. It sure goes fast when you've already done one. Doing both wings at the same time makes things more efficient, thats for sure.
Anyway, this will be my last work session before OSH departure. Tomorrow night I pack for the trip, leaving early wed morning.

Anyway, this will be my last work session before OSH departure. Tomorrow night I pack for the trip, leaving early wed morning.


Sunday, July 25, 2010
SoCal RV-ators HOBBS 256.5 hrs

There were three RV's, two RV6A's and an RV7A carrying six pilot/crew...Mercedes, Rich, Dan, Griffin, Karen and Sean. The original plan was to put four of them at Scott and Deb's and the remaining two at my house. Well, as with most things in life, plans changed unexpectedly. Scott's car had issues on the way to dinner, we were thinking it was a faulty fuel pump. Good timing huh? We had to pile into my truck to shuttle everyone to dinner and then Scott and I towed his car to a vacant mall closeby. Since Scott wasnt sure if he was going to be able to leave with the group as planned in the morning because of his disabled vehicle, we decided to put everyone up at my house since it was a closer drive to the airport.
Well, as I wasnt planning on having 6 people as guests it was bound to be interesting!! haha! But, amazingly enough, everybody was patient and we pulled it off without a hitch and it actually turned into a very pleasant visit with good new friends. I had 4 people in the two guest bedrooms with queen size beds and the remaining two ended up on the two couches. I managed to get everyone off the floor so it was a success and somehow I rounded up enough bedding and towels for everyone. It wasnt the Hyatt, but I think everyone had a pleasant stay considering the last minute change in plans. We were all up early, had some fresh ground coffee, good conversation and we poked and prodded at my wings in progress in the garage before our trip back to the airport.
They all thanked me profusely and told me I now have multiple Southern California destinations I had a welcome place to stay. I enjoyed meeting them all and told them when my bird was flying I just might take them up on their offers. Another shining example of the great RV hospitality and people.
Here are some pics from their arrival, stupid me forgot my camera when they joined four other RV's for a 7 ship departure for OSH. It was a pretty cool sight as I watched them all take off into the wild blue speeding into the distance at a rate of 3 miles/min. By afternoon they will have crossed several states.
You can have your snowmobiles, ATV's, dirt bikes and ski-doo's...but for my money, there is simply nothing cooler than being an aircraft owner and pilot....and the icing on the cake is if you happened to build said airplane with your own hands!! It should be pretty easy to see why I am passionate about this 'obsession'. After seeing them off, of course I headed home and then immediately out to the shop to continue converting my pile of aluminum into a flying machine. I will join them in OSH on wednesday, arriving by way of the peasants, by aluminum tube (commercial airliner). One day I will arrive in my very own chariot...until then, the journey continues.

'39-Alpha' loaded and ready for OSH

Gary's bird also awaiting departure

Dan's gorgeous 'slider' RV6A with Griffin as co-pilot


Mercedes' cougar...;) with Karen in the right seat. Sean's fine looking gray RV7A bringing up the rear with Rich riding along


Discussing dinner plans and the flight out

Thursday, July 22, 2010
Rivet Day HOBBS 256.5 hrs
I headed right out to the shop as soon as I got home to start riveting my main ribs to the main spar. I usually take a little break after getting home from work before getting started on the plane, but I was excited to start riveting tonight. It was a productive night: all main ribs are now riveted on the left spar. I wasnt sure if I was going to be able to pull this off solo, but after some strategy planning I got it done without too much problem. Sometimes its a challenge not having someone readily available to help buck rivets.
Checkoway recommended doing the main spar before attaching the rear spar...great piece of advice. You can flex the ribs as needed to gain access to the rivets, that helps a ton!
I also riveted together the aileron hinge bracket sub-assemblies. When I did, I noticed a note on the drawing saying not to prime the mating surfaces...hmm, too late, not sure if this is gonna bite me later? I have to remember to start reading all notes on drawings before proceeding. Builders beware.


Check out my 'modification' to my new gloves. I couldnt pick up rivets with them on, so out with the scissors and voila. It really worked great, protects my hands but still gives me dexterity with my fingers to pick things up. Adapt, improvise, overcome!! ;)
Checkoway recommended doing the main spar before attaching the rear spar...great piece of advice. You can flex the ribs as needed to gain access to the rivets, that helps a ton!
I also riveted together the aileron hinge bracket sub-assemblies. When I did, I noticed a note on the drawing saying not to prime the mating surfaces...hmm, too late, not sure if this is gonna bite me later? I have to remember to start reading all notes on drawings before proceeding. Builders beware.

My setup, I just used clamps to secure the main spar to the table and the ribs hanging over...worked good.


A view of my factory heads, I had a few 'smilies' but they weren't on the rivets but on the ribs themselves. In light of this I think they will be ok, I'll look at them again next session and make a final decision. I was using my 'offset' rivet set for the first time and its pretty easy to get that thing crooked...since it is crooked! :) I got better as I used it more, just by paying close attention to how it was sitting before hitting the trigger on the rivet gun.

I got the rear spar cleco-ed on and almost ready for riveting. That will come in my next session. I am beginning to realize that I am much better at riveting when I'm not tired and have good focus so I will tackle this when I'm fresh. After getting the rear spar and aileron hinge brackets riveted together it will finally be time to hang these puppies in the wing stand! That will be an exciting day....soon.

Check out my 'modification' to my new gloves. I couldnt pick up rivets with them on, so out with the scissors and voila. It really worked great, protects my hands but still gives me dexterity with my fingers to pick things up. Adapt, improvise, overcome!! ;)
Wednesday, July 21, 2010
Rib Priming Cont HOBBS 253.5 hrs
In the meantime I am keeping myself plenty busy with aircraft construction so I'm sure the time will go fast. Tonight I finished up priming all of the main ribs. They are now ready for final riveting, hee haw! I'm getting much better at this painting thing, these looked pretty good if I do say so myself. I have about 1/4 of my gallon of primer leftover. I'm guessing I should be able to finish up the nose ribs, not sure if it is enough to finish the wings however. Cross that bridge when I get there. Here are a couple shots of the 28 ribs drying (no I didnt spray that close to my truck!)

Nice Looking Console HOBBS 252.0 hrs
I saw this center console on VAF, it is pretty much identical to the ideas I have been kicking around in my head for my design. It also has the same interior/seats that I am considering, although obviously in my red/black color scheme. Really looks nice in my opinion. It belongs to John Clement in Melbourne, Australia. He just got his '7' flying this week, I plan to email him after he gets some hours in the cockpit to see how he's liking it and if he'd change anything. That kind of feedback from other builders is invaluable.
I know there are a lot of people that think anyone who would put a center console into an RV is bonkers, but not me. The reasons for not doing it are being cramped in the cockpit, restricted access if you need to get under your panel to work on something and of course added weight. Valid points.

I have several reasons I think I can make this work for me. First, I'm 5'9" and 180 lbs...not huge and dont plan to be putting on weight anytime soon. Second, I plan to spend a lot of time thinking of ways to make it easily removable for maintenance, which I think I can do. Third, weight is not that critical to me, I'll trade weight for comfort in the cockpit any day within reason...I think builders get way too crazy about the weight topic when building these RV's but I'll save that for another post.
I just really think the center console, when done right, can add a lot of comfort, functionality and aesthetics to the cockpit. Here is my reasoning: I like the throttle on the center console so I dont have to reach for it on the panel (nice for formation flying I have read)...this is exactly where its located on the DA20 and I really like it there. I want an arm rest, its amazing how much this improves comfort. Sit in an office chair with and without arm rests once...big difference. Added storage in the console for charts, books, manuals, etc...this will be my map box since I wont have one in the panel. It provides a place to rest your leg up against. When I ride in an RV without a center console as a passenger, there is nowhere to rest your left leg. And lastly, it adds panel space ahead of the throttle quadrant for items such as the fuel selector.
Tuesday, July 20, 2010
Priming Ribs HOBBS 252.0 hrs

I've never done so many large parts in one batch, the amount of prep work caught me off guard. Much different than doing the empennage parts. I am also getting low on my Akzo Nobel primer, I read that Checkoway ran out even before this stage in his project. For some reason I thought one gallon was enough to do the whole project?? I was sure naive on that one! :) So I am already dreading buying more of that stuff. It really works great, its bulletproof, but it sure isnt cheap.
My new Harbor Freight HVLP paint gun, $15...and I'm liking it so far.

My homemade paint rack, I used the cardboard from the empennage box...framed it up to add strength and voila. Works great, cost literally nothing...chicken wire and a couple pieces of scrap 2x4.

Monday, July 19, 2010
Aileron Hinge Brackets HOBBS 250.0 hrs
Tonight I finished up the main ribs, they are now ready for acid etch, alodine and primer. I also worked on the nose rib prep a little, deburring the lightening holes. Then I moved on to something a little more exciting and decided to prep the aileron hinge bracket sub-assemblies and get them ready for primer as well. With all these parts ready for primer, my next session might be a paint session so I can start riveting stuff together...thats always the fun part.


 So, ok, not too bad, just pay attention...I did the left wing without too much trouble. But, once again I was bitten by the mirror image right wing. So I start laying out the right wing exactly as shown on the left wing print. And of course it wasnt coming out correct, something wasnt right. I was soooo sure that I had finally caught Van's in a mistake that I was planning my morning phone call and actually was writing down notes of which ribs they needed to ship me when it finally dawned on me...duh, I got everything backwards...AGAIN! :) On the left wing, every 'R' rib is now a 'L' on the right...you get the idea. Once I did it correctly, everything fit exactly as it should. I wonder if I will get fooled by this again on these wings!? haha! The good news was no harm done except a little extra time and head scratching.


I also forgot to mention that over the weekend I cleco-ed the main ribs to the main spars and labeled them. I went with R1, R2, R3...and L1, L2, etc to make it much less confusing than Van's part labeling scheme. The whole deal is a little tricky because there are 7 different kinds of ribs that are subtly different and you really have to study the prints to know where each one goes. Complicating the endeavor is the fact that you have right hand and left hand ribs designated 'L' and 'R'...but all 'L' ribs dont go on the left wing and vice versa.
 So, ok, not too bad, just pay attention...I did the left wing without too much trouble. But, once again I was bitten by the mirror image right wing. So I start laying out the right wing exactly as shown on the left wing print. And of course it wasnt coming out correct, something wasnt right. I was soooo sure that I had finally caught Van's in a mistake that I was planning my morning phone call and actually was writing down notes of which ribs they needed to ship me when it finally dawned on me...duh, I got everything backwards...AGAIN! :) On the left wing, every 'R' rib is now a 'L' on the right...you get the idea. Once I did it correctly, everything fit exactly as it should. I wonder if I will get fooled by this again on these wings!? haha! The good news was no harm done except a little extra time and head scratching.
Reluctant Flyer HOBBS 248.0 hrs
This is a great article written by my friend Deb Mills. She is Scott's wife and they are based out at FTG and fly an RV9A (see their blog link below). Everyone out there who has a spouse or significant other involved (or not) in the building process should read this. To me, this is what a pilot calls 'romance'! :)
If only we all could be so lucky to have a supportive wife like this. I have heard so many horror stories of divorces that have been directly or indirectly caused by our 'obsession' that it makes me leery to think a marriage and an 'aluminum mistress' can coexist. Its nice to know they actually can. Now, of course, I'm not a married man so its kind of a moot point right now. But, I can tell ya, the flying question is one of the first ones that comes out when I have new girlfriends. Its now part of the package...
Words of Encouragement for the Reluctant Flyer by Deb Mills
Sunday, July 18, 2010
Climbing a Mountain HOBBS 248.0 hrs
This weekend was a productive one, I spent 10 good hrs in the shop cranking through more rib prep. Last week I was dragging my feet a little bit and wasnt getting much time logged, dreading all of the deburring and prep work ahead of me. Even though I knew it was coming, doing both wings at the same time, adds up to a whole lot of deburring and I wasnt looking forward to it! Ugh...
Here in Colorado, as most people know we have a lot of mountains. We are, in fact, the highest by average elevation state in the lower 48 states. With that comes a lot of peaks that are quite tall--we have 53 peaks that exceed 14,000 ft. Here in Colorado, we affectionately call these '14-ers'. To scale one of the 53 peaks is a sort of right of passage if you call Colorado home. I remember my first, it is a gorgeous peak called Mt. of Holy Cross near Vail. We started out at about 3:30am from camp hiking by headlamp, taking the long 9 hr, more scenic way to the summit. You have to leave early to make sure you summit early in the day and are on your way down before the afternoon thunderstorms roll in. Well, you start out full of energy and enthusiasm to conquer this daunting task ahead of you. About 3-4 hrs into the hike, as the sun is coming up and you are now above treeline, the entusiasm has certainly dampened if not completely vanished as you labored up the mt in the thin air. At this point in my hike, 5 of our original group of 10 decided they had enough and headed back down. They all had various excuses for throwing in the towel, but I remember not one of them told the truth and admitted that they just werent up for it and this was more than they bargained for.
I wouldnt have blamed them at all, it was hard work, much tougher than I had expected when I started either. We still had about 6 hrs hiking ahead of us before we summited at around 1:00. This next six hours, all at an altitude above 11,000 ft was the toughest of the trip. Not because of the difficulty per se, because most of the elevation gain was behind us. It was because, the enthusiasm and excitement were now gone, and we werent close enough to the summit to see the light at the end of the tunnel. This was where you had to trudge on and be persistent, determined to go on. One step at a time.
Finally we summited and to stand on top of the peak was an experience I wont ever forget...the culmination of a hell of a lot of hard work and it would have so easy to turn around and give up when the others did. I'm so glad I didnt.
My relevance for the story is this, building this airplane has striking similarities to climbing that mountain. There are a lot of builders that throw in the towel around this point in the project. Right now I feel like I am starting to get the middle of my climb up the mountain...that period when it just isnt sexy anymore, its more like work--it would be easy to give up. I trudge on, because I dont plan to miss this summit. Dont get me wrong, I am still enjoying myself but I can sense that the project is evolving into something different than when I started.
Time to climb this mountain! The most rewarding things in life are the ones that are difficult to achieve, if it was easy everyone would be doing it and that wouldnt be any fun. ;) If you're like me, and feeling the grind, KPR my fellow builders!
So, rib prep work (deburring, fluting, etc) is thankfully almost done on both the main ribs and the nose ribs. I bolted on the tie-downs to the main spar and drilled holes in the ribs for the cable routing.

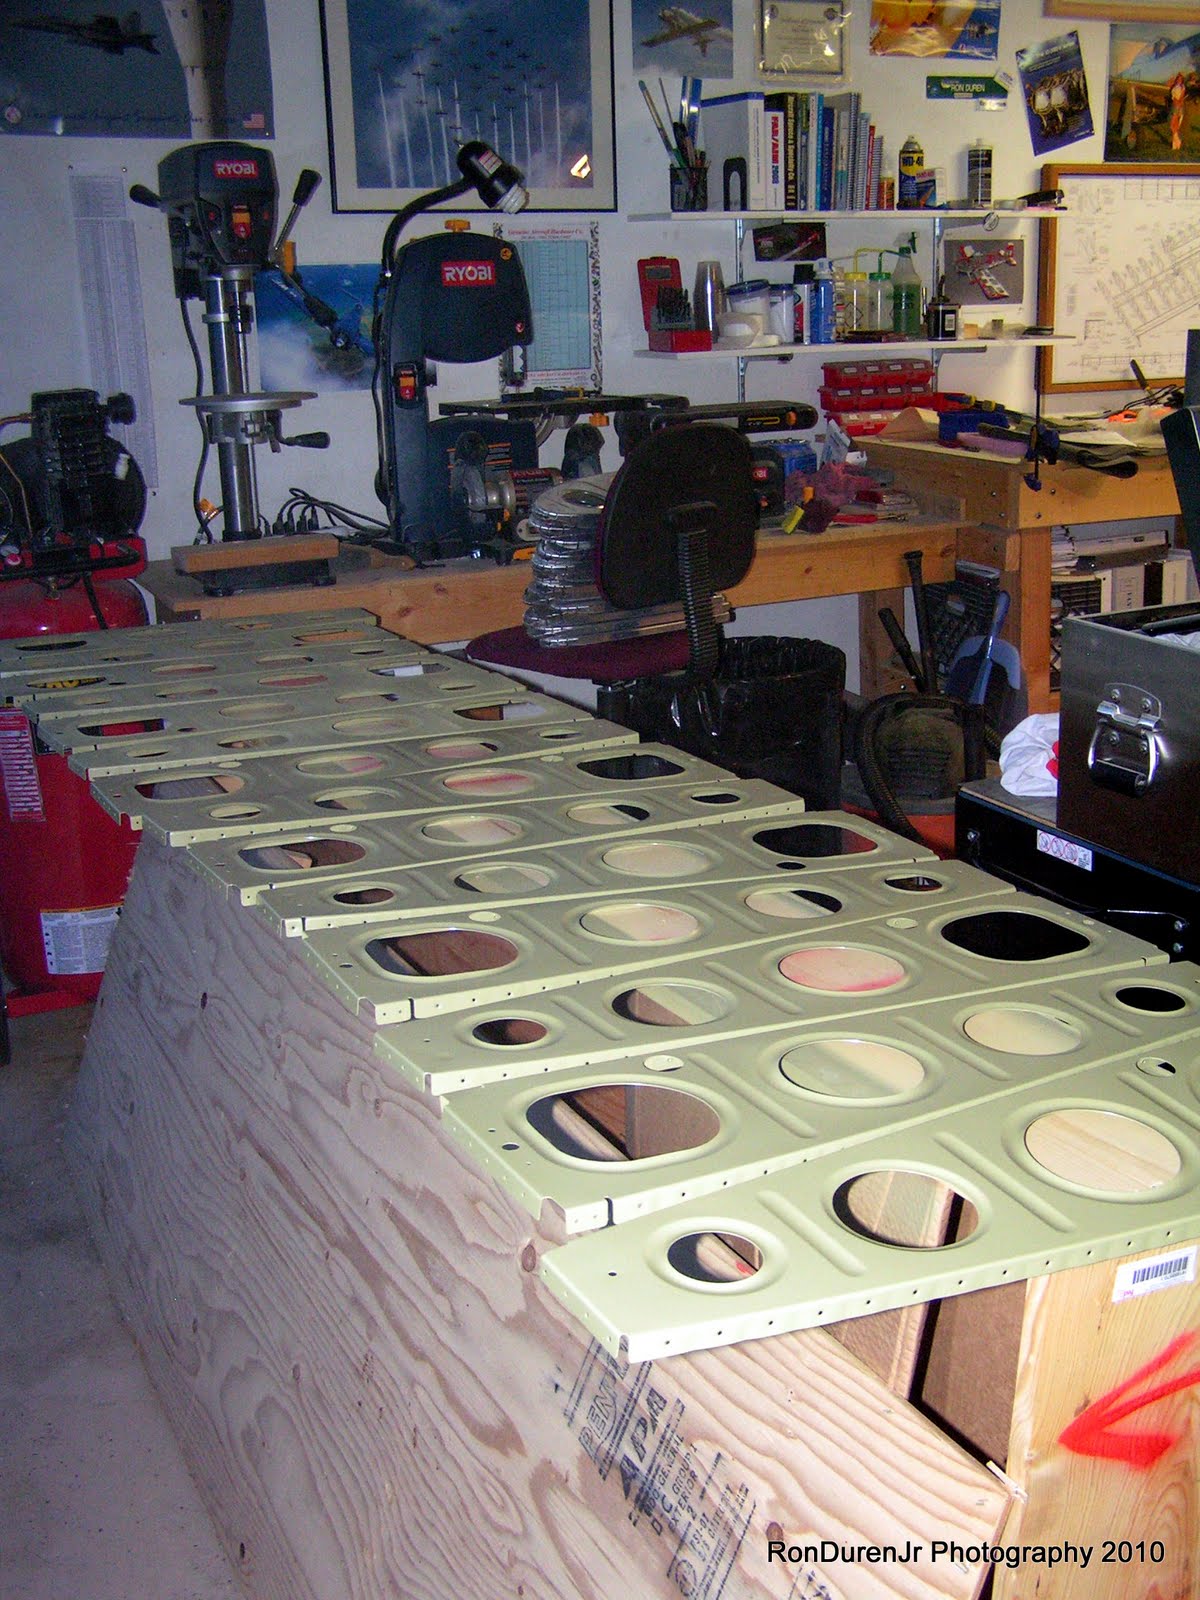
Main ribs, ready for prep, lots of 'em...

Before fluting: see how the rib is bowed in the middle. This is a natural occurence when the part is formed.

After fluting: you can see how the fluting, when done properly will flatten out the rib. This is almost an art to do it well. Ideally each flute is identical all adding up to straightening the rib perfectly. By the end of this process I was getting pretty good at it.
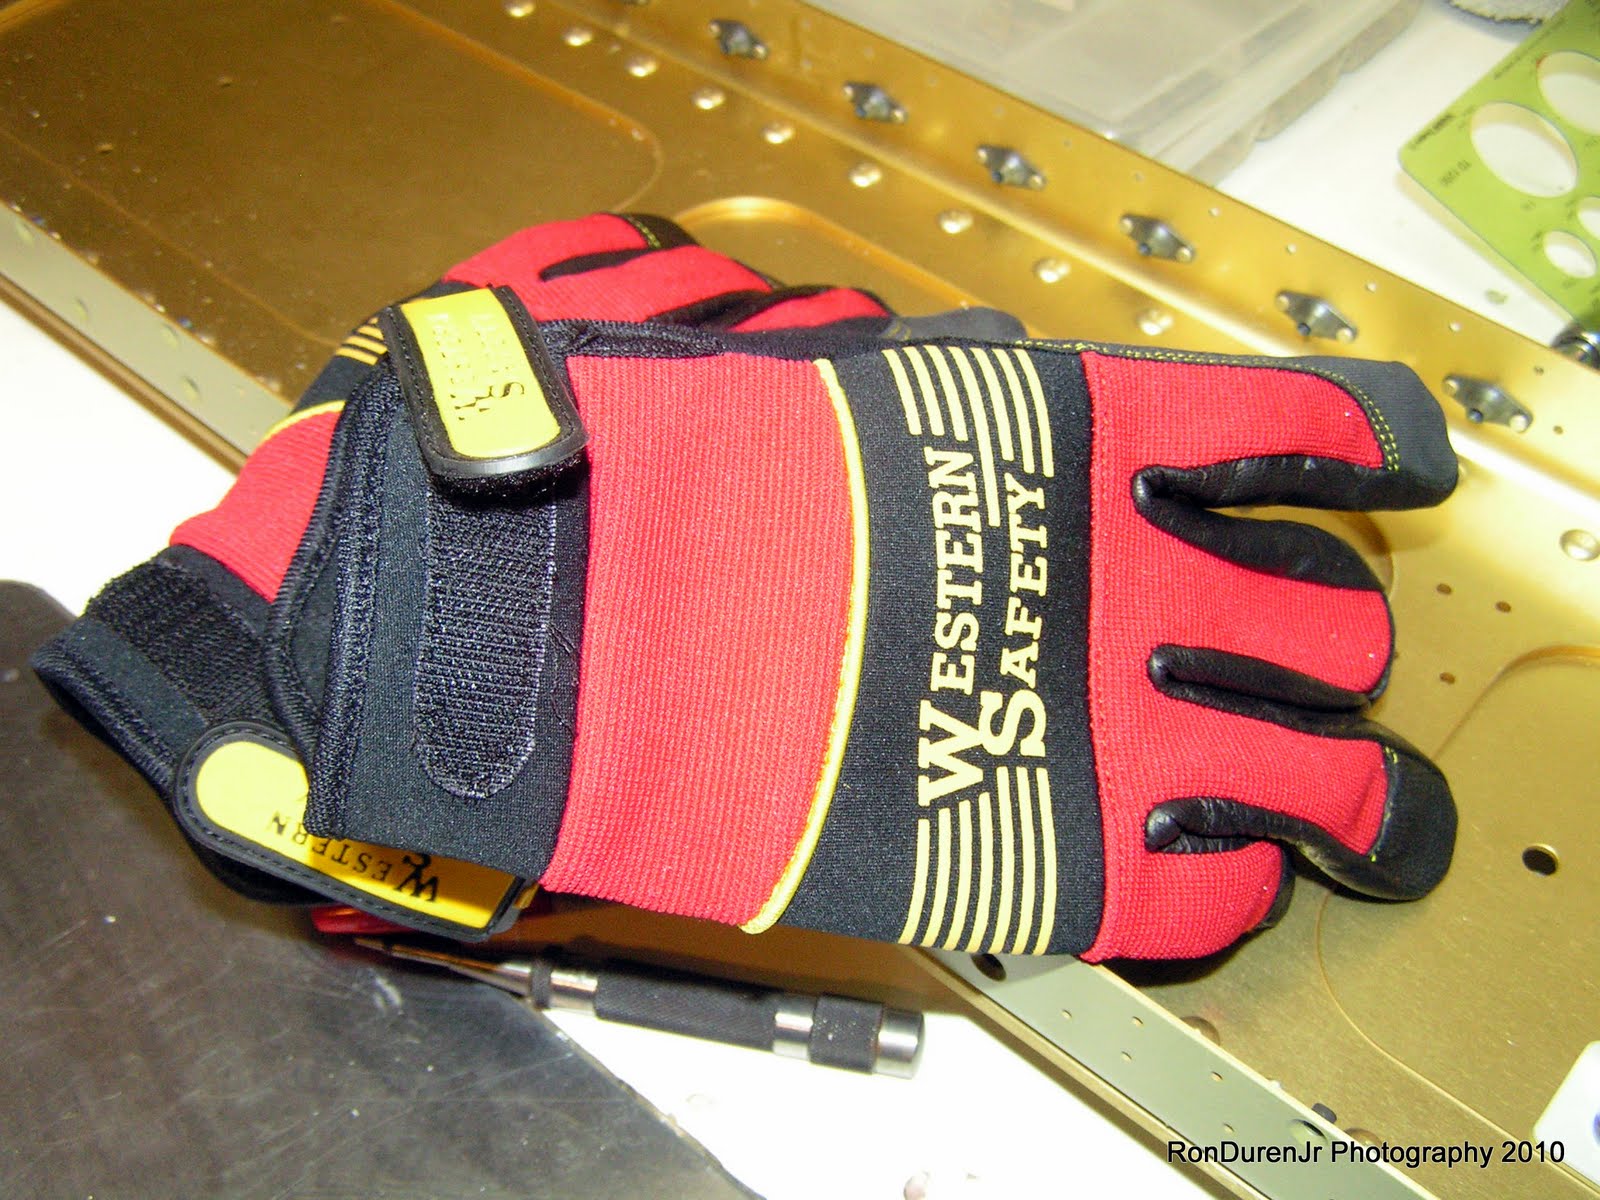
All of that fluting is hard on the hands, I had several blisters by the end of all those ribs. I went down to Harbor Freight the next day and bought these gloves to save my tender hands! Thats what happens when you work at a computer all day. :)

Stacks and stacks o' ribs...all fluted

Aileron bellcrank brackets on the backside of the tie downs. I put these on, but may have to remove them to assemble the bellcranks...hmm EDIT (7/19/10): Yup, although the plans say to install these now...dont. You cant get the bolt in with them installed, gonna have to take them off.

The access hole for the cable conduit, all of my wires running to the wingtip will route through here. Van's pretty much leaves this up to the builder to locate this routing path. You want a straight run that also doesnt interfere with the pushrods or the pitot tube. The lower left hole is where I originally planned to put it (the same location that Checkoway used) but decided against it because I didnt like how close it was to the corner relief cuts and the possibility of comprising the rib strength. The hole with the cross-lines is where I drilled instead. I really dont think it would be a structural problem in either place, Checkoway has 1000's of hours on his airframe now without a problem so its clear his layout worked fine.

In the lower center you can see my 1/4" dia pilot hole. I drilled one rib (the top one), then matched the next rib (seen here on the bottom) and then continued through the stack of ribs drilling pilot holes in the same place. I then used a unibit (love this tool!) to ream it out to 1.125" diameter for the grommet I plan to use. I wasnt nearly as anal about this as Checkoway was, he actually made a cardboard template to ensure every hole lined up exactly. Mine may not be that exact, but they are going to be darn close without as much time and effort. If they are off by an 1/8" here and there they will still work fine for a straight cable run.
Wednesday, July 14, 2010
Rib Prep HOBBS 238.0 hrs
This is certainly the 'grunt' work of the project, nothing exciting about this endeavor. Just pluggin' along, making progress a little at a time.
Tuesday, July 13, 2010
Ribs Started HOBBS 236.5 hrs
Started prepping ribs tonight while watching the all-star game. Jimenez pitched two scoreless innings and the National League wins 3-1, breaking their 13 yr losing streak to the American League! woohoo!
All Star Game HOBBS 235.5 hrs

Ubaldo is actually starting for the National League, a first for a Rockies pitcher. He also threw the first no-hitter in Rockies history earlier this year against the Atlanta Braves. That, along with his unbelievable 15-1 record, adds up to an amazing first half of the season for the hurler. Tulo, hands down my favorite Rockie, has a broken wrist, so he will be a spectator. And some might say he shouldnt be there because he is hurt, but he is hands down the best shortsop in baseball if you ask my humble opinion. As a guy who used to play the position and watches him on a daily basis, his defense and leadership qualities are off the charts and dont get enough attention by the baseball writers who dont follow him.
On a side note related to baseball, George Steinbrenner, longtime owner of the New York Yankees died today of a heart attack at the age of 80. I was never much of a fan of his, but I did admire his fiery competitiveness and baseball wont be the same without him. RIP 'Boss'...
Here are their mid-season statistics...


Rear Spars Done HOBBS 235.5 hrs
Logged another two hours last night riveting parts together before heading out to FTG to visit Scott as he was working on his IFR panel upgrade on his bird. I like to poke my head in on other projects and learn when I can from guys with much more knowledge than I. We had a beer and some conversation before heading home.
This brought my running total so far to 32 hrs on the wings (5 of which were inventory). So, all in all, it took me about 27 hrs to get the rear spars completed. Certainly seemed to take longer than I expected when I started out but I think that total is right in line with what other builders have done (Checkoway for example).
Update: regarding my driling mistake I mentioned earlier, I decided to build on. As my Dad jokingly said, those are just lightening holes in the rear spar! haha! All told, it wasnt 4 added holes as I mentioned, but 6 total. 4 of them are no factor, the other two were concerning because they blended together into a figure eight (see pics). Of those two holes, one of them holds on a cover bracket for the flaps (not structural and is one of many), the other one just secures the doubler and reinforcement fork...and it is also one rivet of many doing this job. I just fabricated a small reinforcement piece to make up for this one to add a little strength for piece of mind. That's my thought process on this flub. It is now going to just add to the character of the build although it would be hard to ever see it when the wing is finished...I wouldnt advise going this route if you can help it however! :) Its definitely kind of ugly to look at.
My tip to other builders: be careful when doing the right side of anything when building these wings...the plans will show the left wing (but not the right), you, as the builder, need to mirror that image in your head to do the right side. Takes a little concentration and its easy to get confused, so beware!

Here is a shot of the infamous 6 holes, click on the pic to enlarge.

Here you can see an inserted rivet, this one was the one that caused me concern. My thinking was because of the figure eight hole that the shop head would not form correctly with this configuration and probably just bend over.

So I quickly fabricated this reinforcement piece out of some scrap alum for the backside. Hit it with some self etching primer and voila, the shop head formed up nicely.

To give you an idea, this is that same rivet from the other side. It isnt going anwhere!

This is some fabrication work I needed to do on the inboard side of the doublers. This is just an RV7 specific trim I believe. This pic shows one already trimmed per the drawing, I just traced the outline on the other one to match.

More fabrication, had to cut out a hole for the pushrod. It is shaped like that to match the movement of the pushrod. Not a big deal, did some of it with the unibit and then trimmed it up nice with the dremel.

Alodine bath...


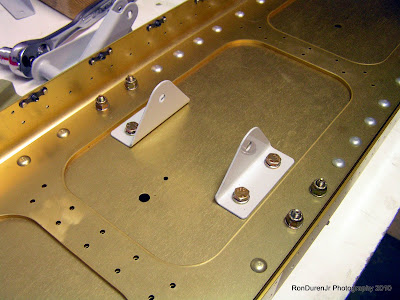
Tie down brackets. I wasnt happy that my nut plates came out a little askew...just a pride of workmanship thing since it really doesnt affect their functionality at all.

This view shows the alodining process in the tapped hole that I added for the tie down rings. If you werent alodining parts I'm not sure how you protect this hole from corrosion since painting threads probably wouldnt be advisable. Came out nice like this.

And a few shots of the finished parts: the holes circled with no rivets installed are purposely left open as they are riveted later in the assembly of the wing skeleton.

Note: I forgot to machine countersink some of these holes before priming. Doh! They will sit flush under the aileron bracket. No big deal, I will do this later and just hit it with some self etching primer when I'm ready to rivet this section.

Next step: prepping the ribs!! Woohoo, not too excited about this step but its gotta be done.
Subscribe to:
Posts (Atom)