
I've used the mountain climbing analogy several times while building my plane. It is such a great metaphor for talking about the emotional ups and downs you go through during the build. When climbing a mountain, its an emotional high when you finally, after a long climb, catch a glimpse of the summit. Being inexperienced at mountain climbing, much like plane building, I remember thinking...its so close I can touch it, I'm done...its right there for criminy sakes!
Not so fast I learned, let me tell you, that last push for the summit is usually the hardest part of the climb. The altitude is high, oxygen thin and energy reserves are low. The good news is you can see the end goal, the bad news is you are not quite there yet and it seems to go agonizingly slow. I found out I still had plenty of hard work to conquer that last small distance to the top. My approach was to stop looking at the summit, put my head down and just focus on one step at a time. Eventually I will get there...
Right now, the project is feeling just like that push to the summit. I am methodically marching up the mountain, without focusing my gaze on the summit. I work on the plane pretty much every day these days and I'm making slow, steady, measurable progress...one step at a time.

In a previous post I showed you the start of a fiberglass cap that will transition my arm rest to the throttle quadrant. Here is the evolution of that cap...I will sand this a little more and eventually it will be covered with a vinyl wrap possibly so the surface doesn't need to be perfect. The red leather is just a sample piece Luke at CAD sent me when I was picking out my seats...just to give me an idea what it will look like with leather. I will probably not go with red on the armrest however...black or gray most likely.

I really think this is going to a pretty sweet looking interior when I'm done...I know, I might be biased...but I like the way its all coming together.

Fiberglass and 407 West systems filler (rust color) on the bottom rudder cap is pretty much done. Some light sanding and then I'll throw a coat of filler primer on it and call it good. Here I test fit it with everything installed...wiring to the tail strobe and trim motor in place. It wasn't exactly an elegant install with the wiring...but not too bad either, I can live with it. Again, tired of dealing with it.

My goal is to get all of the cockpit wiring done before mounting the wings. I moved my attention to the seat heaters. It took some research and thinking about how to wire these up, but I think I have it finally figured out. I am not using the switches supplied, but adding a 7A dimmer instead. I got this idea from Jason Beaver. I thought about a clever disconnect for the wires like he did, but decided it wasn't worth the effort as I don't expect the co-pilot seat to be removed very often. This setup will suffice just fine. Unplug the two connectors and both seats come out fairly easy.

I got a little sidetracked here...as I was doing the seat heaters, for some reason wanted to install the Velcro that holds the seats in place...and the stick boots. Sidetracked or not...this was fun as I got a glimpse of the 'summit.'

These are my dimmer switches for the seat heaters. I decided to add the two LED's, which I will wire in series so you can a visual indication that the seat heaters are on. They will also dim along with the seat heat...kinda cool.

Here is the backside wiring as I was doing some bench testing of the LED's and the seat heaters with the dimmer. If you go this route, make sure you get the appropriate dimmer switch...its a higher amp rated version from pilot lights.
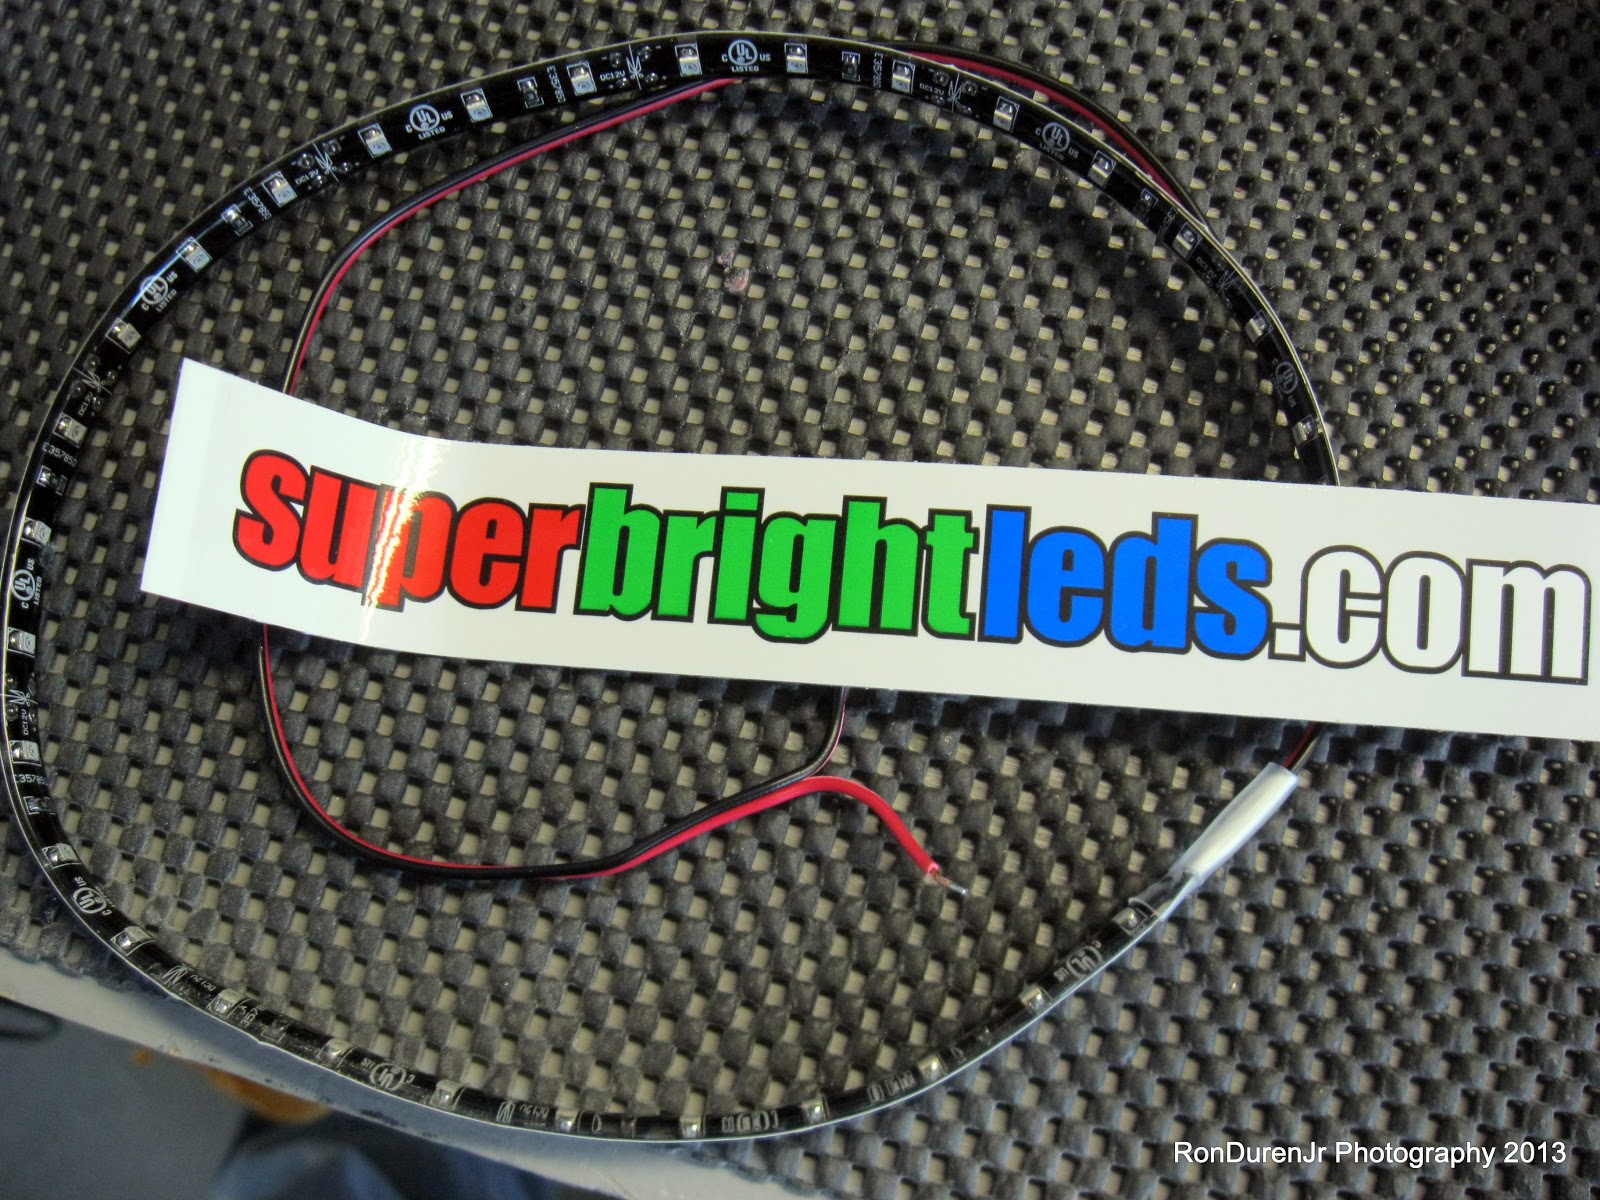
Early in the project, I bought a glareshield strip from an aviation company and paid about $60...which I thought was a little ridiculous. I have changed my interior lighting scheme since then (more on this later)...no glareshield light for me now, but I am using these LED strips somewhere else so I needed to buy another one. I found this website shown in the pic...got what looks like an identical version for $12.99 plus $3 for shipping. It should work just fine...don't pay $60 for these, they are not 'flight critical' and dont justify that kind of expense.

Here is a pic of where my stick grip wiring will attach to the large (actually two) terminal block. From the terminal block I will distribute wires throughout the plane. The white wires you see will attach to terminal block, on the other end are DB15 connectors that go to each stick. I don't know if this is the most elegant way to do this...but it should work fine and I'm tired of trying to be clever about this, I'll leave that to you.
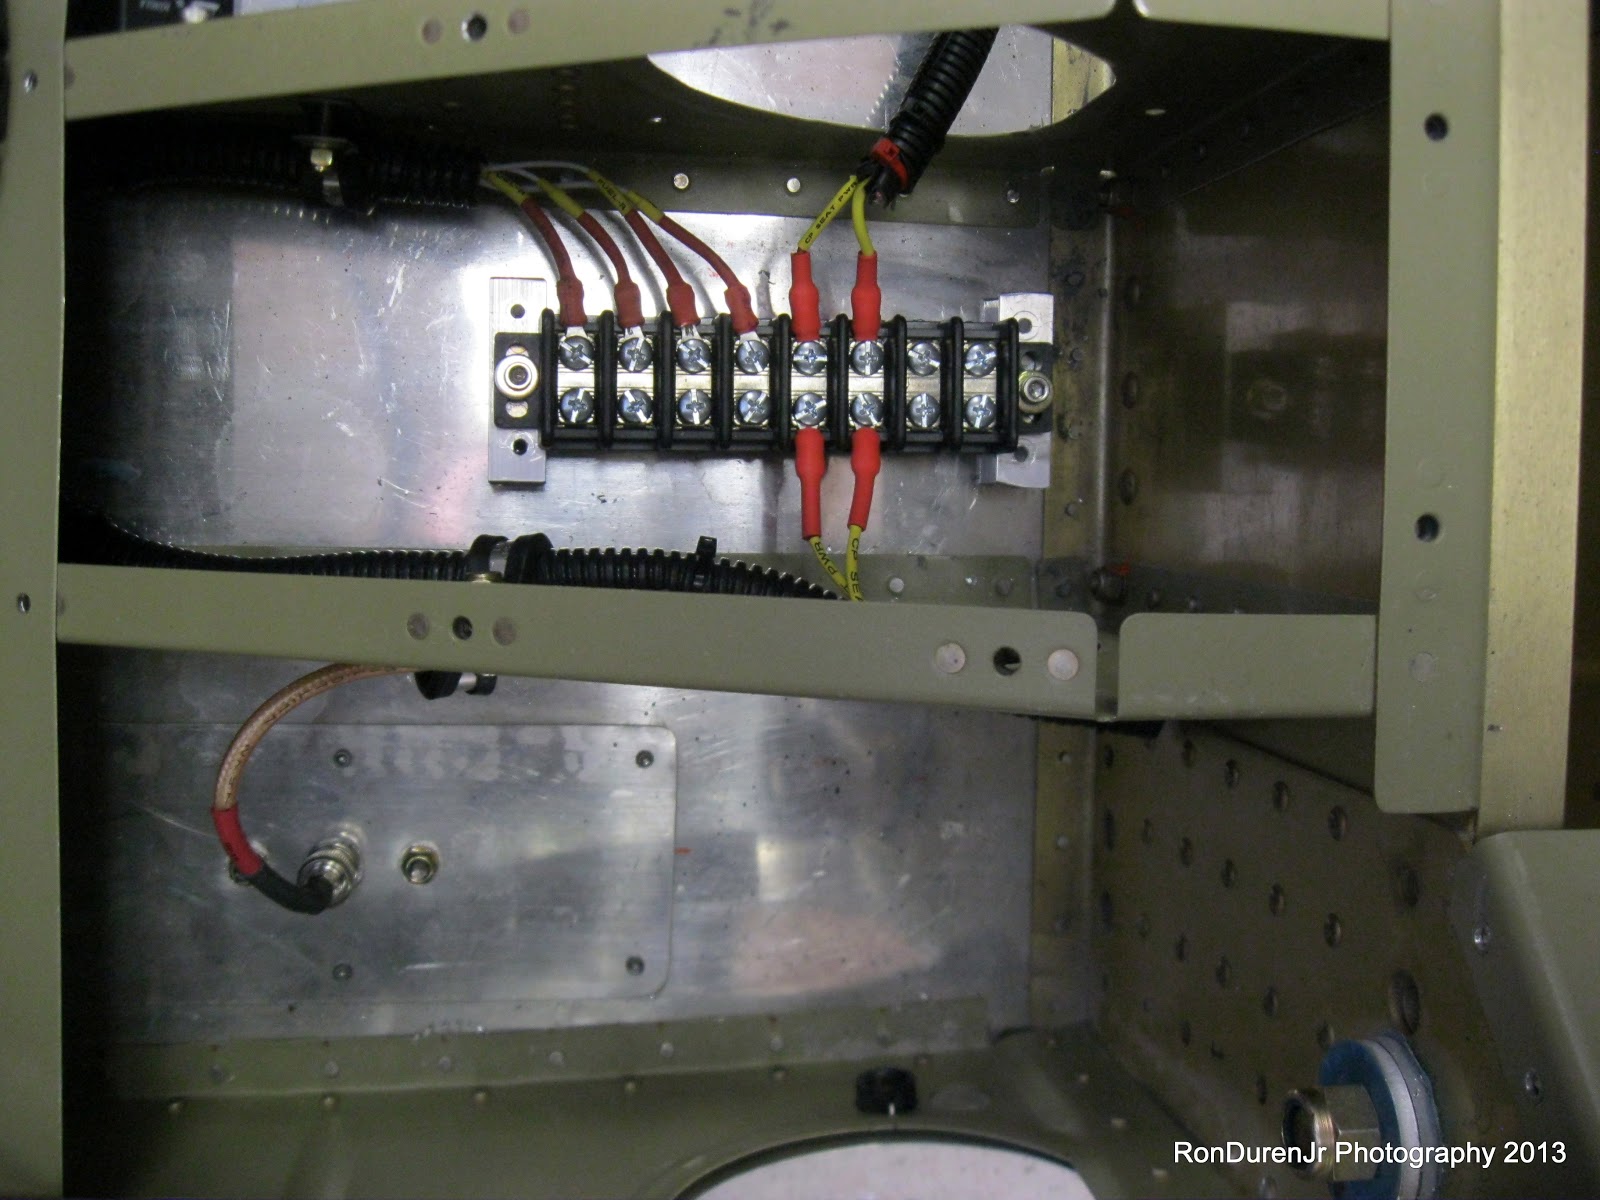
My terminal block on the right wing...I also ran my seat heater wires to this for what I think is a nice clean solution.
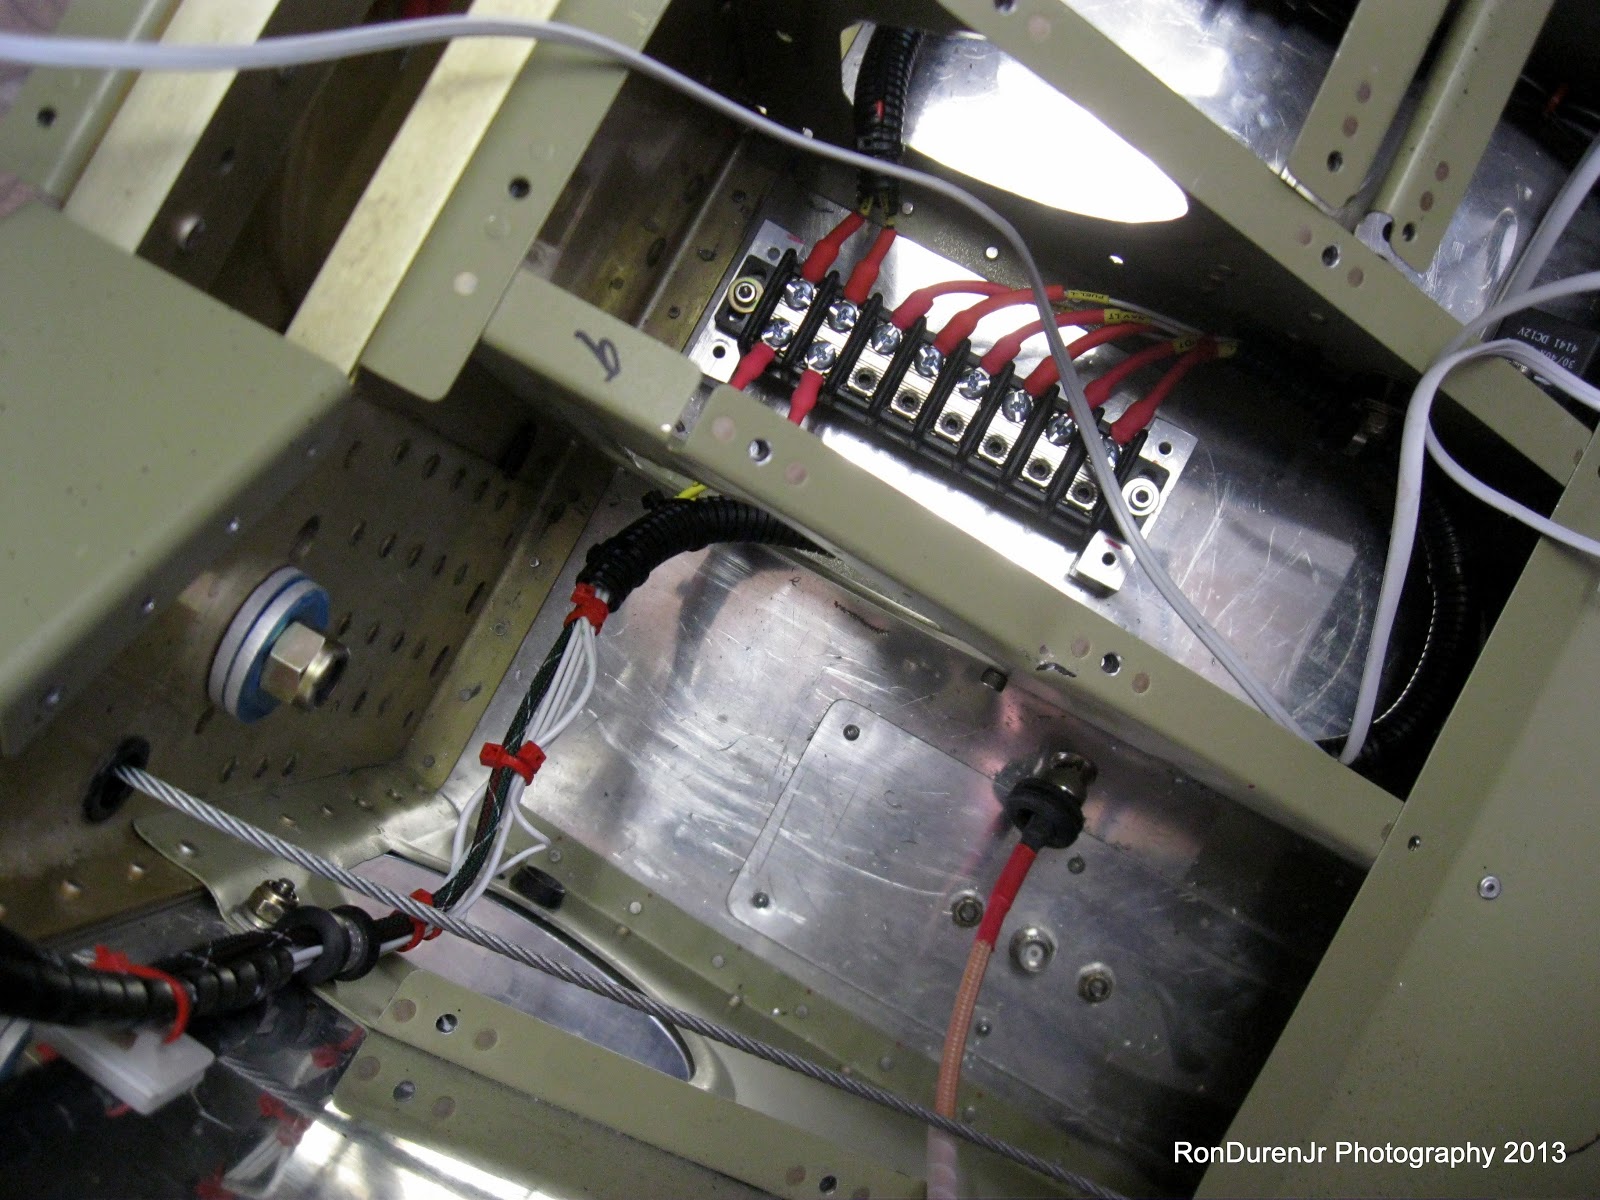
Left wing terminal block...notice my wires running up the side of the fuse, these will be covered by the side panels. The holes in the spar carry through for wiring runs are pretty inadequate for an airplane with as much wiring as this one. I didn't want to start drilling more holes in spar carry through...so I went around it.


As you can see...the wiring runs are "maturing"...I am getting the routing finalized and the loose wires are slowly disappearing. I will do a complete test fit and eletrical system test, then disassemble for final painting and then riveting on the top fuse panel. We're getting there.
No comments:
Post a Comment