
I have gotten really good at posting every two weeks vs. my normal weekly posts. Again, I apologize, but the website has taken a backseat to getting shit done. :) I'm sure you can understand. When you reach this point in your build, you'll probably say..."now I get it". Bare with me as I come down the homestretch. Plenty of pics for ya this week.
As you read in my previous post, I am now working my way through my punch list. I have been marginally successful at getting items crossed off. Sometimes it goes fast...three or four items in a work period, other times, none get crossed off. The good thing is, progress is being made.
The last two weeks saw mostly electrical work, with some other mechanical items thrown in when I get sick and tired of wiring...I need a break every now and then from that. The electrical part of this build really has been a lot more work than I expected. So, if you are building a plane even remotely like mine...prepare yourself better than I, it will take considerable effort to get through it.

Terminating the PAR100EX, I must've zip-tied this into place about a half dozen times already only to remove them because I forgot a wire, had a broken solder, or had to double check something. I think she is finally good to go.

Finally adding my manifold pressure line (the one without firesleeve). I thought I would have to order a custom length, but found this line in my pile of unused hoses that worked perfect....I think this one came from Aerosport power with the engine?

Here you can see the routing along the firewall of aforementioned hose up to the manifold.
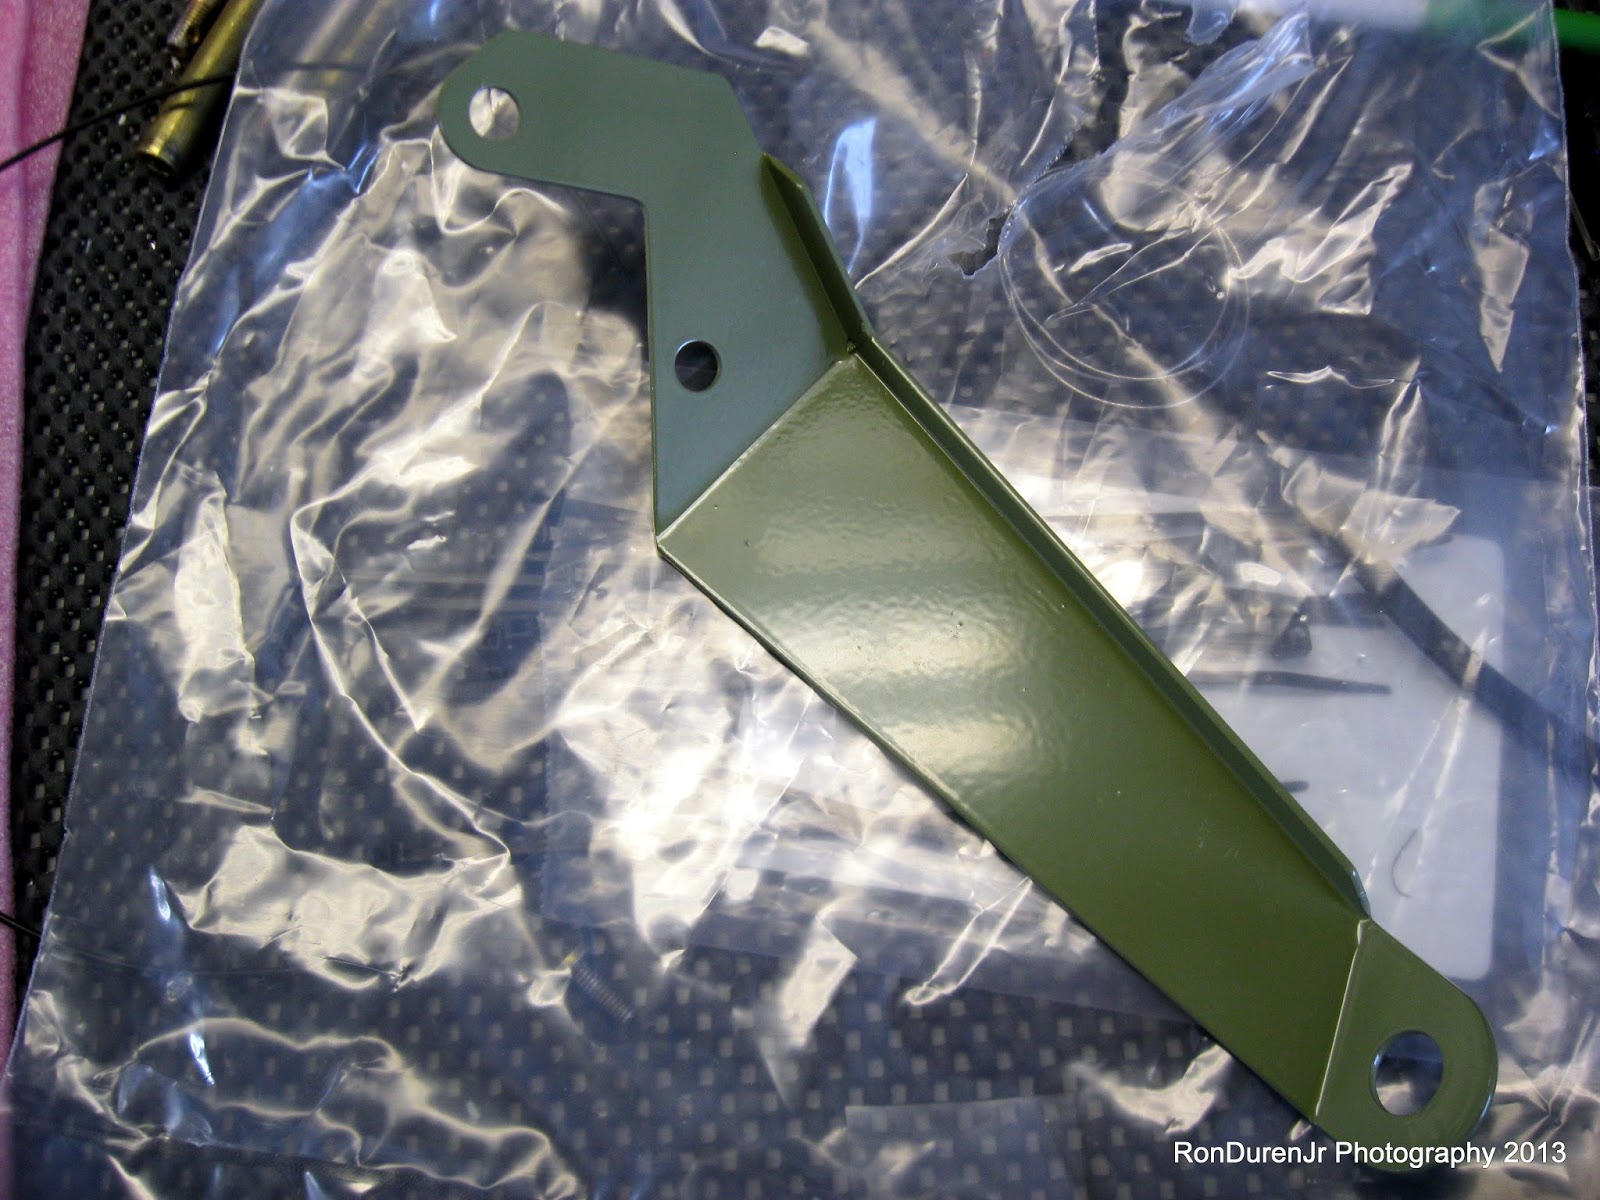
This is my prop governor cable bracket, ordered from Whirl Wind. Its specially designed for my Czech governor (always forget the name?). You can buy the Van's version of bracket, but you will need to modify it to work with this governor. I figured, why do that when I can get the correct one. My advice, order this when you order your prop and governor...save on shipping, I didn't even think about it at the time.


A couple more pics showing it mounted in place

Next, I spent some time working on my cowling...as mentioned, my break time from wiring. Specifically I wanted to work on my hinge pin covers. Aerosport Products makes these and I thought about just buying a set from them and being done with it. I'm kind of tired of spending money right now (the bank account is exhausted), so I am building my own. Shouldn't be too tough. First order of business...create a template. A paper plate was handy...

Positioning it on the cowl....

Rough cut....

Clean it up with a rotary file...this pic will give you an idea where they will sit.

Bouncing around...working on the final details of my empennage fairing attachment.

And some more bouncing...installed my canopy guides that I bought from Buller Enterprise. Not too much to it, although since I added a reinforcement bracket behind it (i.e., two sheet metal thicknesses), I just tapped these holes. Getting a nut on the back is a fricken pain.

After going around and around...and doing some research about whether I should include an oil cooler shutter, I decided to buy the Van's version for $85. Its a little pricy, but its a nice product, I gotta say I was impressed with it. I was going to fabricate my own, but I'm glad I didn't, it would be hard to build one this nice.
This shutter is designed for the smaller oil cooler, but most guys on VAF say this one works just fine with our bigger oil coolers. The reason being is the oil cooler fins constrict the airflow so much already that the percentage of open area you see here is plenty of airflow for the cooler. Time will tell if this holds true.
Basically I just ground down the sides enough so that it fit nicely in between the flanges on the oil cooler. I like how this turned out, its a nice clean install. I can add high temp RTV or a gasket to seal the top and then secure it somehow and it'll be done. This will be cockpit controlled to fine tune the airflow through the cooler as needed.

The design has two shutters (four pieces of sheet metal) sandwiched between the outer shell...as you move the lever, the two shutters move in unison. Its a pretty slick little design since you dont have to worry about pinching the shutters during the mounting. Here it is roughly half closed (click on the pics for a better view).

Fully closed...

The way I installed it...it easily just slides out the top if needed. No need to remove the cooler to get to it. However, if I use RTV on it...that may not so easy to remove, but its still pretty cool.


I got this handy tip off VAF...add a "bug" nut (or wire nut) to the lever. Van's carries them. This has a set screw to secure the control cable wire...its a nice clean, professional looking setup.

Installing my vernier style mixture cable through the firewall. I bought the standard 48" length from Van's...and yes, its too short...PITA. I ended up buying an extension...I'll post pics later.

Cockpit location...and mounting. The throttle and prop will be on the quadrant, the mixture is the only one that will be vernier style. The reason being is the nice fine tuning capability of the vernier for dialing in the mixture for LOP ops.

Finalizing the wiring behind the bulkhead...ELT, remote transponder, remote COMM. I could've done better with the wire routing...but it'll work. Much of my wire routing leaves something to be desired, its tough doing this the first time to make it look pretty.

Getting prepared for my first full (well, almost full) system electrical test. Vertical power instructs you to use test leads that they supply to check power to each device before doing the full system power up. I'll admit, I only did checks on the high dollar stuff as every wire seemed to be a little bit overkill. Here is the SL40 powering up...cool to see after months of slaving over the electrical to see some action!

And it gets even more exciting with the GDU375 power up...now we're talking!

And lastly, the SkyView comes to life!! The GPS was still trying to get a fix at this point so it was reading an altitude of about 2500 ft (well below the approx 5600 ft at my home airport), which is why all of the surrounding terrain is red. The red designates that the terrain around me is above me. If you see this in flight...it is "game over" and it will probably be the last thing you ever see. Of course, after a few minutes the GPS finally got a more accurate fix and this changed color.
As you might guess, the next post will show the full system power up with the Vertical power...stay tuned.
No comments:
Post a Comment