

More canopy work...finishing out the inside, added some flox fillets and some filler to smooth it out


I bought this little 'tool' from Avery tools. A magnetic finger for installing nuts/washers in really tight areas. I tried using tape prior to buying this with frustrating results. Mainly I wanted this for the nuts/washers that hold the strut brackets...those are a PITA (pain in the ass) to get to! Even with this, it took me awhile...a lot of deep breaths.

So, after getting the aforementioned hardware installed I put my struts back on. Now, doesn't that look cool!? I'm obviously biased, but the tipup canopy in the 'up' position like this is so cool looking to me.


I purchased a chunk of 3/4" thick black UHMW plastic. I will fabricate a new mounting block for my canopy latch, Van's sends a white block...but obviously that would look horrible in my black cockpit so I'm redoing this. To my local builder friends...I will have plenty leftover if you want some material to do the same.

Sherwin Williams color chips for my prop..."Flight Red" blades with "Fall Leaf" tips...need to send these off to Whirl Wind so they can match them
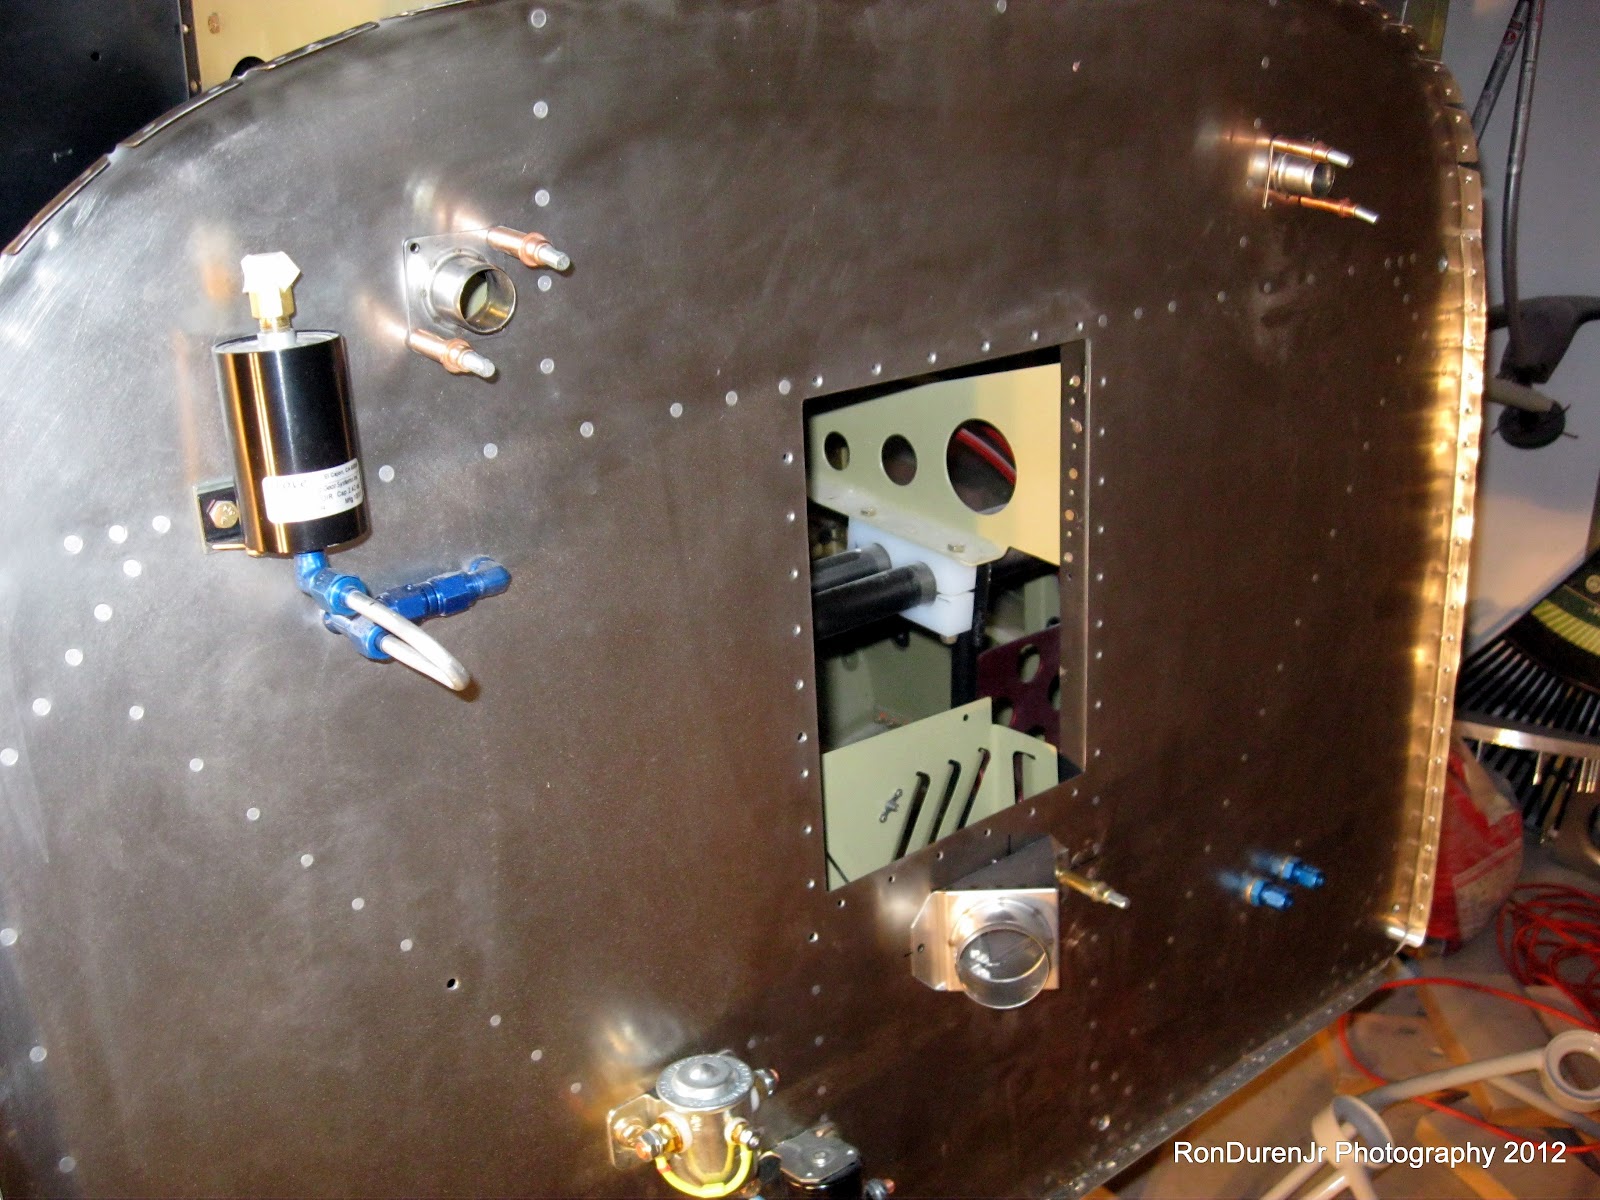
Getting the firewall ready for engine hanging...just about there. I should be getting a delivery date any day now from AeroSport Power for my engine. Two firewall pass-through kits for wiring. My SS heater box also installed. Make sure to use SS hardware on these installs.

If you use my strategy, be careful that you don't get your pass-through's too close to the manifold. I got lucky...I didn't think ahead before drilling the 1" holes for the pass-through.

My pass-through with the firesleeve in place. What you do is cut another piece of firesleeve that will wrap around your wires, inserted into the firesleeve shown here and then secured with hose clamps and caulk. Pretty slick...but these kits are $50 each from ACS...not cheap. And, my rant, they don't come with SS hardware!! A $50 kit and they cant throw in $2 worth of hardware?? They claim in the literature it is so the builder can decide on screws or SS rivets...really? Just send some screws already. I had to make a run to home depot to get some button head screws...you can see they are allen head screws. I don't like phillips...strip out too easy and screwdrivers are hard to use in tight quarters. As you start doing FWF stuff...think about making it easy to work on since you will be the mechanic. With that in mind, I've changed a few things that I'll share as I progress.

SS heater box installed...I did use phillips here only because I had these laying around, I may swap them for allen head screws later. I used some biotherm fire sealant (supplied with the kit...no screws, but they do provide sealant) here also...notice the gray fillet.
No comments:
Post a Comment