On a personal note, I finally installed a fence in my backyard...that was nice as it was something I have been putting off for several summers now, and yes, I frequently think about what I could've bought for the airplane with that money!! ;)
And then there was the flying part...I became a tailwheel pilot, and that was VERY cool...the highlight of the summer for me. In addition, I attended a mountain flying ground school and made two mountain flights to Granby and Leadville to get a "mountain flying" signoff in my logbook. All in all, some good training, I learned a ton...I feel like I am a much better pilot because of it. I hope your summer was just as good or better!
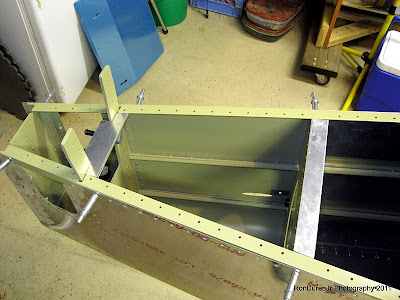
Ok, back to the project status...still dinking with the baggage compartment. I need to have Deb help me do some riveting on the bottom skin before I finish this up...so for now it will wait for that effort. So, to keep moving I switched gears to the aft deck and finished that up...I was a little behind in the checklist in getting that done. After that, I moved to the flap assembly...and am just getting into that now. Here are some pics...
I realized I almost screwed this baggage panel up when I match drilled it. Make sure you cleco it in place along the bottom BEFORE match drilling it to the bulkhead. The bottom cleco's will properly place it nice and straight. I didn't do that and my panel is just slightly crooked, hardly noticable...luckily it lined up enough to install it ok. Just a silly oversight on my part.
Here is a pic of one of my hidden compartments...looking good. I haven't selected a latching mechanism yet...I want something I can lock up, so I need to research some options...I'm thinking about a cam lock of some kind. I'll do that later.
The plans call out for some 'wear blocks' for the seat belt cable as it goes through the corrugated panel. I could not find the material for these things anywhere in my pile of parts...!! Not sure where they could be? So I had a piece of 1/8" nylon sheet laying around and used that...it'll work just dandy, although 3/16" thickness probably would've been better.
The plans say to use pull rivets to secure these in place. Something about the description of 'wear blocks' made me want to install screws/nuts instead. If I have to swap these out a couple years from now, I'd rather have screws than drill out rivets...weight addition is minimal.
On to the aft deck...need to fabricate a couple spacers out of 1/8" sheet.
In place for a test fit before match drilling and priming...
And the finished product after riveting...now that looks HOT doesn't it? I know...I'm a dork! ;)
If you look closely you can see where, in my attempt to use the rivet squeezer in this tight space, I dinged the edge of the aft deck in a couple places. I broke out one of my small files and dressed these just like you would a ding in your prop blade. Its imperative to eliminate any sharp edges that are stress risers...cracks will form if not.
Now to the flap assembly. I spent a good half hour just studying this drawing to get a feel for how the assembly goes together....its kind of a 'busy' drawing. I started by cutting to size, notching, drilling and then finally cutting in half the center bearing shown here.
Be careful here...the plans say this is a 'full scale' detail view for this attach bracket...but as you can see, its not...3" doesn't translate to 4"...at least not in the math I learned. :) The 4" dimension is correct, as are all of the dimensions....its just 3/4 scale rather than full scale. Not a big deal...momentary confusion is all.
And here you can see a properly done full scale view...just lay that puppy right on the drawing and it should match up exactly. Always look for that 'full scale' note on detail views...it is kind of handy when they do that for you.
Here I am...Saturday night...watching a little college football and having a beer after a productive 6 hr work day. Sometimes I just like to hang out in the shop when I'm done and admire my handiwork...gotta enjoy the journey...once again, I know, I'm a dork! But I bet you can relate... :)


No comments:
Post a Comment