This weekend, I tackled getting the aft fuselage skin riveted in place. I made sure I had everything attended to in that area (static ports and routing, wire routing for the tail strobe, etc) of the fuse and figured it wouldn't hinder me to rivet it now. I also wanted to get this riveted so I could do finishing work on my empennage fairing as the cleco's were in the way. So, here are some pics...
Before I get to the aft fuse skin...here are a few shots of my work on the forward canopy structure. After bending the flanges that I showed in a previous post, it was now time to add flanges to the lightening holes....a little more tricky. After considering more creative (ie, complicated) ways to do this, I ended up doing it exactly how Van's suggested....very simple, but effective, as you can see. Just cut a 1/4" notch in a piece of scrap wood and bend them carefully by hand. In this pic, you can see a before and after shot. I liked how this came out. I just took it slow and easy and was very deliberate. Don't try and bend it in one pass...I typically did two to three gradual passes to get the full bend angle I wanted.
When I was doing this task, it dawned on me how much I enjoy stuff like this. Things in the build that you have to do by hand...it takes a steady touch, concentration and some genuine workmanship to get good results. All of which are right up my alley. I also noticed, muck like my Dad, that I had my tongue hanging out while I deep in concentration!! haha! I had to laugh when I noticed this...but hey, Michael Jordan, the greatest basketball player who ever lived, did it too! Anyhow, when I thought about it...whenever my tongue is hanging out, I am very much enjoying myself...lost in the moment. From here on out, it'll be known as the "tongue factor"! ;)
Now that the flanges were done and I got them match drilled and cleco-ed, I shifted to fabricating the little attachment pieces.
Here they are cleco-ed in place...looking good. Some dimpling, edge/hole prep and sanding and these should be done...ready to send to the anodize shop before I rivet them in place.
Ok, now, finally the aft fuse skin. As with most (but not all) of my fuse skins, I am using ProSeal on the overlapping joints. Just for added water and air sealing and also contributing to a better structural joint and less vibration...not really needed, but just a nice touch for my airplane. Mind you, I didn't ProSeal the seams on the bottom of the fuse...I actually want those to leak water if possible. I have recently read about guys putting drain holes in the bottom of the fuse...It certainly makes sense but I need to research this further (I dont think Van's recommends it?) before I commit to drilling holes in my fuse. Drain holes or not...I would rather keep water from entering my fuse if possible, so that's why I did the ProSeal here.
And, after some laborious solo riveting...stretching, grunting, sweating...I got 'em all but these three rivets on each side. The seat belt attachment bracket resides right there and the bolts were getting in the way. I think I will just remove the bolts...rivet it and then rebolt it back in...I'll do that later, this will work for now.
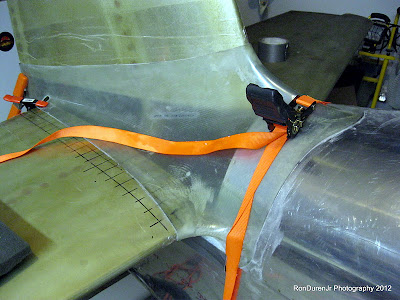
Now that the skin is riveted in place I shifted my attention back to my empennage fairing. I mixed up a batch of 'flox', added some to the inside of the fairing in areas where I needed to close up some of the bigger gaps. This will give me nice a precise fit tailored exactly to the shape of my aircraft...I will do this again with some West systems fairing mixture (micro will also work) for the finishing touches. By the way, I do have clear box tape protecting the skins....hopefully it will peel right off when I remove the fairing for sanding.


No comments:
Post a Comment