And now the time consuming part starts. In the previous post I showed how I had fit and trimmed the tips and got them ready for install. One thing that I forgot to get a picture of is the aluminum strips I glued to the inside of the tips. The aluminum strips act to add strength for the pop rivets that are installed and dont pull through. Here you can see the first step. The holes have been match drilled. The tips have been countersunk and the aluminum has been dimpled in preperation for the pop rivets.
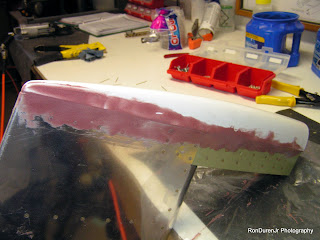
In my last post I mentioned the blue foam that I used to close the HS tip. Well, here you can see where that blue foam resides. Underneath the special fairing epoxy (the rust color, basically this is aircraft 'bondo') is the blue foam that has been glassed in place.
You can see the fairing work I am doing here on the elevators. Basically I am filling the seam, the pop rivet heads and low spots.
After it dries, I sand it to remove some of the excess fairing material and smooth the contours. I am getting it ready to glass the seam.
In this view, you can see how the two tips are starting to take shape. I will do several iterative processes to get these to match up nicely before I am done.
Its a little hard to see, but in this view I have added a 1" fiberglass strip over the seam. This is insurance to prevent the seam from cracking under the paint later. I use 'peel ply' over the fiberglass to keep it as smooth as possible.
This view shows the fiberglass tape after it has dried and the peel ply has been removed.
By adding the fiberglass strip, it adds a little height to the seam. So now I am using my fairing to not only fill the weave of the fiberglass but also to blend it into the sheet metal. I used a nice straight edge to get a real nice flat transition and to also fill any low spots I may have missed in the previous step. I am getting real close to being done with this. Now I will sand it smooth.
I wanted to show this shot because I really made the 'micro' very dry in this batch. By making it so dry, it was very thick in consistency...thick peanut butter-like. At first I thought it was too thick, but it really worked well for what I was trying to do. This was kind of a breakthrough in my education, in the future I will try to repeat this consistency.


No comments:
Post a Comment