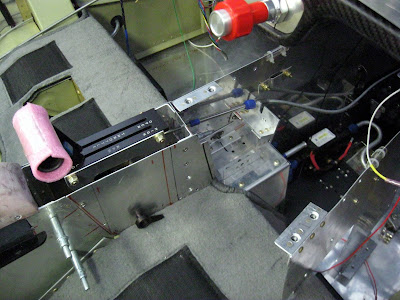
The center console is turning into quite a labor intensive project, but I'm making progress and nearing the end. Some of the reason for that is it is essentially a 'nerve center' of cables, plumbing and levers.
A detail shot of the plastic latch and an alignment pin to get everything lined up.
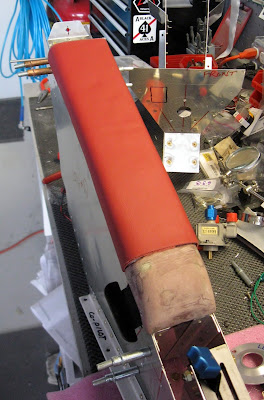
My end cap riveted in place. This transition cap will be covered with some kind of 'wrap'...still TBD.
A piece of 1/8" thick UHWM plastic for the plastic latch and alignment pin.
A couple shots of the arm rest in place.
I added this wraparound flange to keep this 'wing' from being a catch point for my foot. This is the 'wing' that goes around the smoke pump.
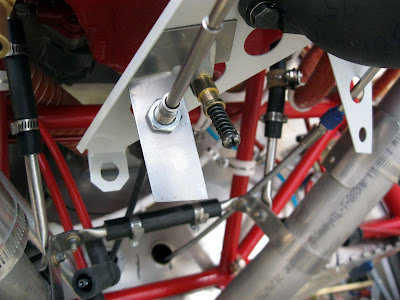
So I started finalizing the control cables...throttle and mixture. I bought the powder coated steel bracket for the IO-360 from Van's. I knew it wouldn't work without modification, but figured it would be a good foundation to work from. I've seen lots of pics of what others have done and if you have a non-standard setup, they all seem to be a little different. Mine is no different. This is not a trivial exercise. #1, its vitally important for flight...it is a definitely a "safety of flight" issue so treat it accordingly. #2, it's time consuming to get everything just right...including cable lengths.
In this pic (above), you can see my first attempts at creating add-on brackets. I had a piece of steel sheet left over from when I fixed my elevator horns that came in handy. If you use alum, make it beefy angle. Also, notice in this picture I have a 4" threaded extension that I bought from ACS.
Cleco-ed in place for lots and lots of fit checking...moving the mixture lever back and forth, back and forth...making sure it was hitting the hard stops as needed before I committed to a permanent location and drilled it.
Cutting it down to size...making it look good.
Now over to the throttle side...this is how it started, before any modification. Notice this control cable is a little different, it doesn't have the threaded nut attachment design. Just a slot...more on this later.
I created a 'comb' style bracket to hold the cables in the center console...again, this will capture the slot in the cable and then I will safety wire it to keep it from moving.
Creating a template to cut out a support bracket for my throttle cable.
Match drilling it, getting it ready to rivet. Also notice the trim lines on the existing bracket. I will cut the bracket down later, it will look much different by the time I am done.
I bought this bracket from ACS for my control cables. Its pricy, $20, but works well. I added the hole for the safety wire. This is just a detente snap to keep it in place. In a vibration heavy environment like the FWF, that's enough for me.
Working on the plumbing details that will reside in my center console. The Andair fuel pump, filter (by the way, the filter is installed backwards) and fuel tank selector all need to be connected.
And lastly, onto some fun stuff. Adding a cell phone and glasses pouch to the side of the console. Again, just bought these at the local automotive store for cheap.
This does get in the way of my knee a little bit, but since its a soft pouch it will fold down when not in use. If I don't like it, I can easily remove it later. For now, I like the convenience and want to see how it feels.


No comments:
Post a Comment